Creating a New Site
This section briefly explains the steps involved in creating a new site in the Bold Reports® on-premise multi-tenant application.
Site Creation
You can create another site in Bold Reports® On-premise application by clicking on Create Site button in site management module.

This step holds the site details such as tenant type, name, domain and identifier. The site identifier should be unique and it is part of your site URL.
Based on branding chosen, following information will be copied to the site. Otherwise, default images and values will be used for the tenant branding.
- Localization
- Date Format
- Branding Images
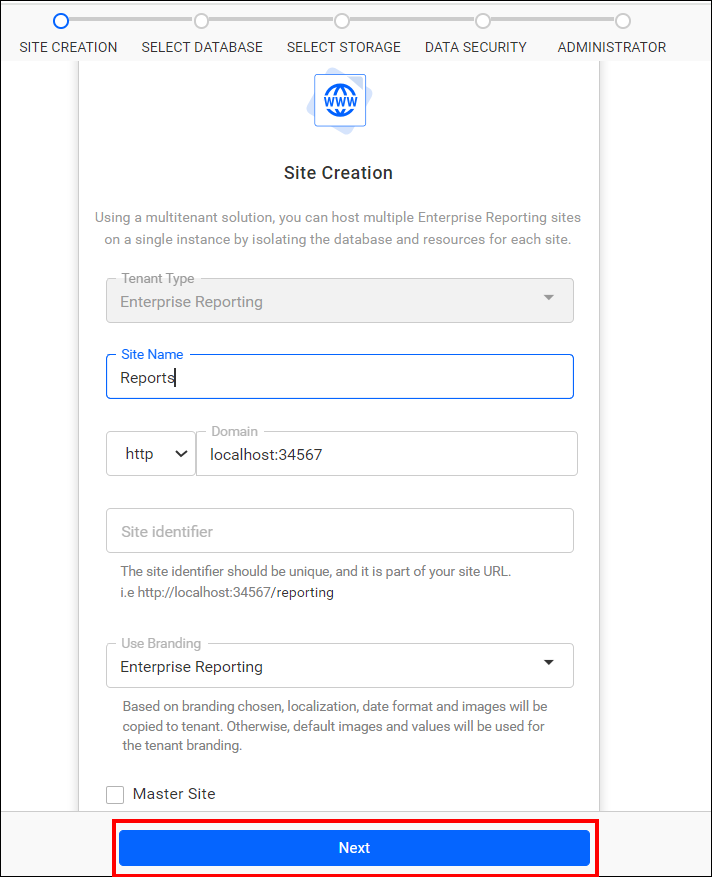
Note: When creating a new site, you have the option to designate it as the master site. Please refer here for more information.
Select Database
-
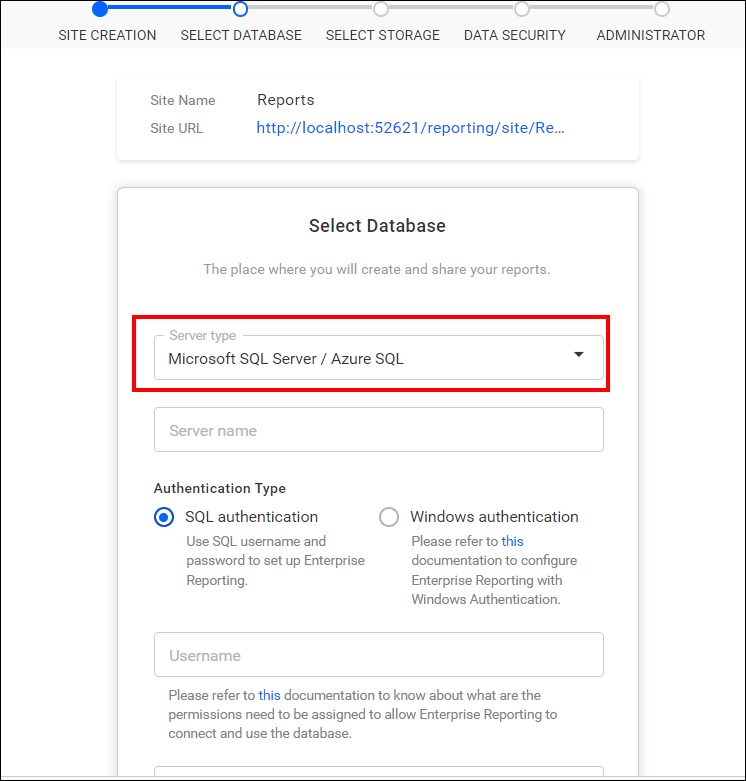
This step helps you configure databases for the Bold Reports® Server.
-
The reports, users, and their access rights are stored in various SQL databases, including MSSQL, PostgreSQL, and MySQL.
You can connect to the existing MSSQL Server instance using the options below.
-
You can create a new database for Bold Reports® Site using MSSQL.
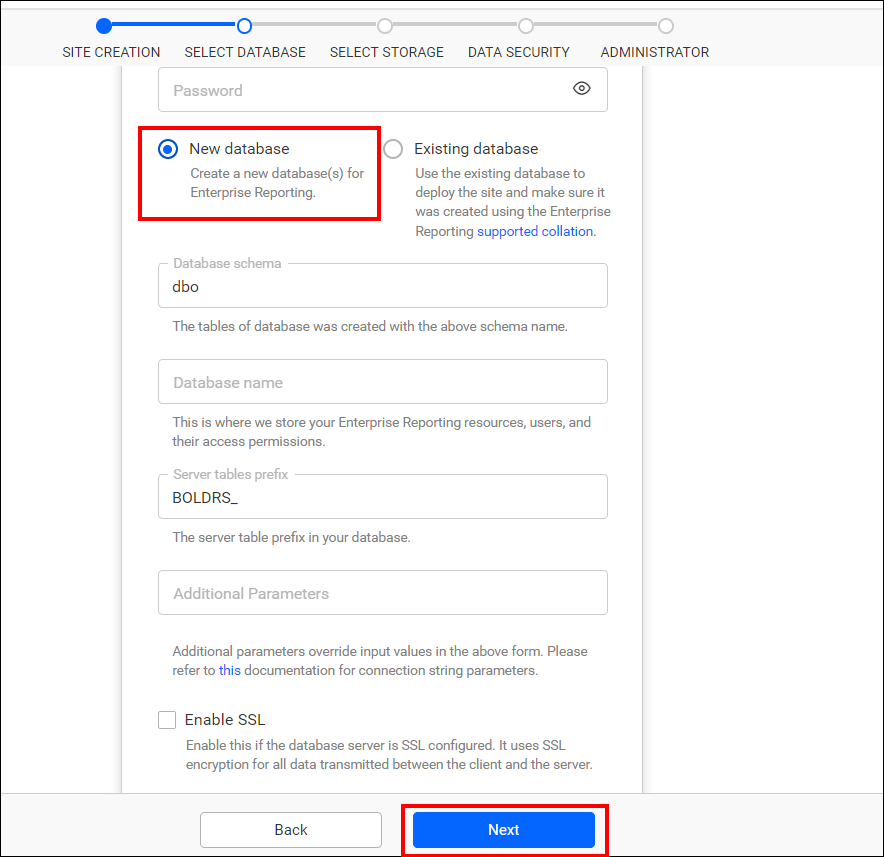
-
Additionally, you have the option to select an existing database in order to create a new site.
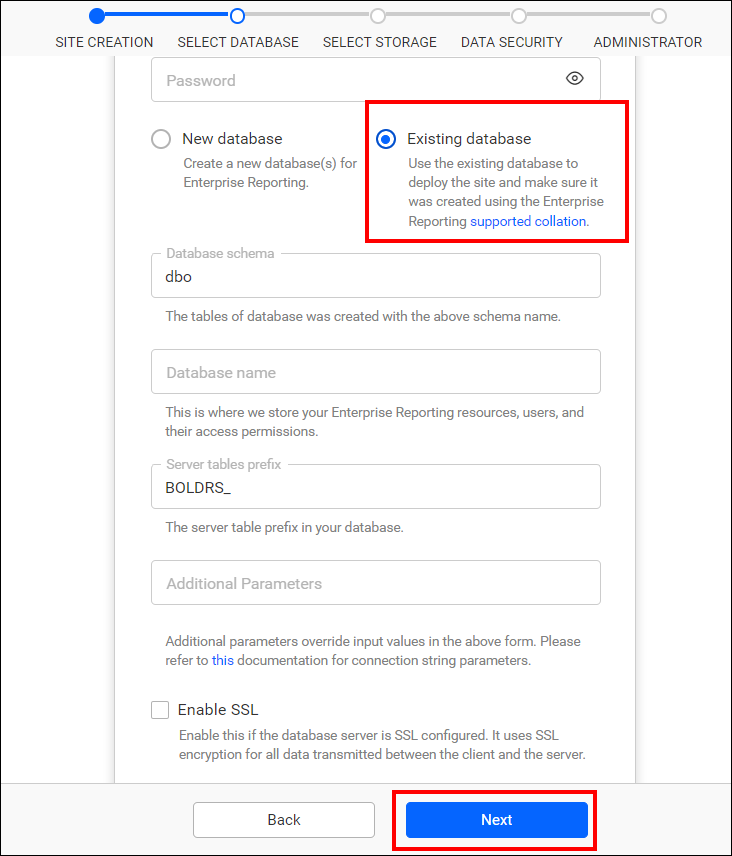
Similarly, You have the option to connect to the existing PostgreSQL Server and MySQL Server instances.
Note: The credentials given to connect to the MSSQL / PostgreSQL / MySQL Server instance must have permissions to
- Create Database
- Create Table
- Insert
- Update Table
- Alter Table
- Select
- Drop Table
- Drop Database
Select Storage
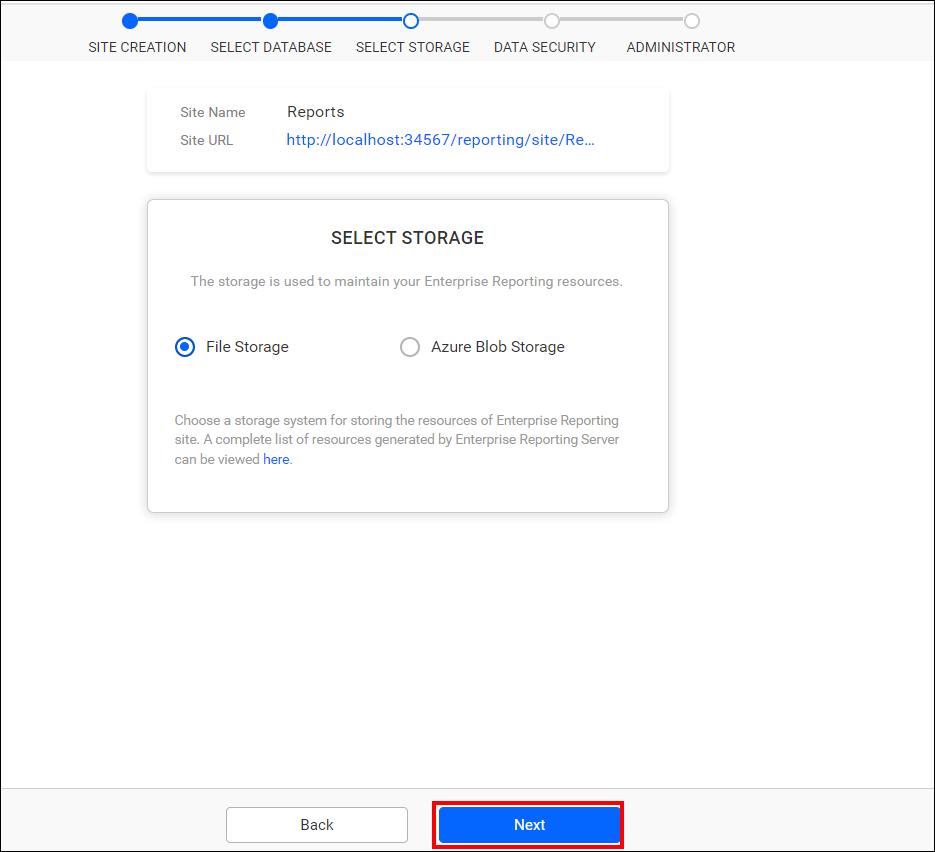
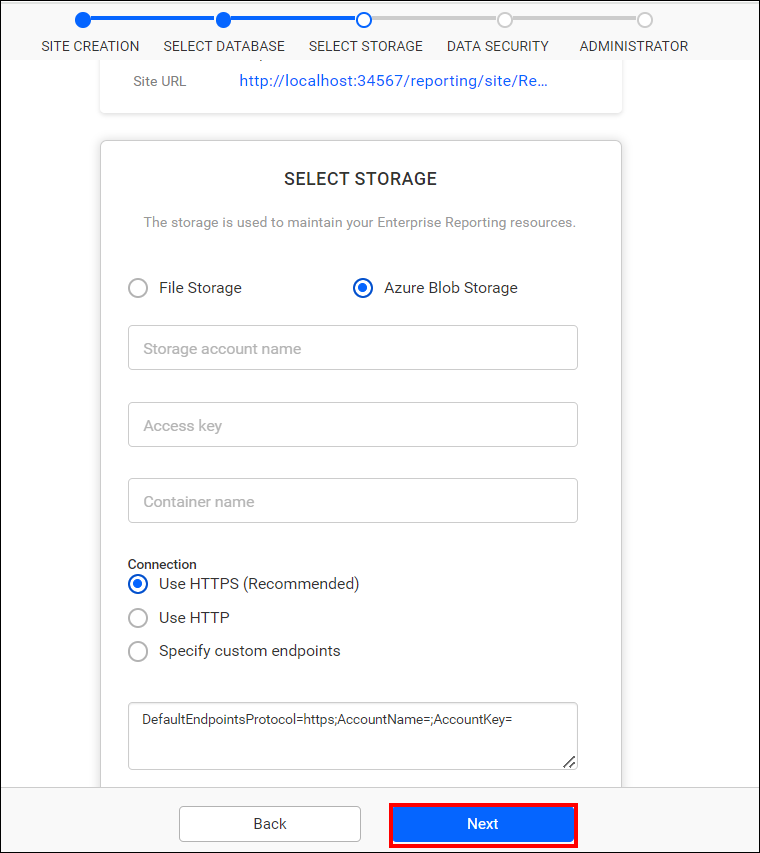
The user can select the preferred storage type, File Storage or Blob Storage, to store the report,data source and dataset in BoldReports Server.
Configure Custom Attribute for the site
You can skip this configuration directly by clicking the Next button, or you can configure custom attributes and then proceed with the Next.
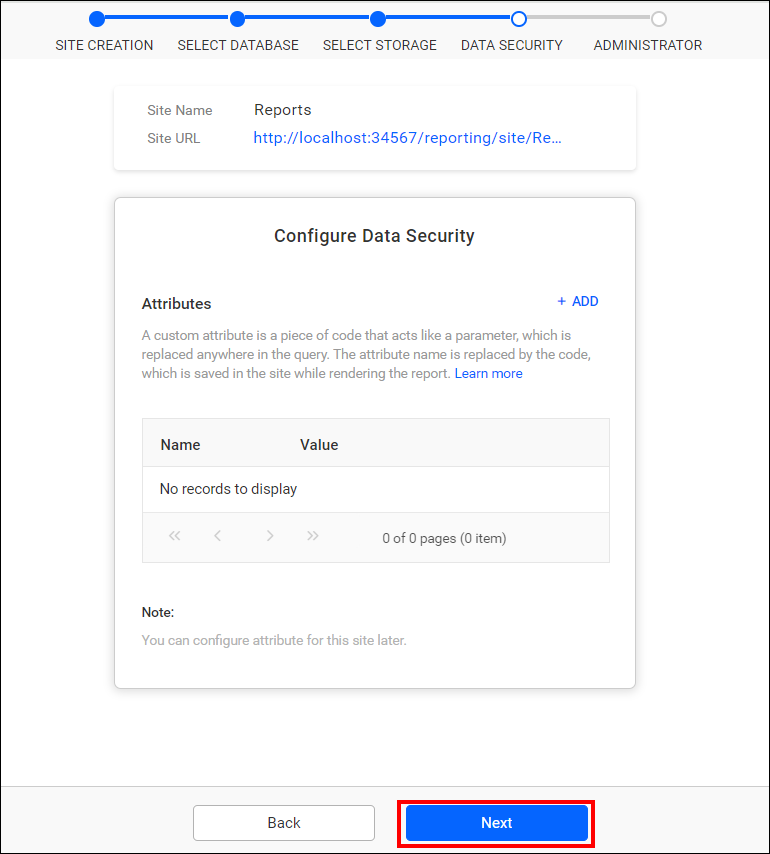
Custom Attribute
This can be configured by the UMS admin for a site on the site details page. For additional details, refer to the Configure Custom Attribute section.
Attributes are name-value pairs that are associated with users, groups, and the sites.
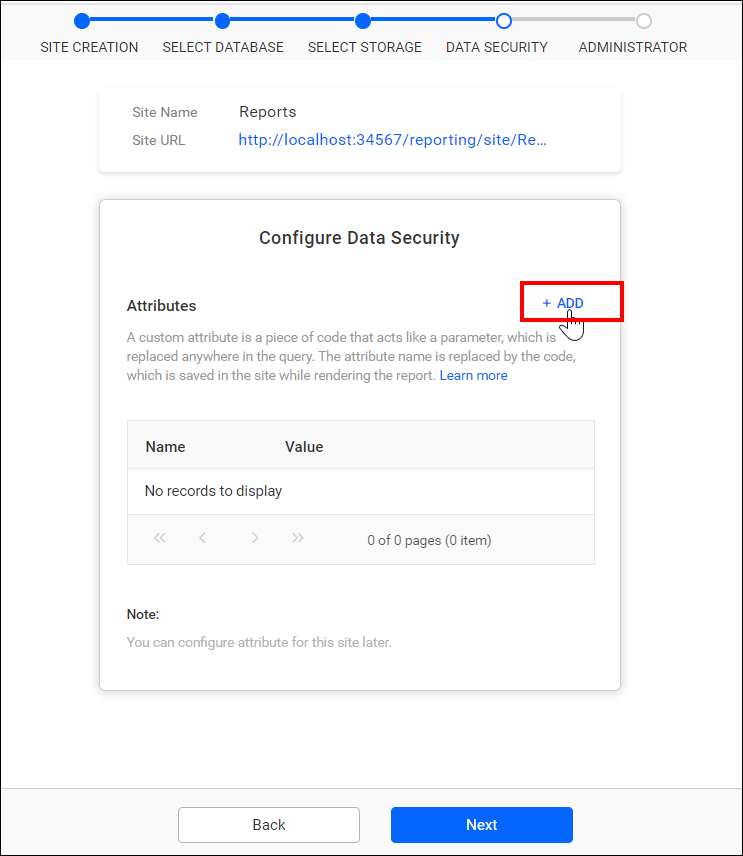
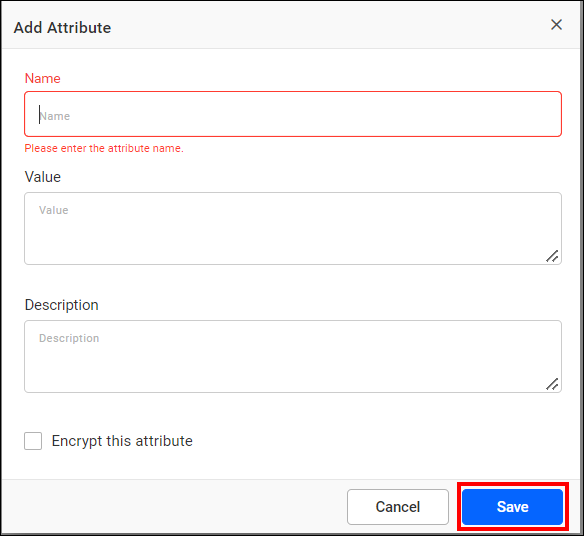 Name : The name of the attribute
Value : The value associated with the attribute
Description : Explanation of the attribute’s purpose
Encrypt : Store the value as encrypted in the database, displaying as dots in the grid
Select Administrator
This step used to select the user who will have complete control over the site.
The selected users will have the following permissions:
- Create Reports
- Create Data Sources
- Create Datasets
- Create Schedules
- Create Users
- Create Groups
- Manage Permissions for users and groups
After selecting the user, proceed by clicking Create and launch site.
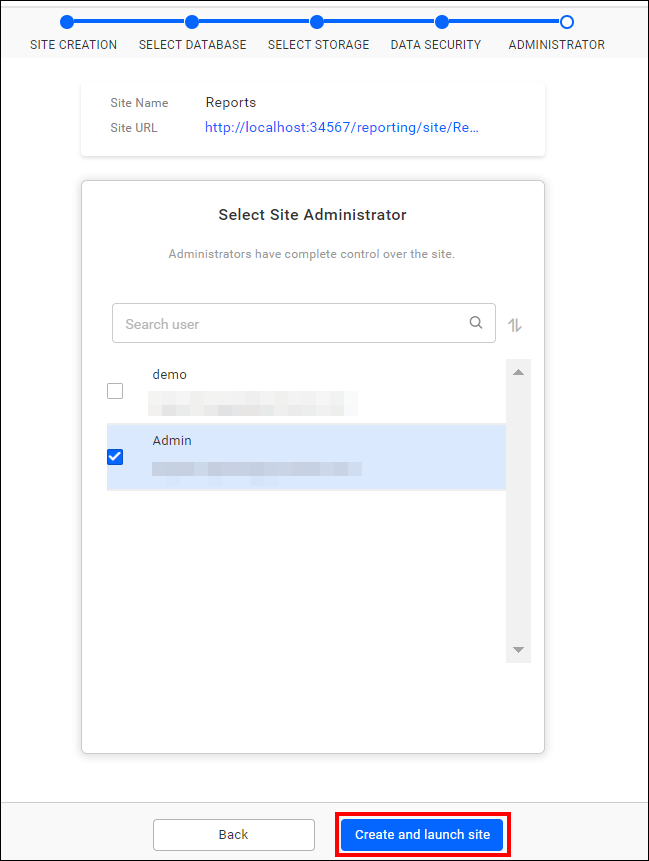
The selected admin user(s) can access resources and manage users, groups, and their permissions solely within the corresponding site.