Manage Groups
This section explains how to add, edit, and delete groups, as well as how to assign users and manage permissions to groups in Bold Reports® On-Premise.
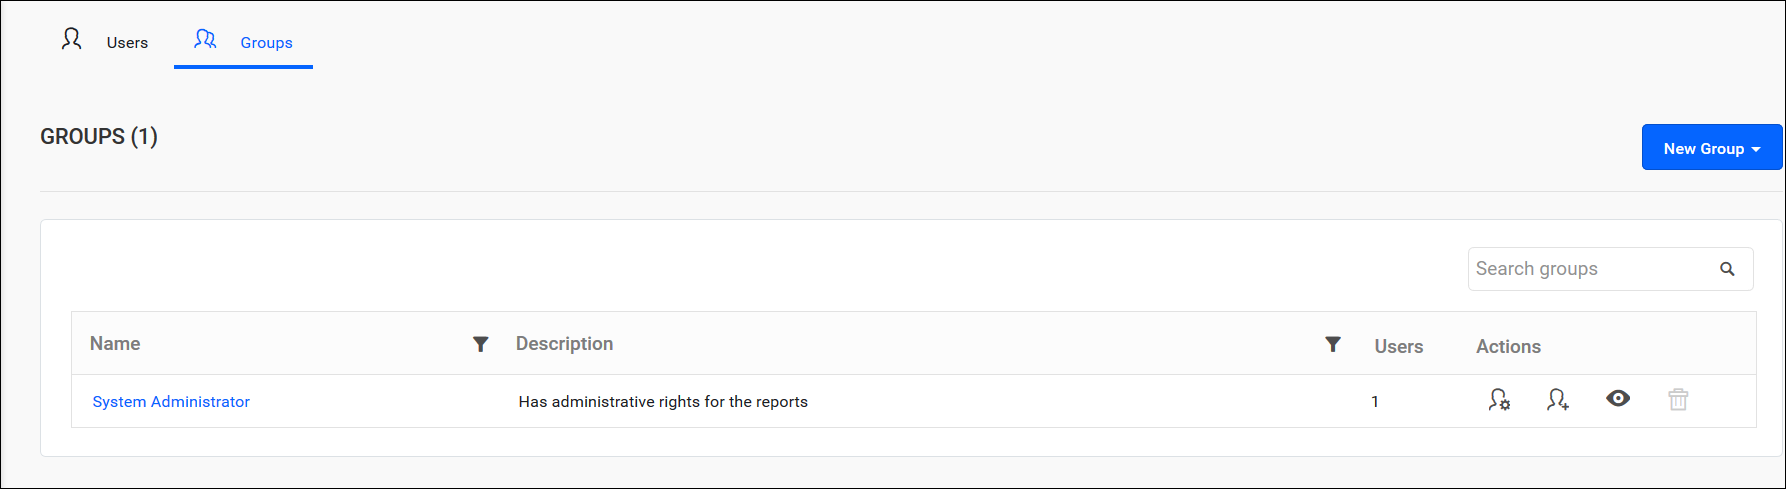
A groups is a collection of users to which permissions can be assigned.
Add new group
-
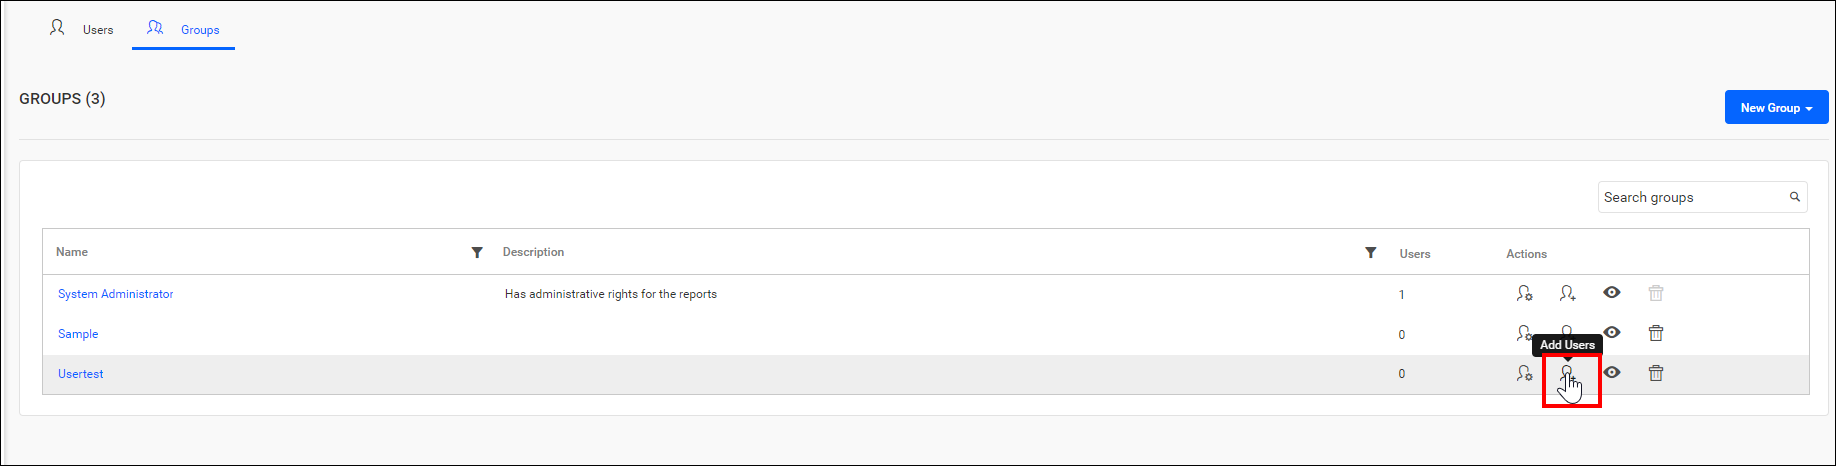
To add a new group to Bold Reports® On-Premise, click on
New Groupon the groups management page. -
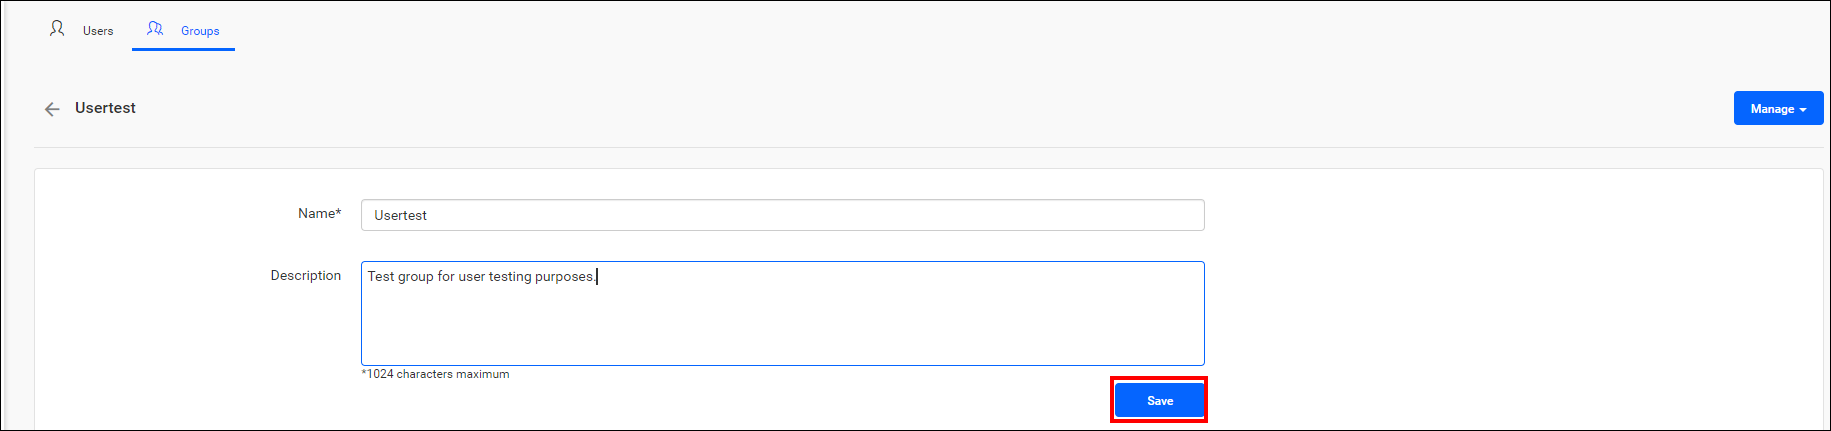
New groups can be added by providing a name and an optional description for the group.
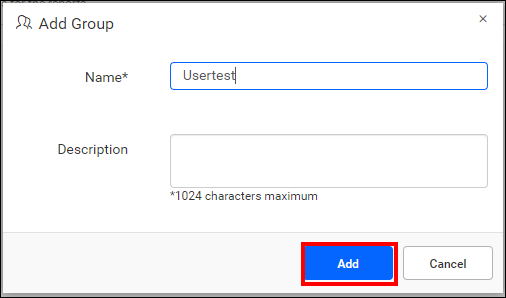
Fill out the form with a name and description, then click on Add. A New group will be created, and you can proceed to add users or manage permissions for it.
Edit group
Group information can be edited from the group’s edit page.
-
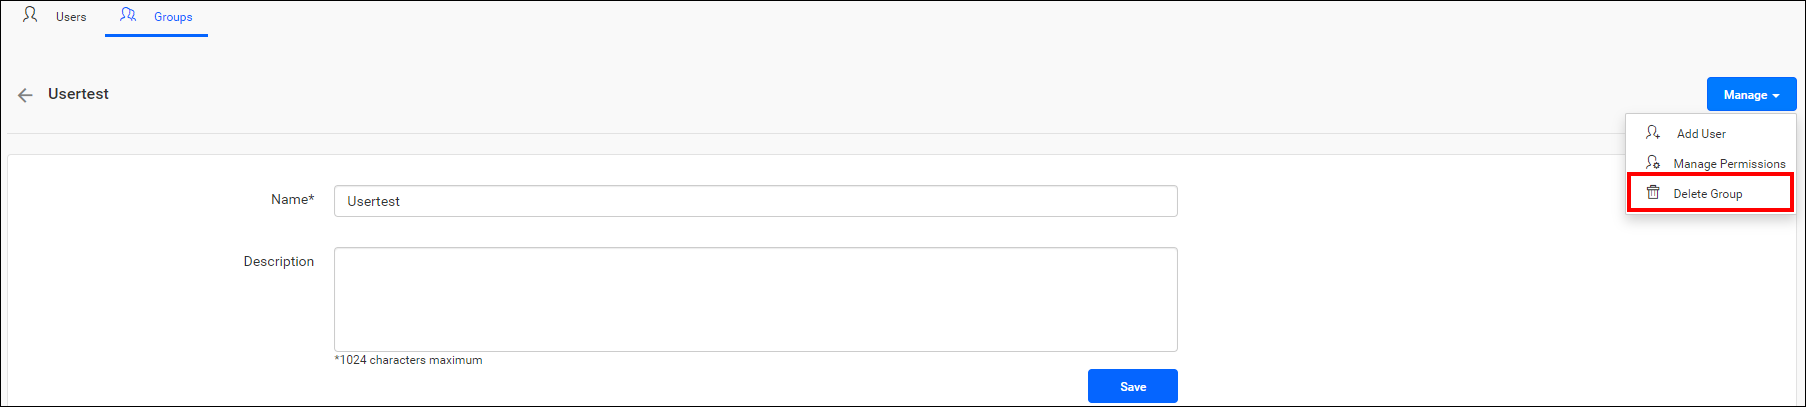
Click on the name of the group you wish to edit and then click the
Edit Groupbutton.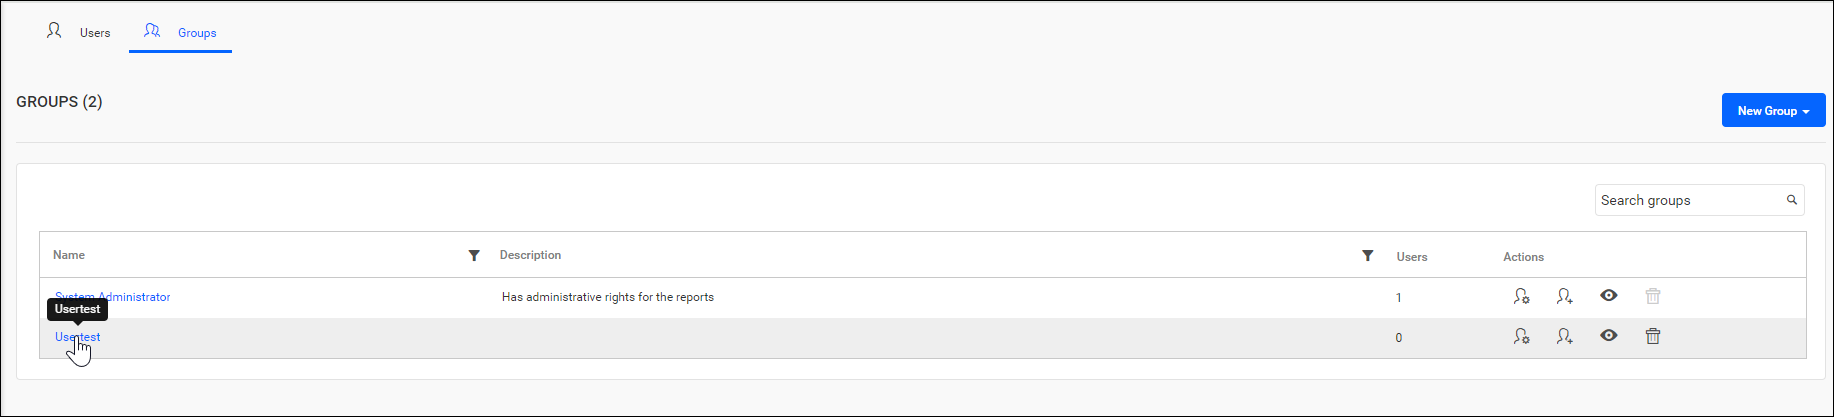
-
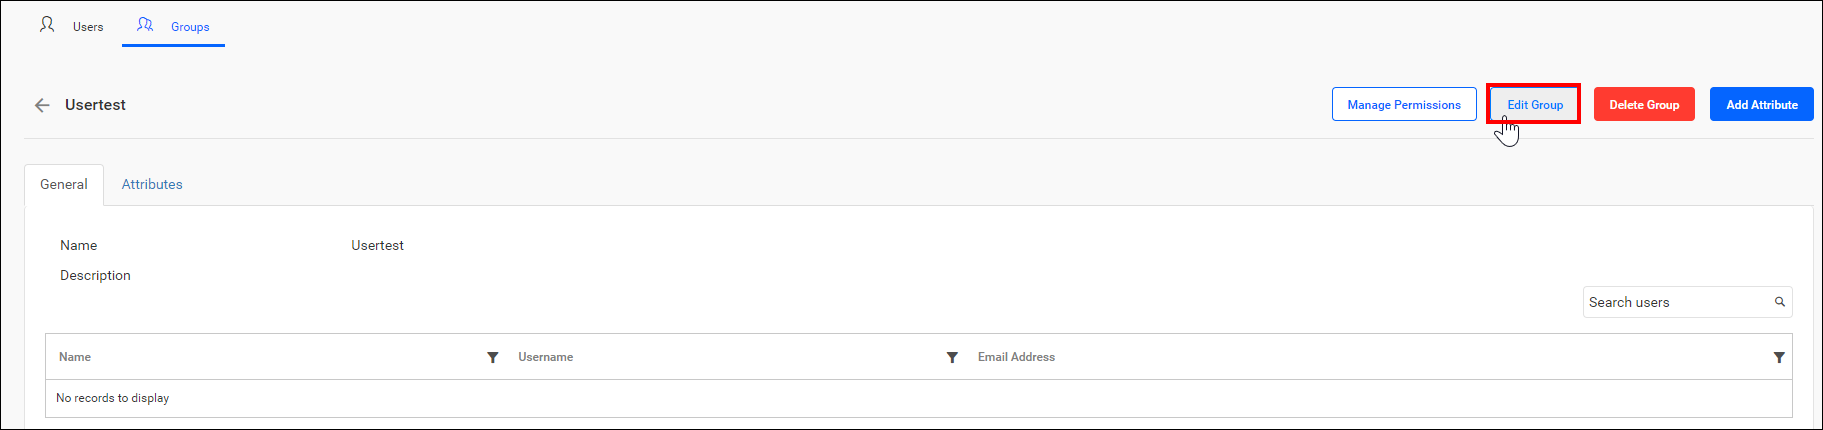
Make the necessary updates to the group and save the changes.
Group name and description can be edited on the group edit page. Additionally, users can be assigned or removed from the group on this page.
Delete group
Groups can be deleted if they are no longer needed. However, You cannot delete the System Administrator group.
From group management page
-
Clicking the
Deleteicon will remove a single group.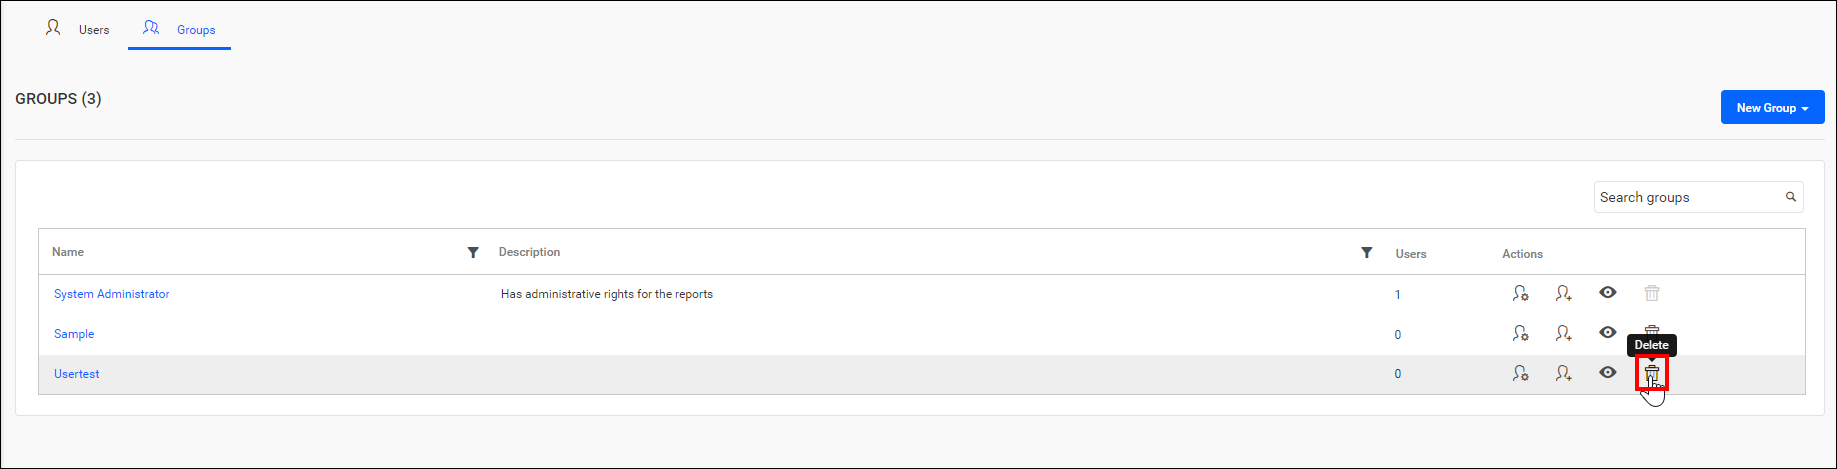
-
Additionally, you have the option to remove multiple groups by selecting them and then clicking
Delete Groups.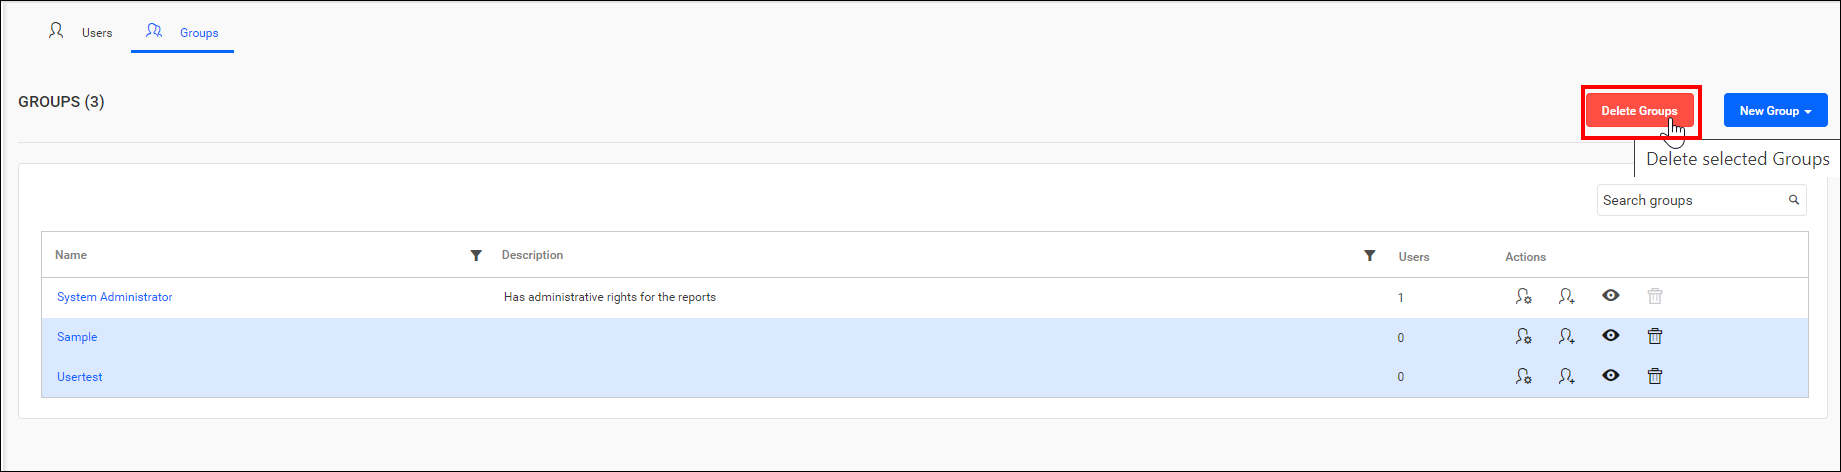
From group edit page
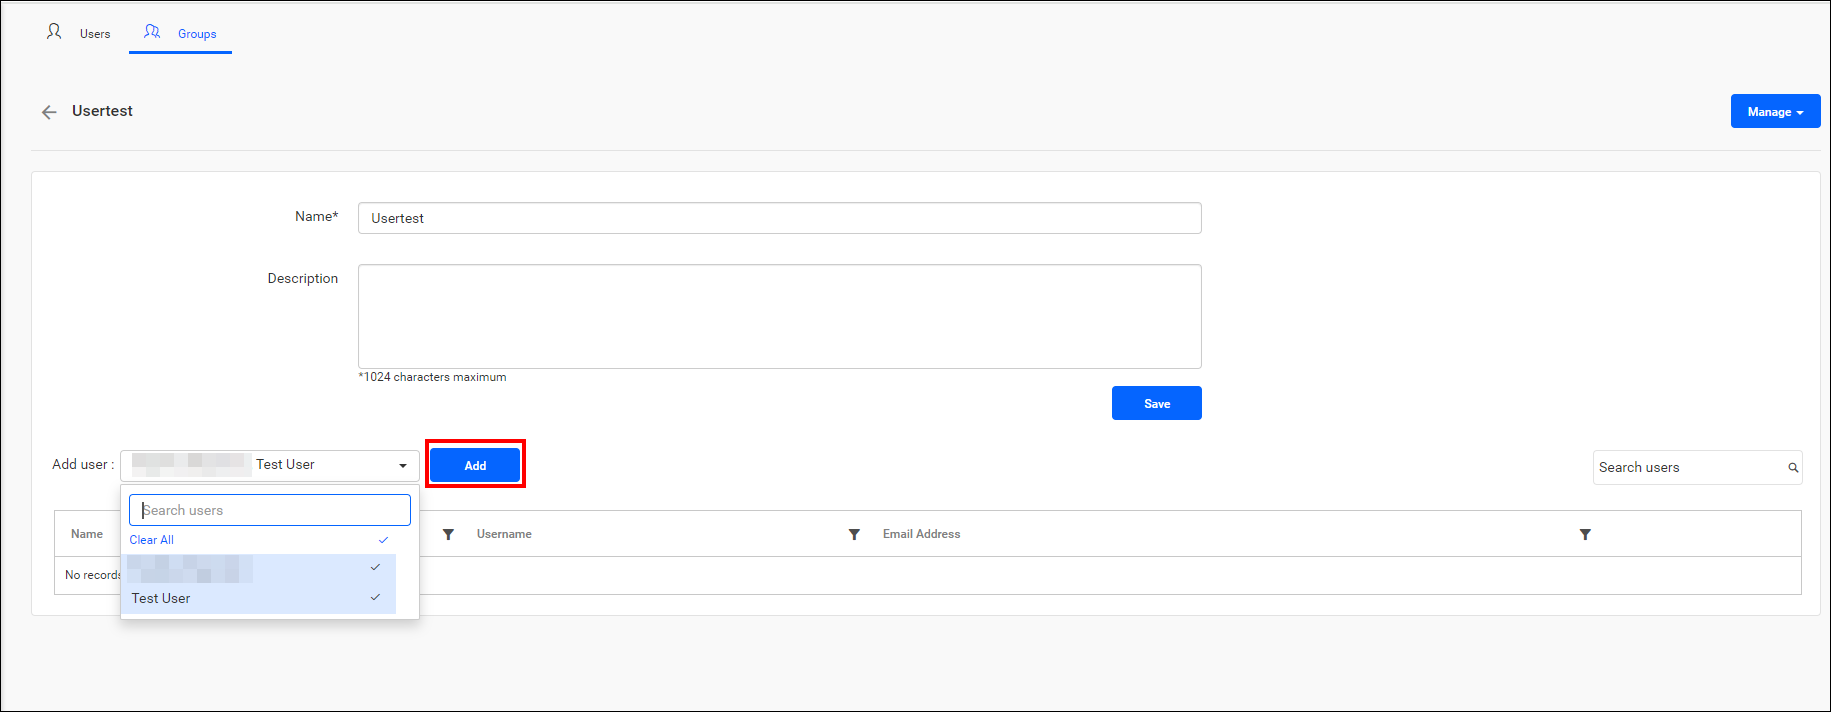
Assign users
Users can be assigned to the selected group, allowing them to inherit the permissions assigned to the group.
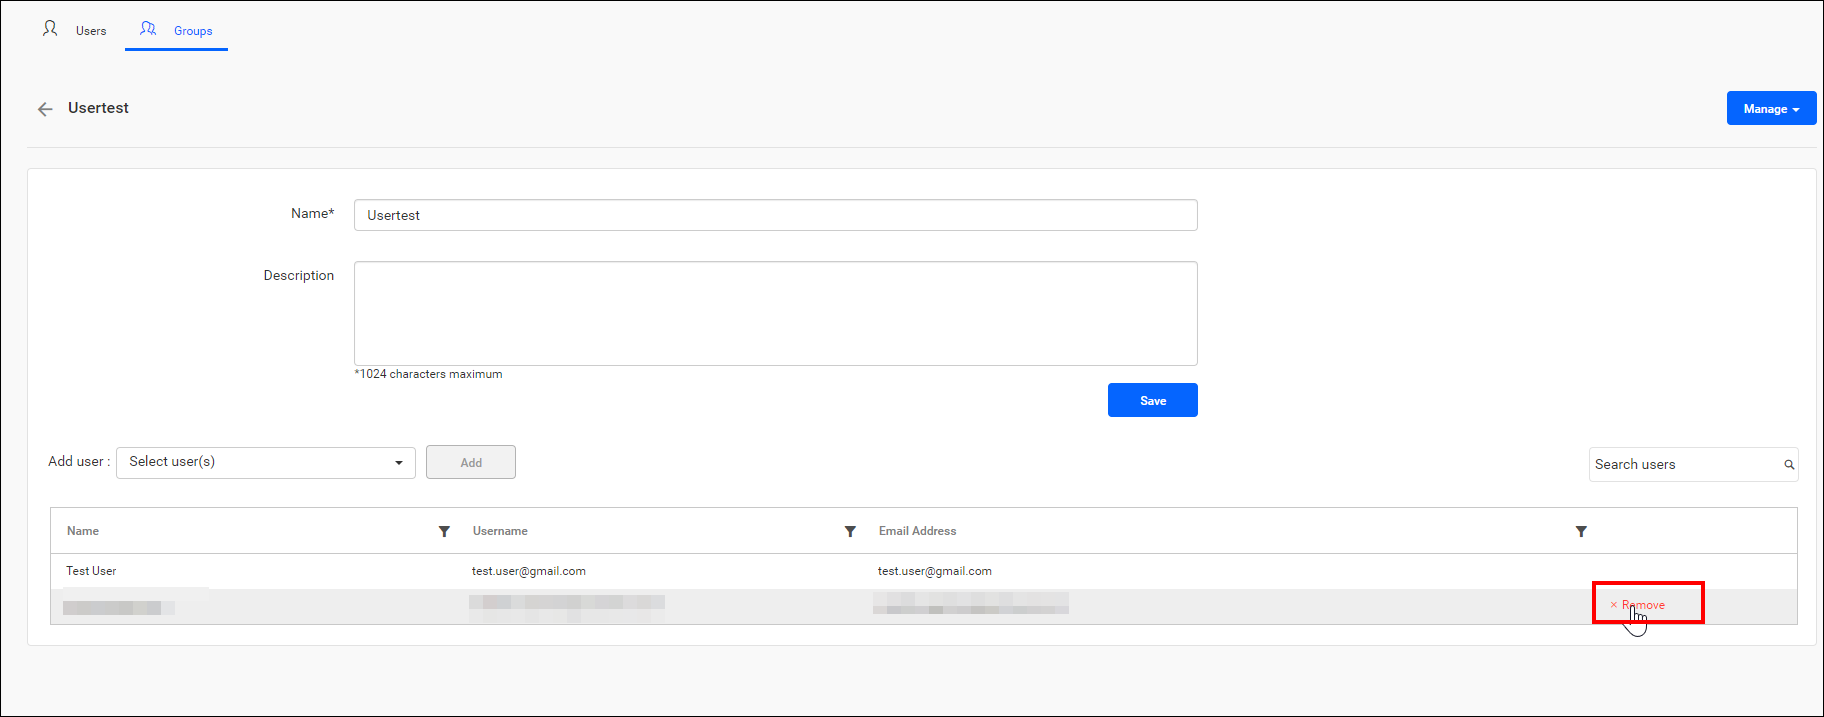
Users can also be removed from the group if the user no longer needs the permissions of the group. Click on Remove next to the user in the group edit page to remove the user from the group.
If a user no longer requires the permissions associated with the group, they can be removed from the group by clicking Remove on the group edit page.
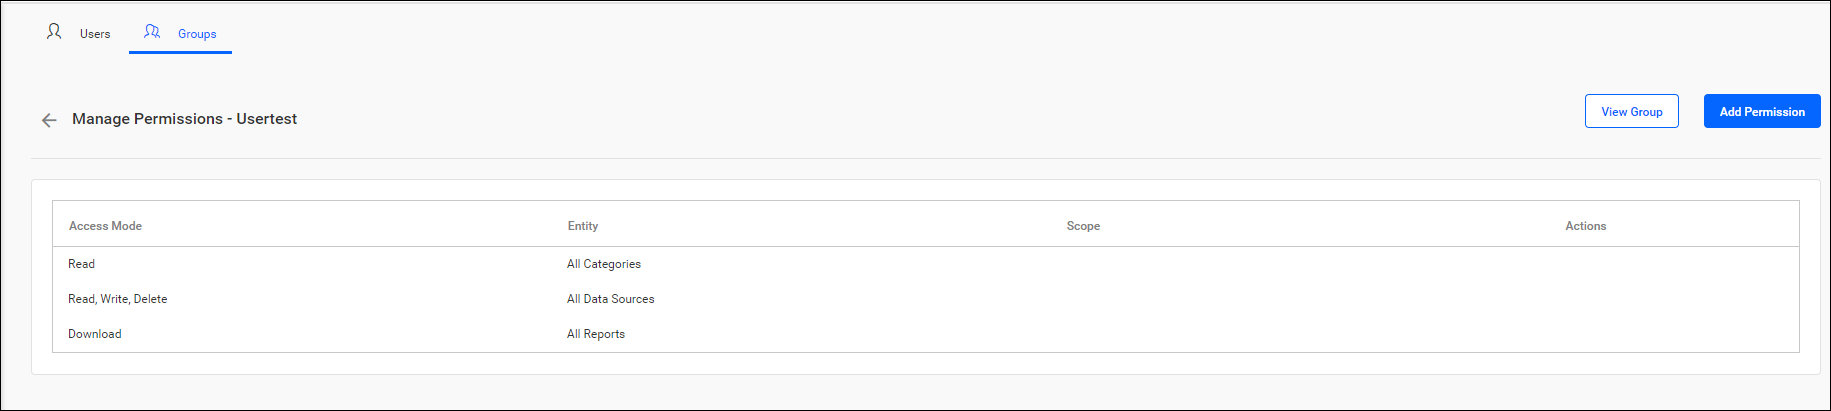
Manage permissions
The Manage Permissions page for the group can be accessed from any of the following pages.
-
Click on the
Manage Permissionicon for the respective group on the group management page.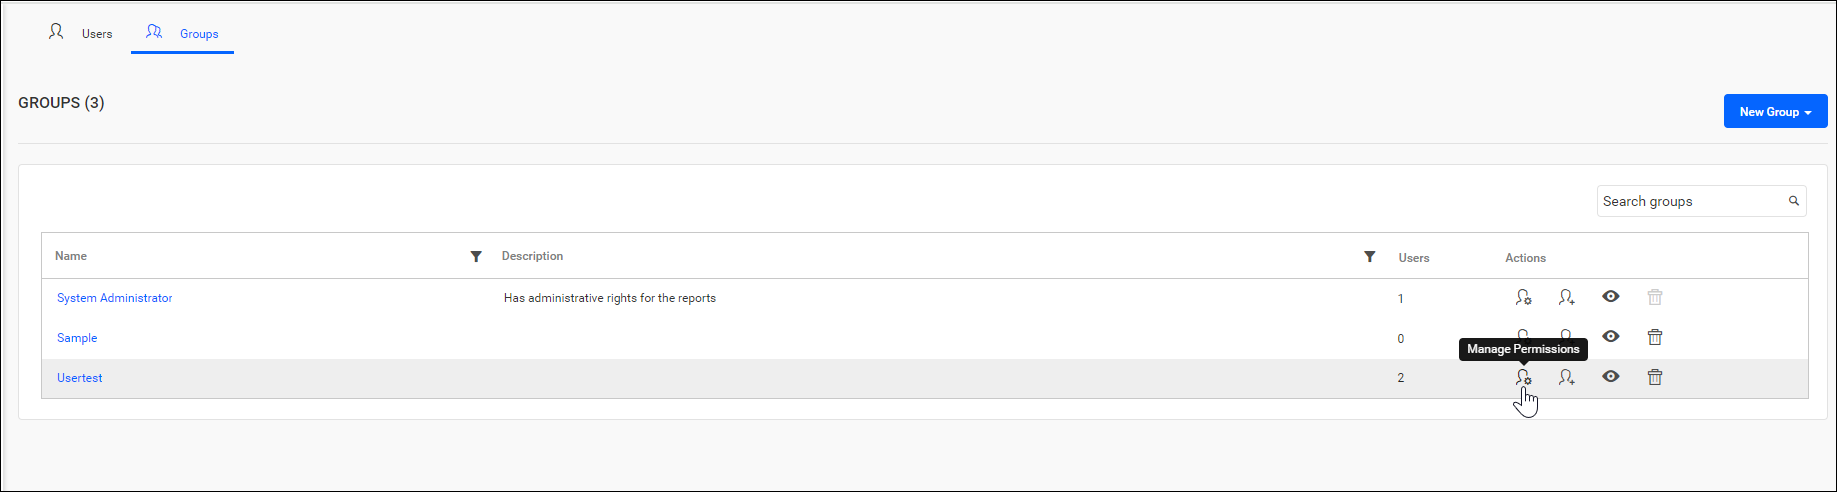
-
Click the group’s name on the group listing page to navigate to the group edit page. Then, select the
Manage Permissionsoption from theManagedrop-down menu in the top right corner of the page.
-
You can find the permissions assigned directly to the group in the Manage Permissions grid.
-
Click
Add Permissionto assign permissions to the group.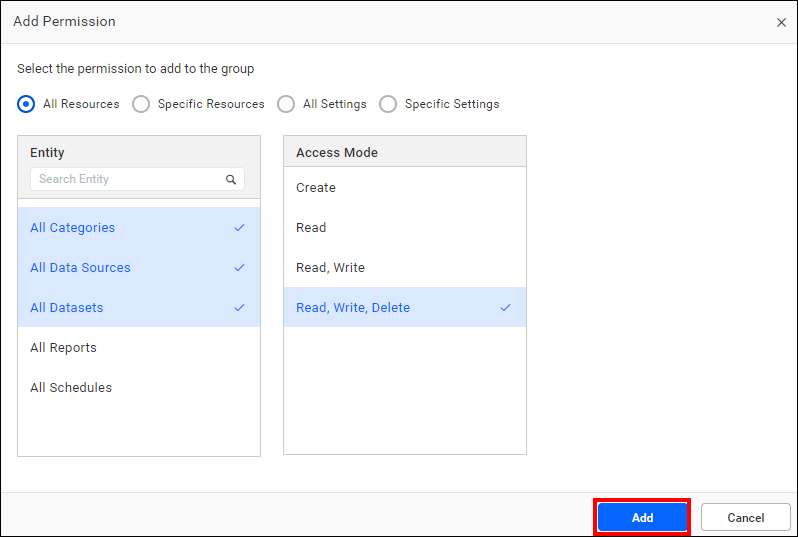
Steps to add permission to the group
- Select the entity
- Choose the scope if the entity is not of the
All ResourceorAll Settingsitem type. - Select the access mode
- Click
Addto include the specified permission to the group.
You can also select multiple scopes and entities to assign multiple permissions. For more information on how to add and manage permissions, please visit the Manage Permissions section.