Single Sign-On (SSO) with OpenID Connect authentication
The Bold Reports® application can be configured with OpenID Connect for Single Sign-On (SSO), so that users can log in directly to the Bold Reports® application after authenticating using OpenID Connect.
Prerequisites
-
An account with an OpenID Connect provider.
-
Register the Bold Reports® application with the OpenID Connect provider.
Steps to configure OpenID Connect in Bold Reports®
-
Login to Bold Reports® with an admin credential.
-
Click the settings in the Report Server left-side menu.
-
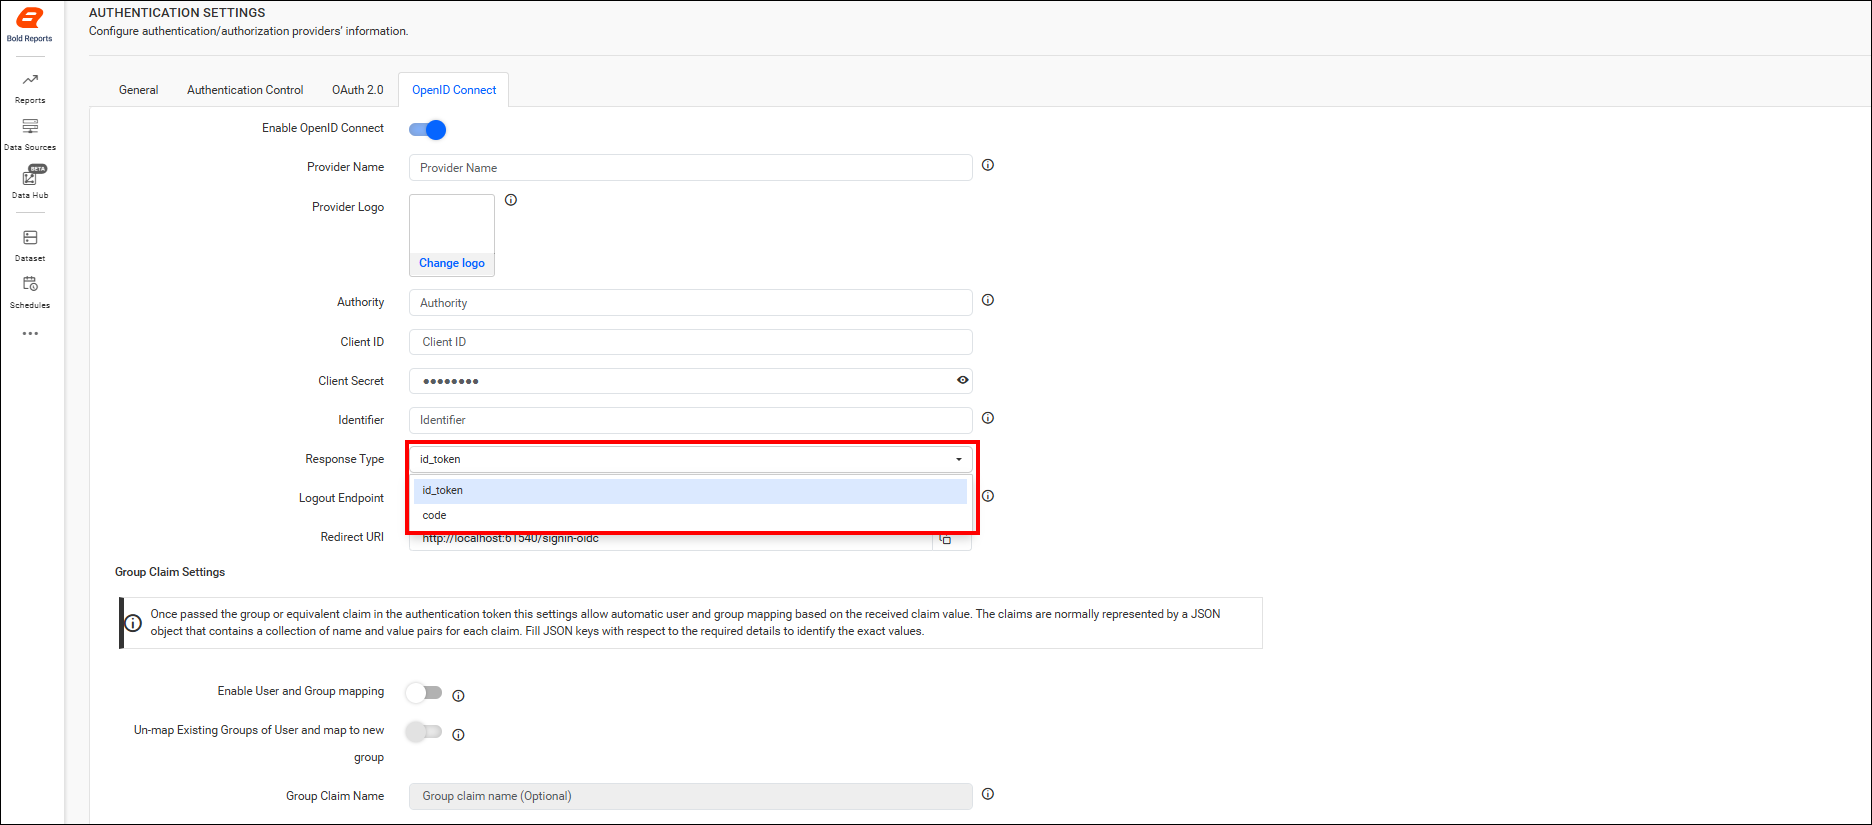
Navigate to the Authentication tab and OpenID Connect, as shown in the following image.


-
Provide the following details in the
OpenID Connectsettings of the Bold Reports® application:
| Provider Name | It represents the name of the authentication provider to be displayed on the login page. |
| Provider Logo | It represents the logo of the authentication provider to be displayed on the login page. |
| Authority | It is the instance created within the provider for the user. |
| Client ID | It is a unique identifier provided to each of the applications while registering with the providers. |
| Client Secret | It is a secret key used to authorize the applications. |
| Identifier | It is the property name that stores the email address of the user in the deserialized ID token. |
| Logout Endpoint | It is an endpoint that logs out the third-party provider. |
Note: While configuring OpenID Connect, you need to choose the appropriate Response Type either
token-idorcodefor the Group Claims settings.
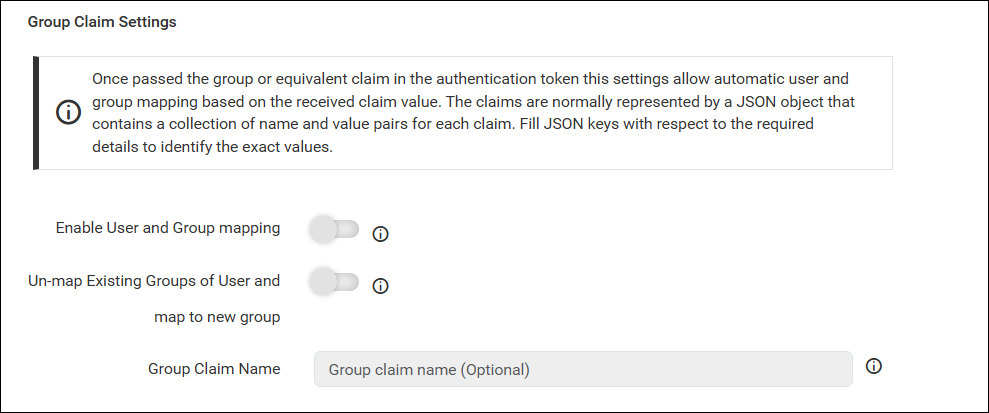
Group Claims Authentication
This section allows automatic user and group mapping based on the group claim received in the authentication token. The claims are typically represented as a JSON object containing key-value pairs for each claim. Provide the appropriate JSON key to identify the group claim value.
| Enable User and Group Mapping | When enabled, the system fetches group claim values from the token and dynamically maps users to one or more groups during login. |
| Un-map Existing Groups of User and map to New Group | When enabled, all previously assigned groups for the user are removed, and the user is mapped only to the groups specified in the claim. |
| Group Claim Name | Enter the claim name that contains the group identifiers. Users will be mapped only if the group names in the claim match existing groups in the site. |
The previously mentioned similar steps are applicable to configure OpenID Connect in User Management Server by logging into the URL {Bold Reports<sup>®</sup> URL}/ums/administration/sso?view=openid-settings with an admin credential.
Following is a list of few OpenID Connect providers, and that explains how to connect with the Bold Reports® application.
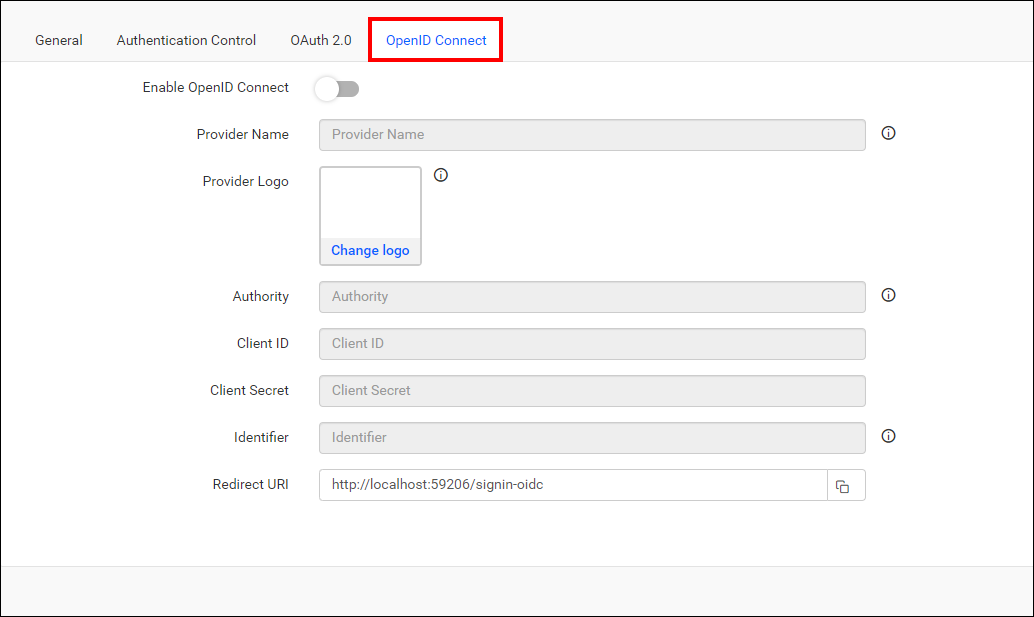
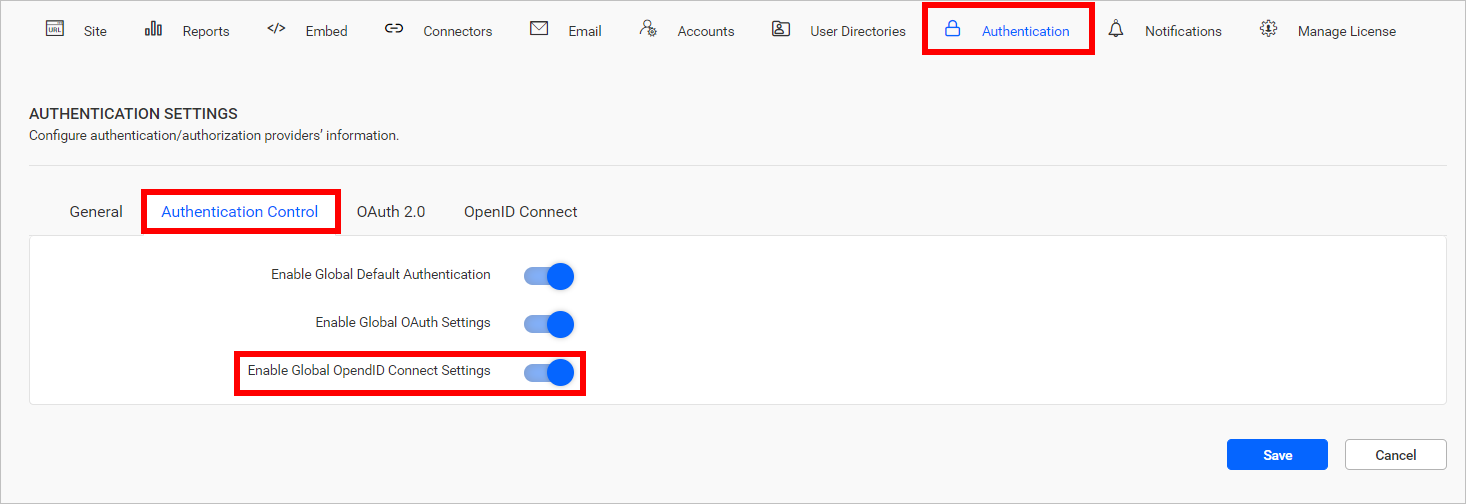
OpenID Connect is provided on both the Bold Reports® sites and the User Management Server. It can be managed individually for each site on the settings page by disabling the option, as shown in the following screenshot.
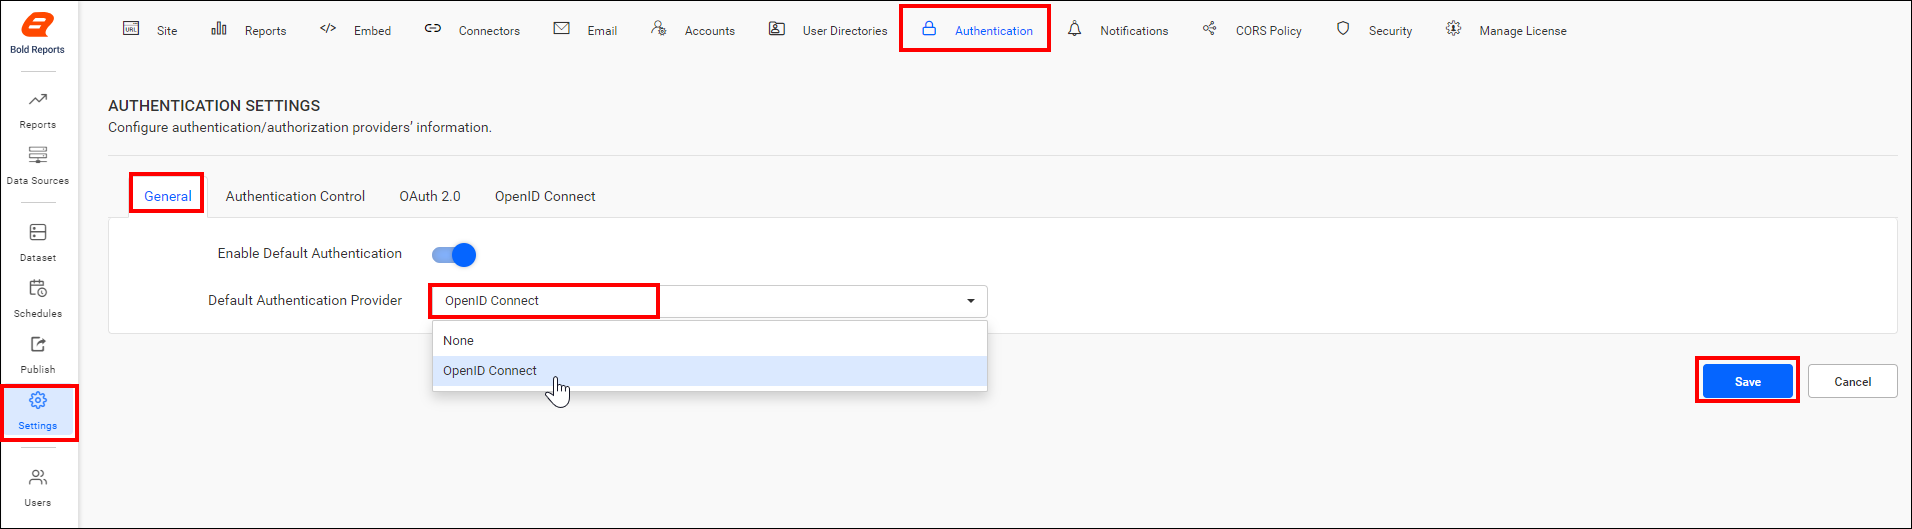
Set OpenID Connect as Default Authentication
OpenID Connect can be set as the default authentication when OpenID Connect settings are enabled and saved. Follow the below steps.
- In the settings page, click the Authentication tab and select General.
- Enable the option Enable Default Authentication and select OpenID Connect as the default authentication provider, as shown in the following screenshot.
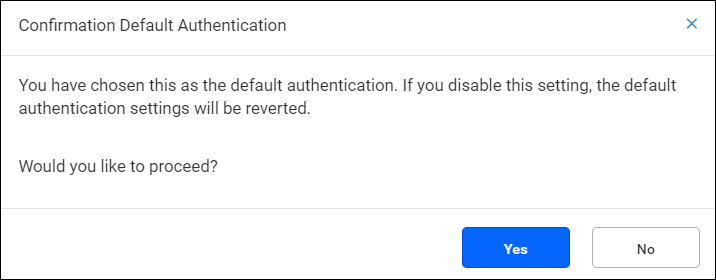
Disabling OpenID Connect Settings
When OpenID Connect is set as the default authentication and you try to disable the OpenID Connect settings, a pop-up will appear below. Proceed by clicking Yes to disable the OpenID Connect default authentication.
Bypassing OpenID Connect authentication
When OpenID Connect default authentication is enabled, use the custom login URL below to login as a normal user who is not from OAuth.
{Bold Reports<sup>®</sup> URL}/reporting/site/{tenant-name}/login?use_default_authentication=false