Bookmark
Bookmark links allows the users to navigate to different parts of the RDL report. You can add bookmarks to each textbox, image, table or chart or to the unique group values displayed in a tablix which can direct the users to specified locations in the report. The value of bookmark property can be your own strings or an expression.
Prefer watching over reading? Check out this video for designing an interactive bookmark report:
Configure bookmark
- Select the text box, image, table, chart, or other report item to which you want to add a bookmark. The respective report item properties will be listed in the
Propertiespane. - Under
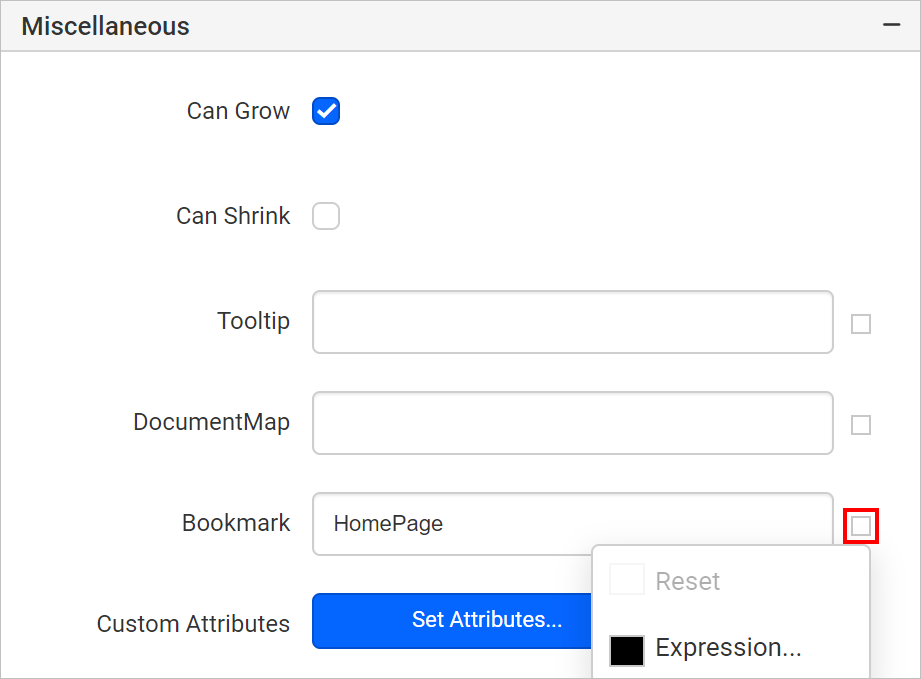
Miscellaneouscategory, enter a string or expression inBookmarktext field. It will act as the label for this bookmark.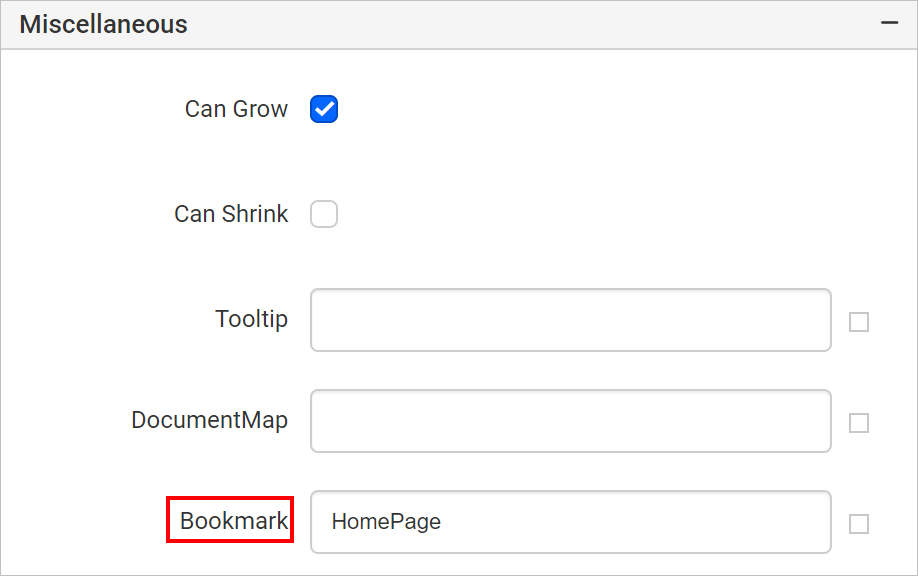
Refer Set Expressions and Reset Expressions section to open set/reset expression menu in properties panel.
Note: The bookmark can be any string, but it must be unique in the report. If the bookmark is not unique, a link to the bookmark finds the first matching bookmark.
Link bookmark
- Select the text box, image, or chart series to which you want to link a bookmark. The respective item properties will be listed in the
Propertiespane. - Under
Linkcategory, chooseBookmarkoption. An option to link the bookmark will be enabled.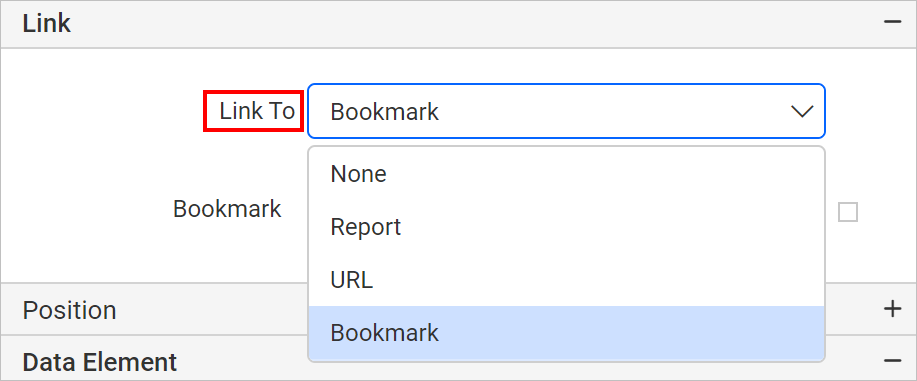
- In the bookmark dropdown, type or select a bookmark or set an expression that evaluates to a bookmark.

Designing bookmark report
The following example will show how to use a bookmark feature to design an interactive report.
Create data
In this designing section, the following dataset query is used for dataset creation.
SELECT [HumanResources].[vEmployee].[EmployeeID],
[HumanResources].[vEmployee].[FirstName],
[HumanResources].[vEmployee].[LastName],
[HumanResources].[vEmployee].[EmailAddress],
[HumanResources].[vEmployee].[City],
[HumanResources].[vEmployee].[CountryRegionName]
FROM [HumanResources].[vEmployee]
Refer Create Data section and create dataset using the above query.
AdventuresWorksdatabase is used here.
Add bookmark
This design will teach you how to configure and link the book marks in report items. At runtime, clicking on the items will navigate to the first matching bookmarks.
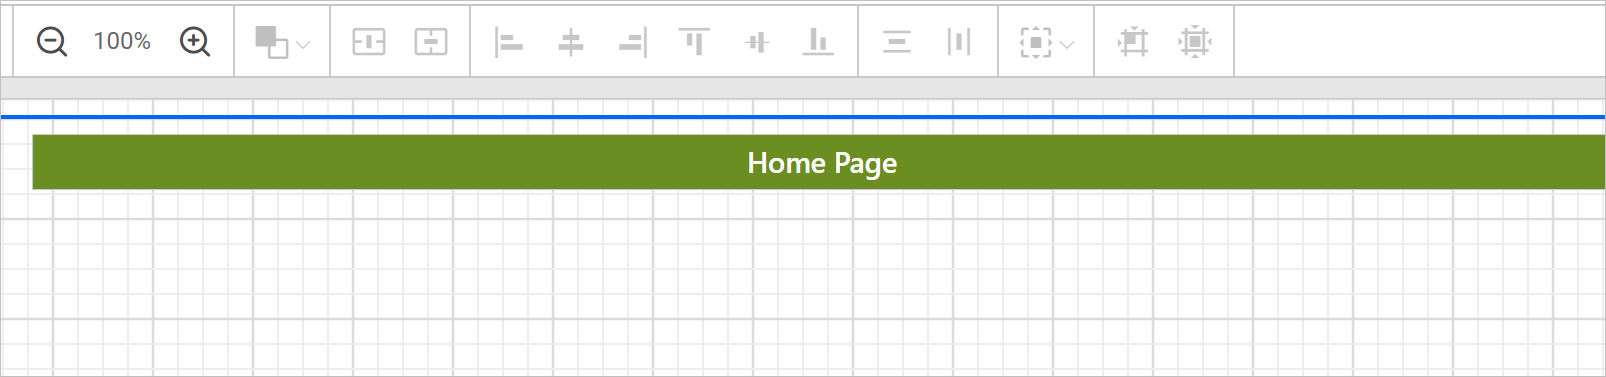
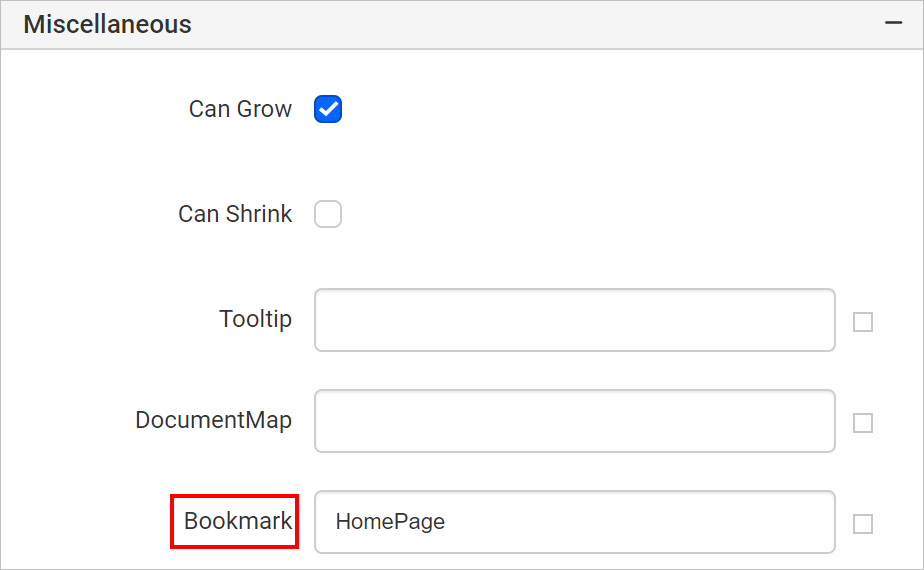
Add a textbox to the report and enter the text as Home Page. Apply some formatting.
Open the textbox properties. Under Miscellaneous category, enter the Bookmark property value as HomePage.
Add a matrix report item and remove the first column.
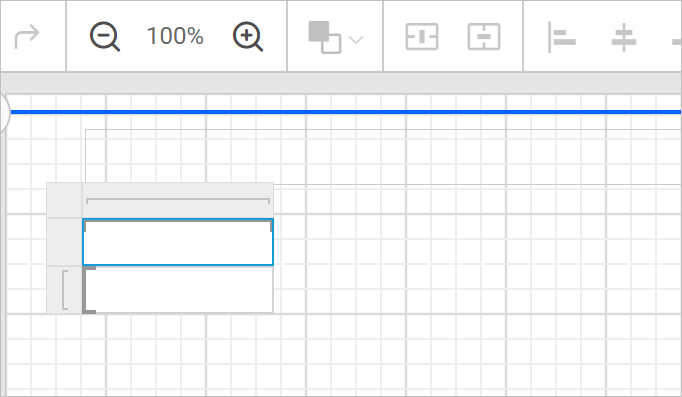
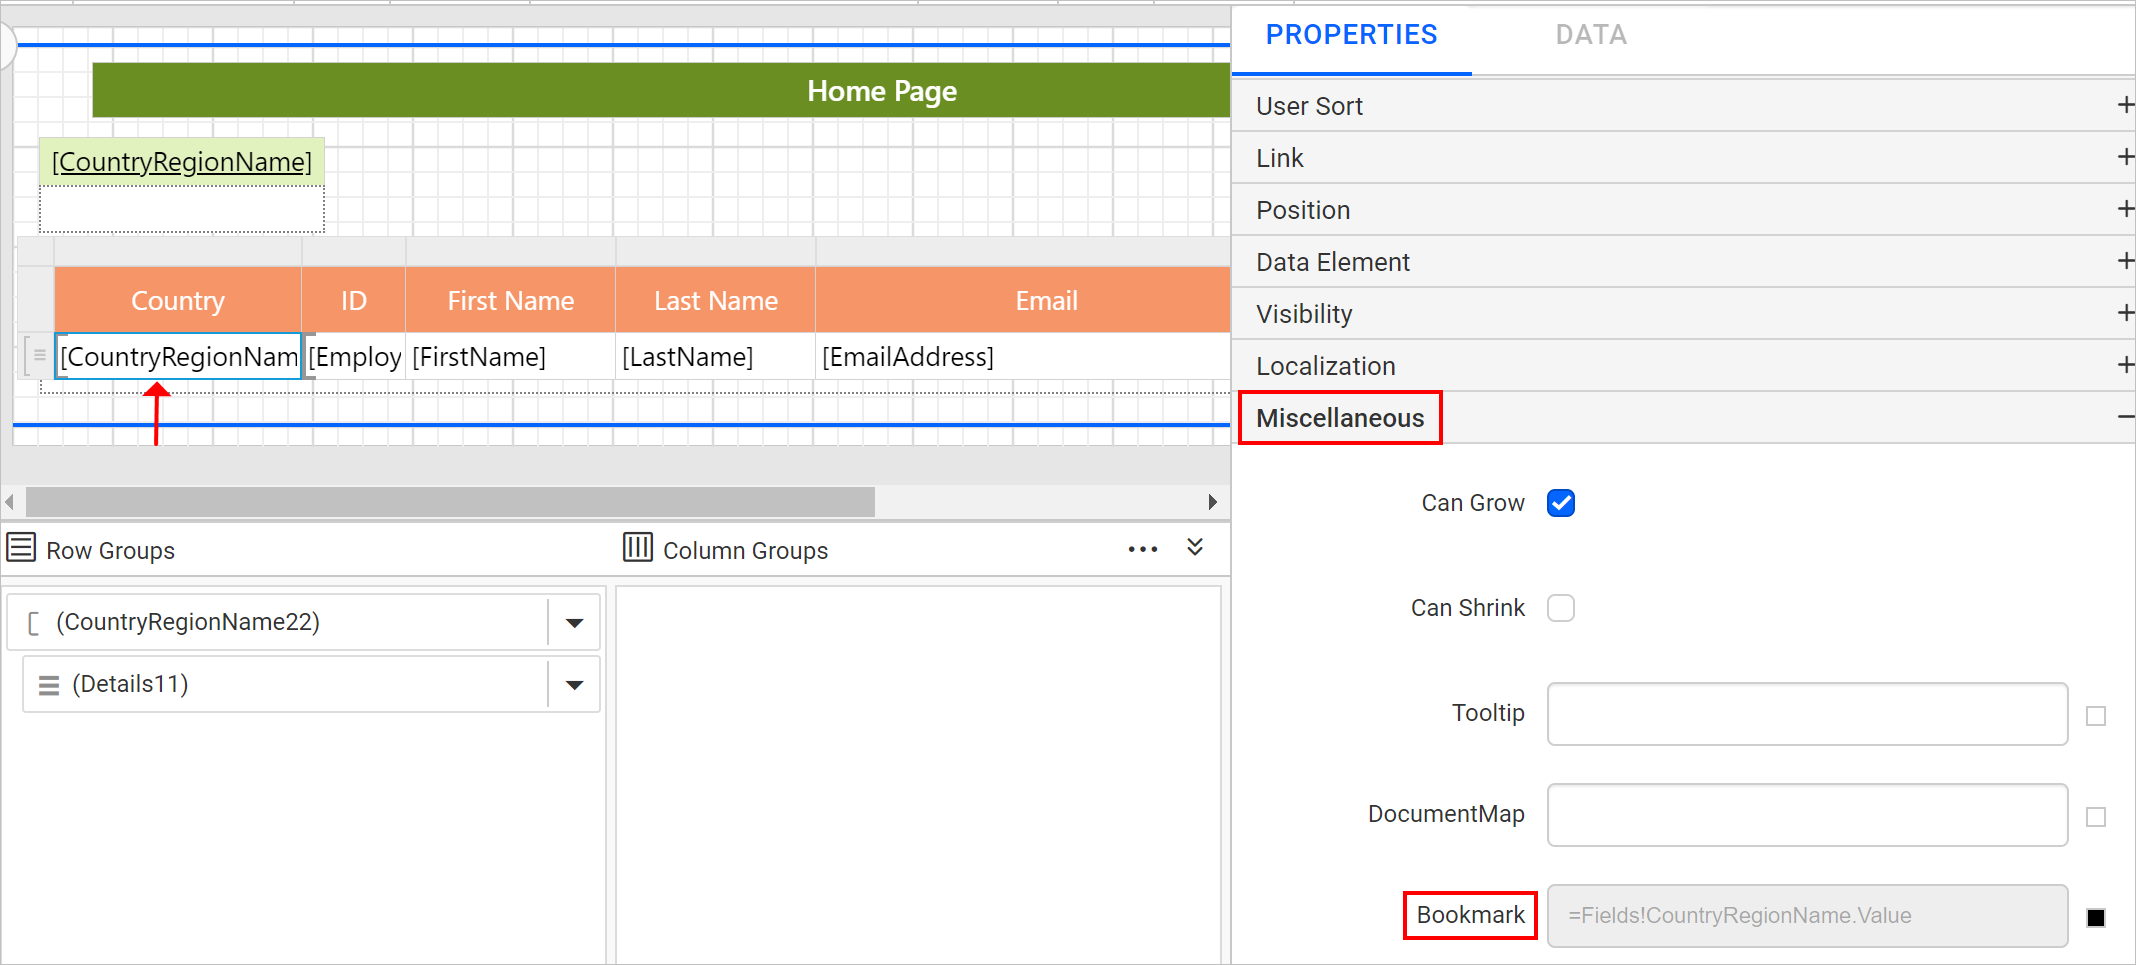
Assign CountryRegionName field in the first cell.

Select that cell and open properties panel. Under Link category, choose Bookmark option.
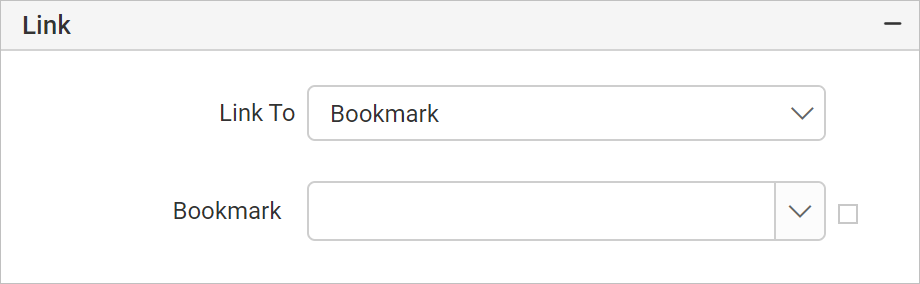
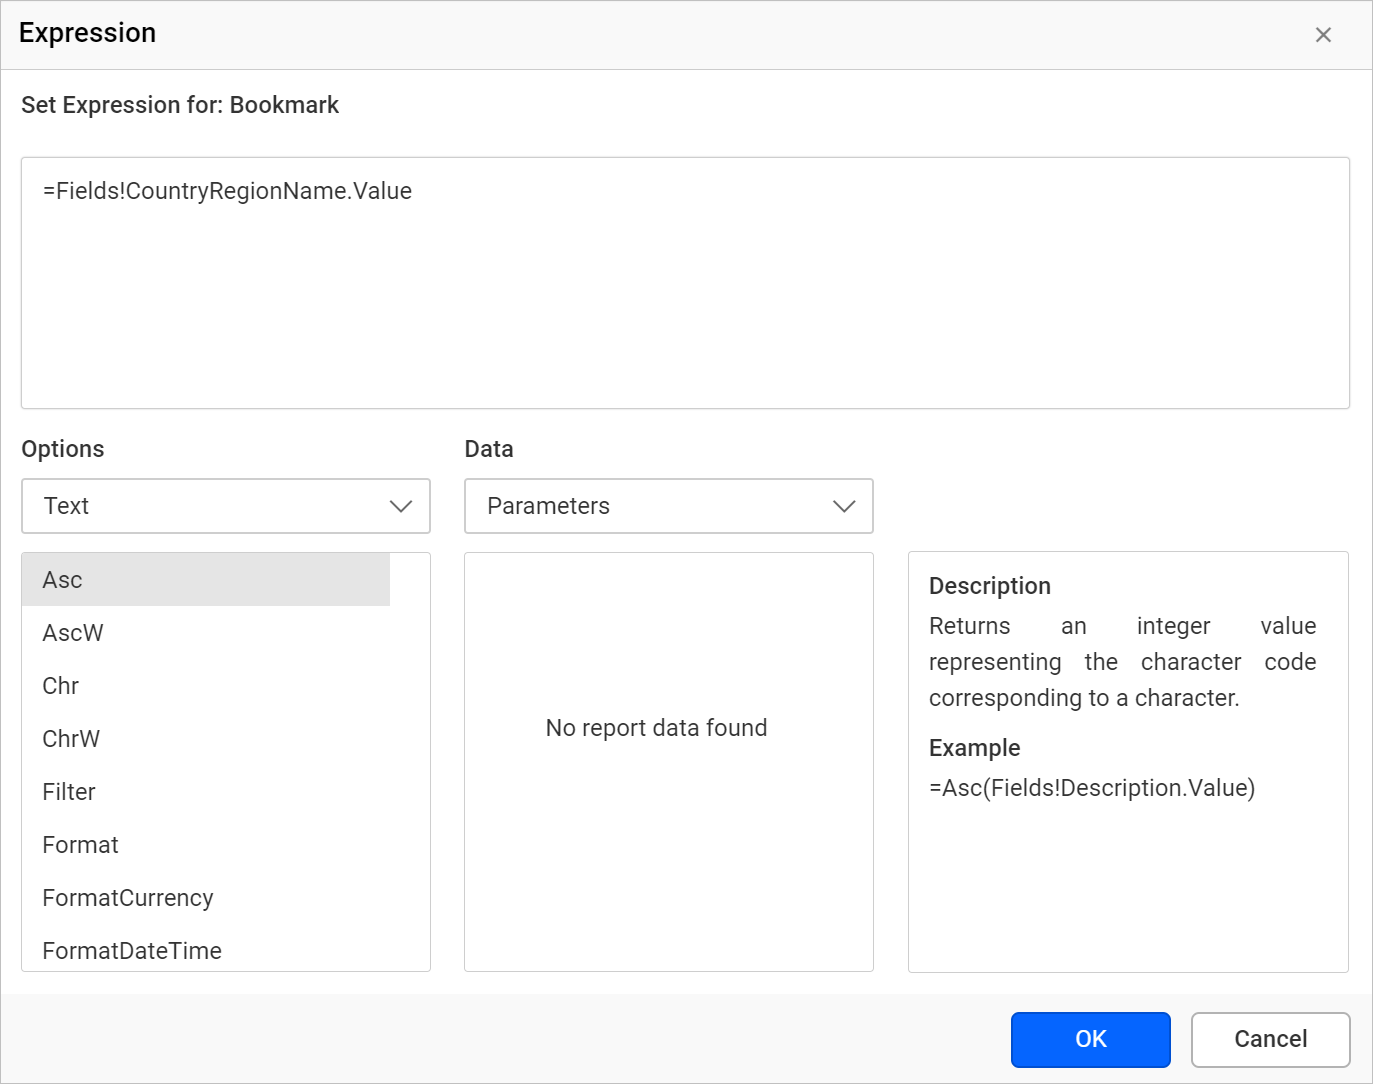
Set the =Fields!CountryRegionName.Value expression in Bookmark field.
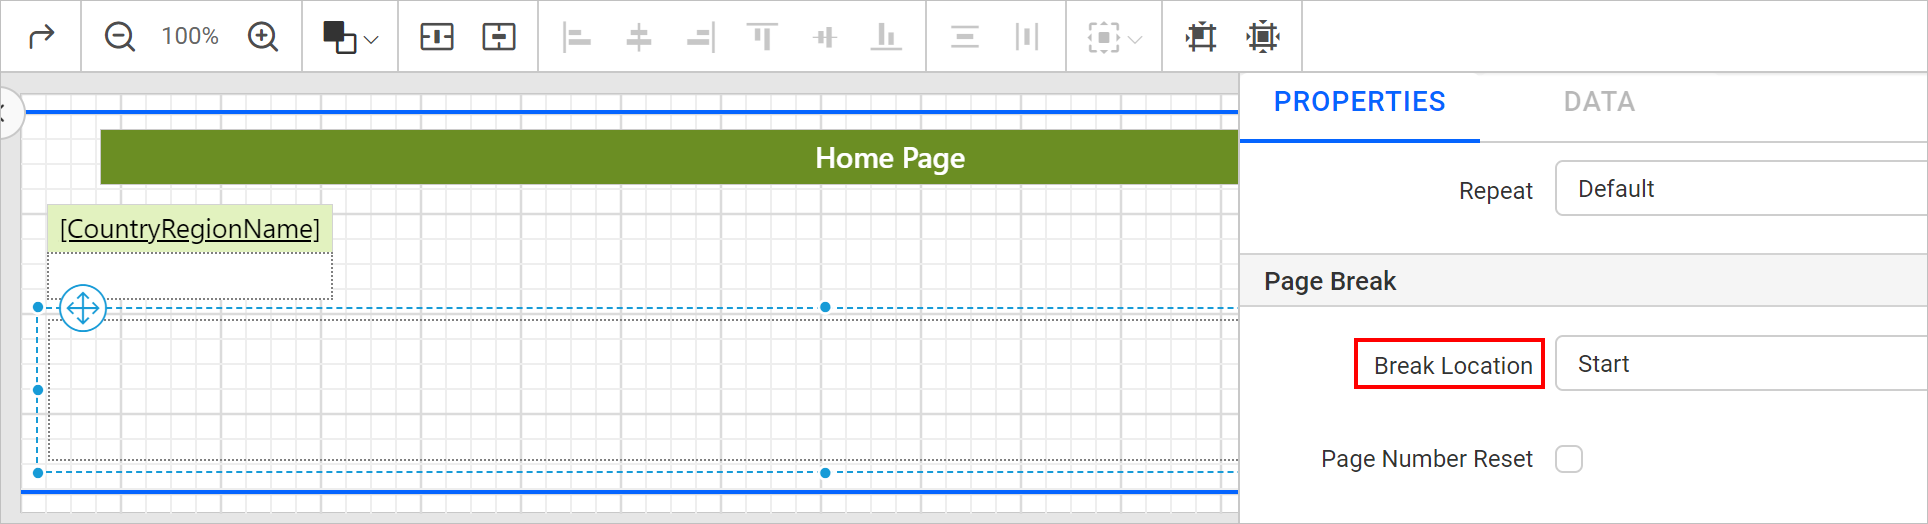
Add a rectangle and set the Page Break as Start.
Then insert a table report item. Refer Add table section to add table.
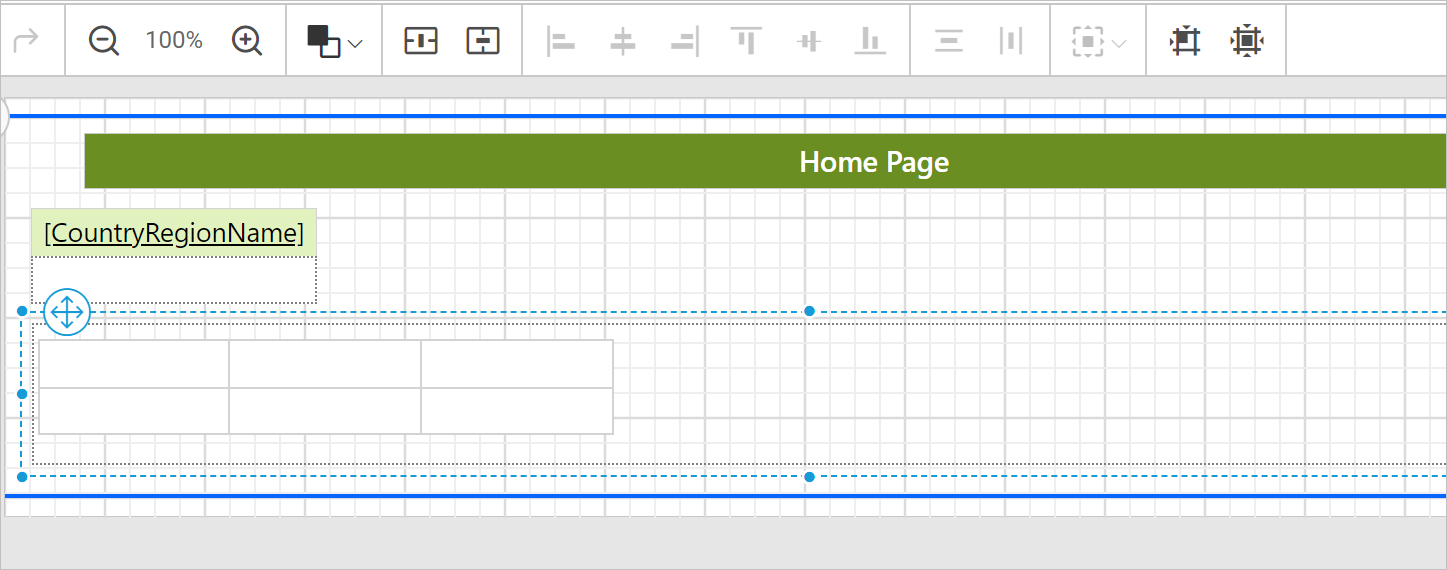
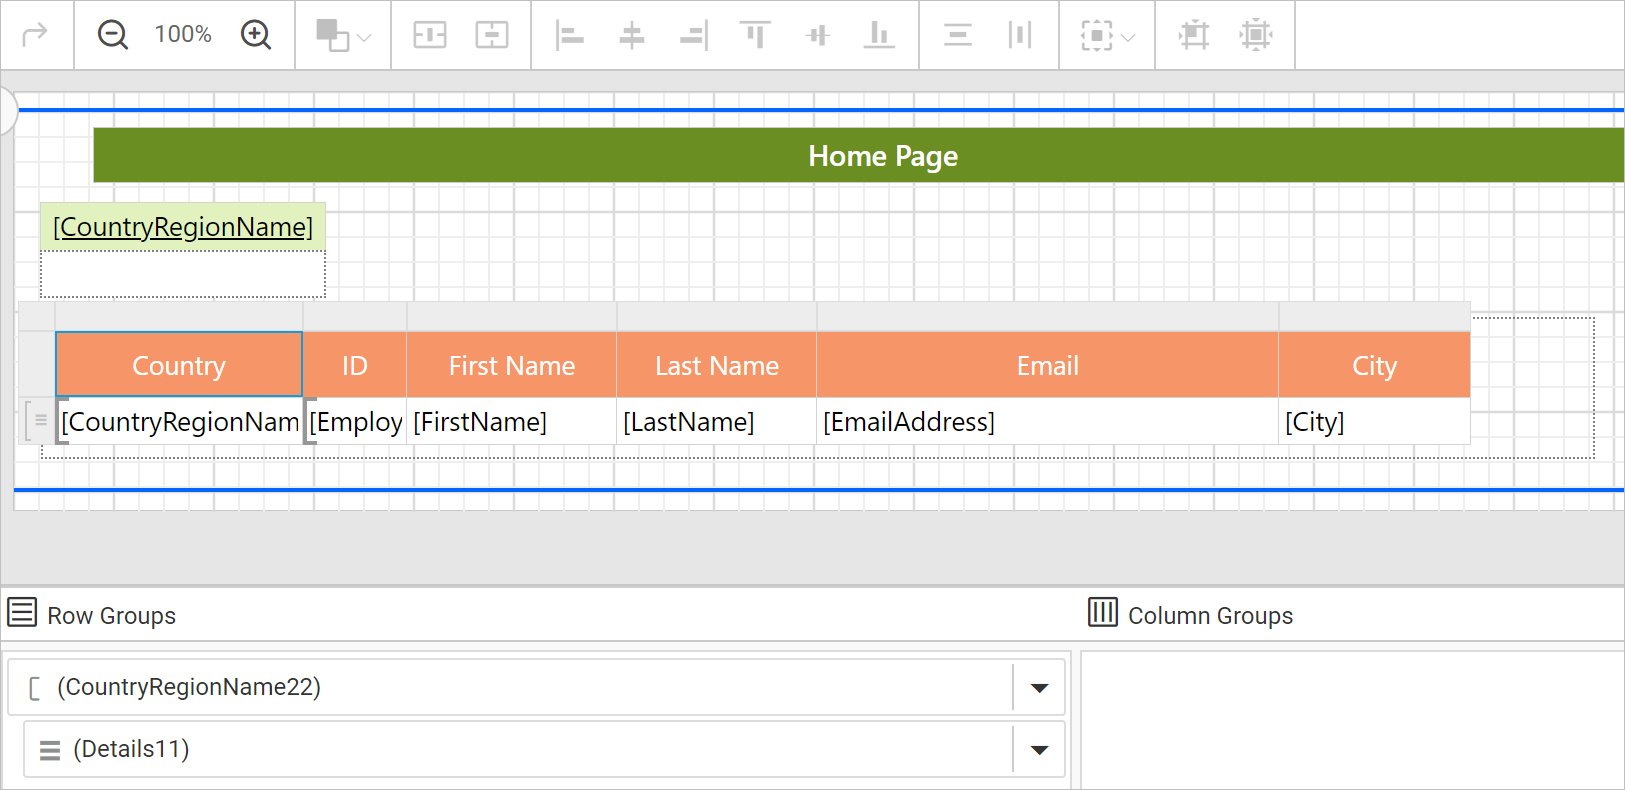
Assign dataset fields and apply formatting as shown in the below image.
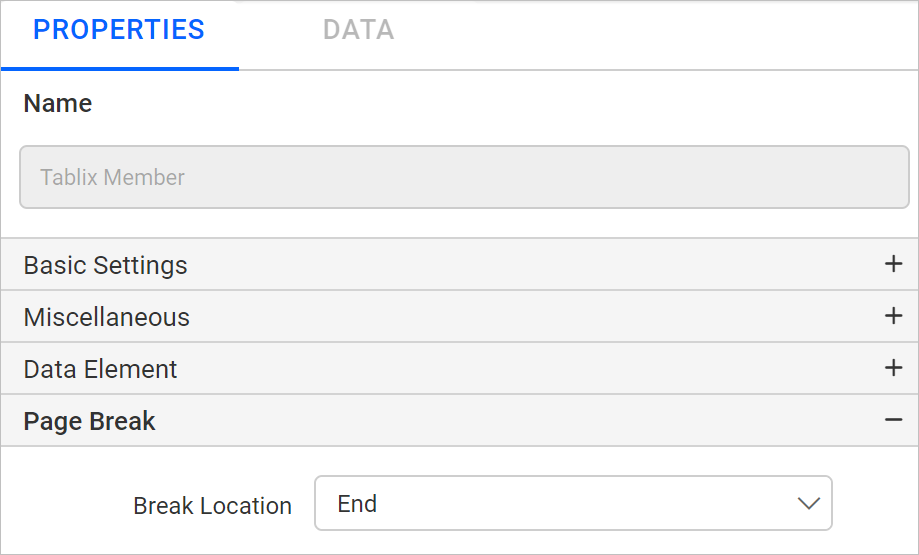
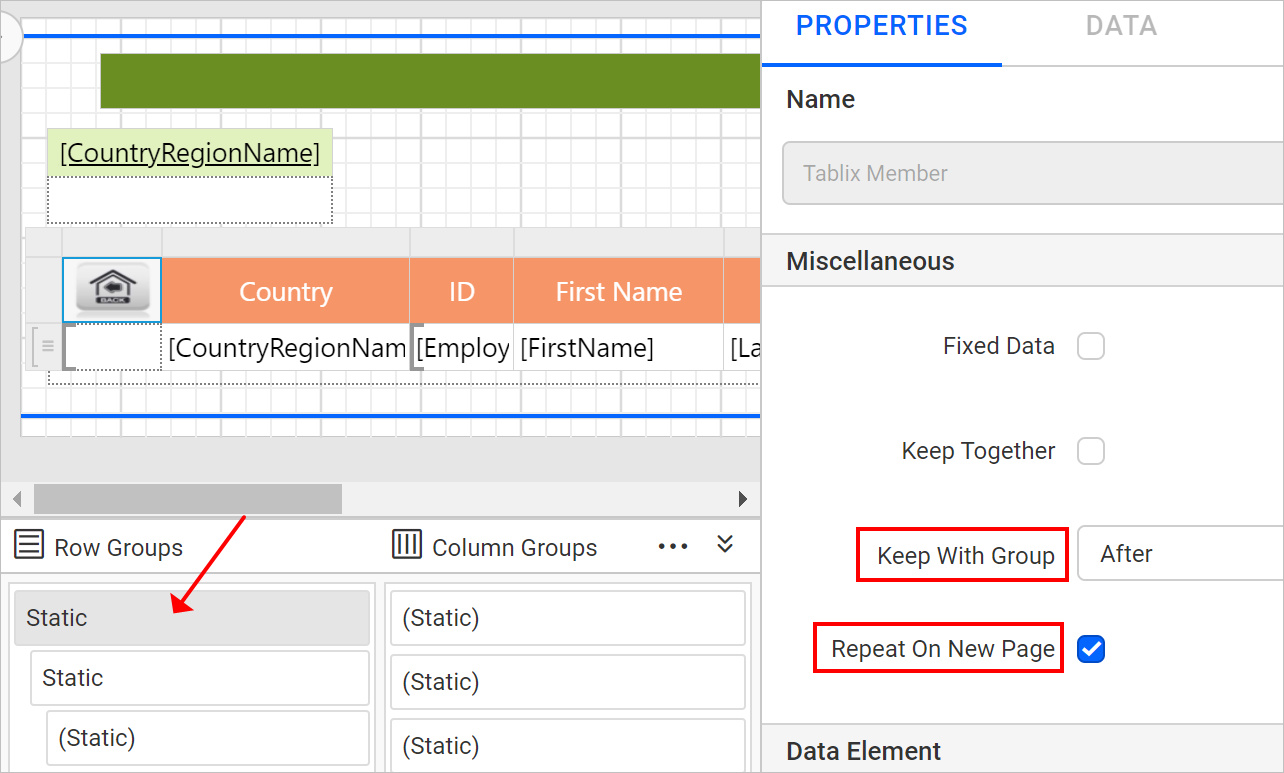
Open CountryRegionName group properties and set the page break as End.
Select the CountryRegionName group cell and open properties panel. Under Miscellaneous category, enter the Bookmark property value as =Fields!CountryRegionName.Value.
Add a column in table report item.
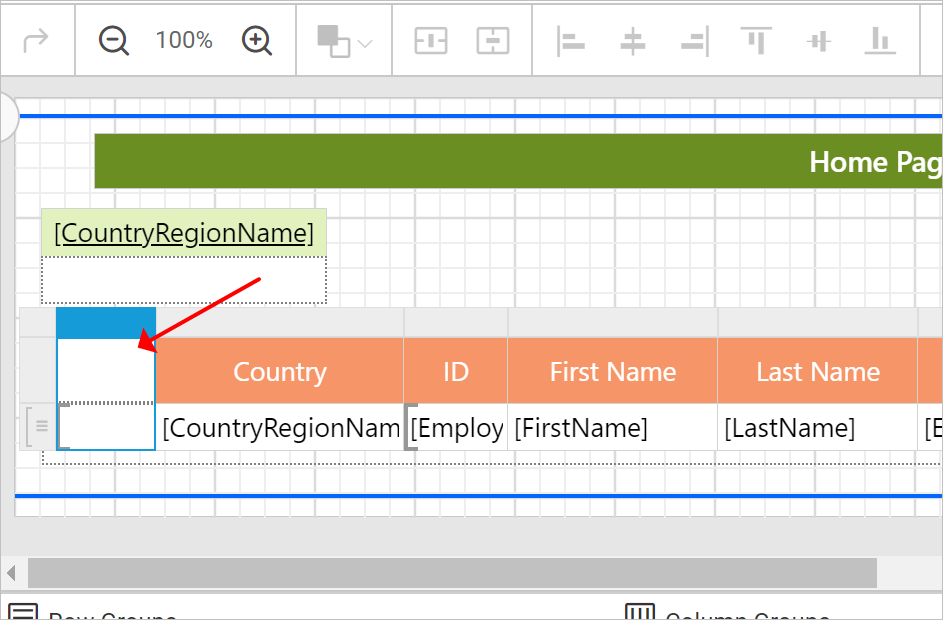
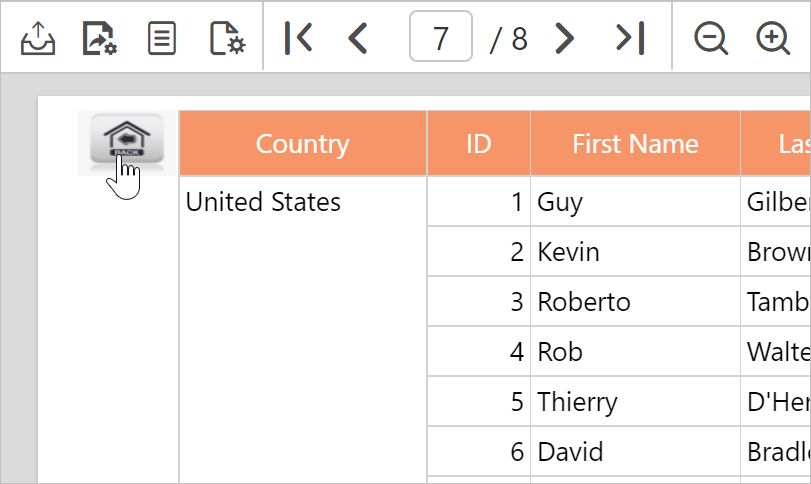
Now, we are going to add an image in table cell and configure book mark to it. When clicking on the image, it will navigate to the first page of the report.
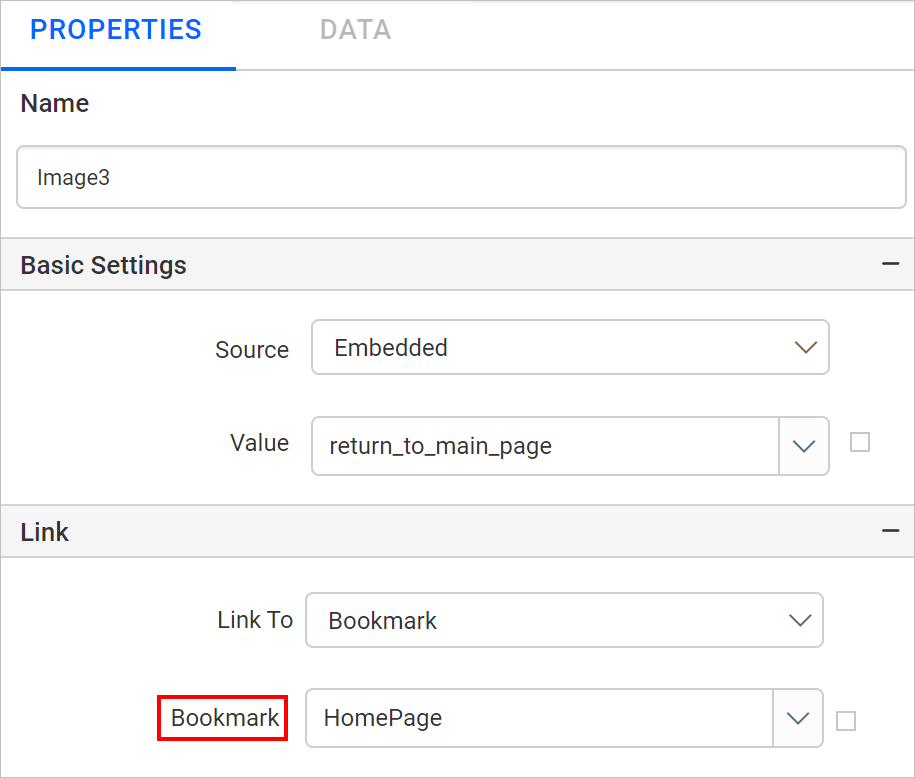
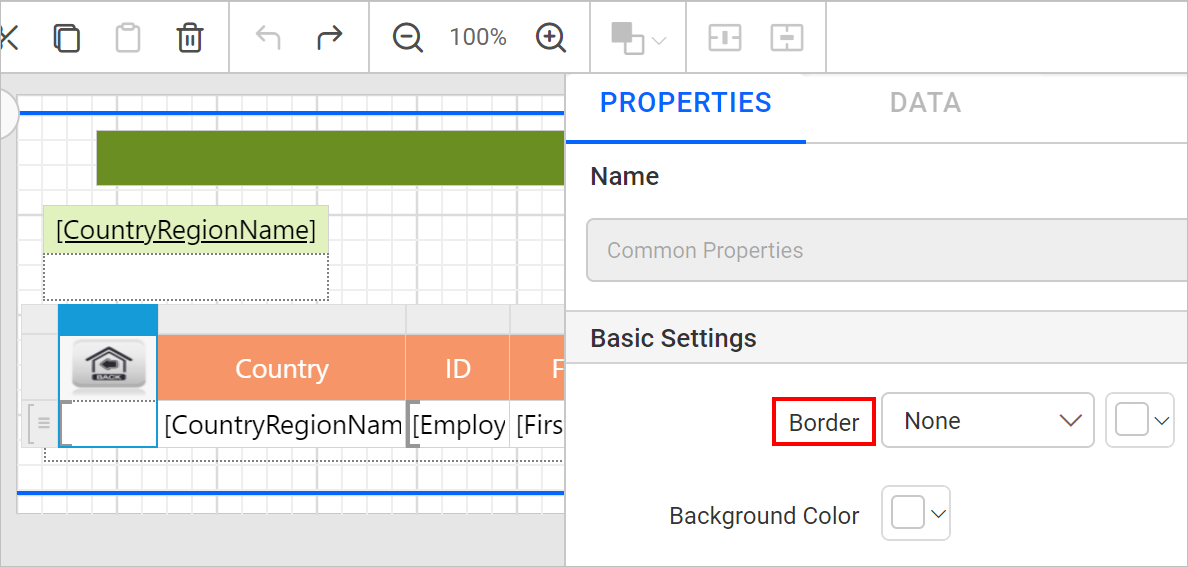
Insert an image in first cell of the column.
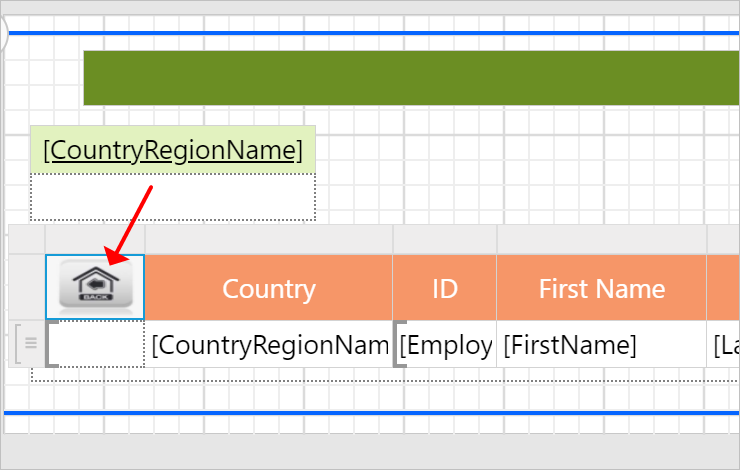
Select the image and open properties panel. Under Link category, choose Bookmark option.
Choose the HomePage bookmark label in Bookmark option.
Set the border as None for the first column cell.
To repeat header row for each group, enable Report on New Page and set Keep With Group as After for first static field.
Preview
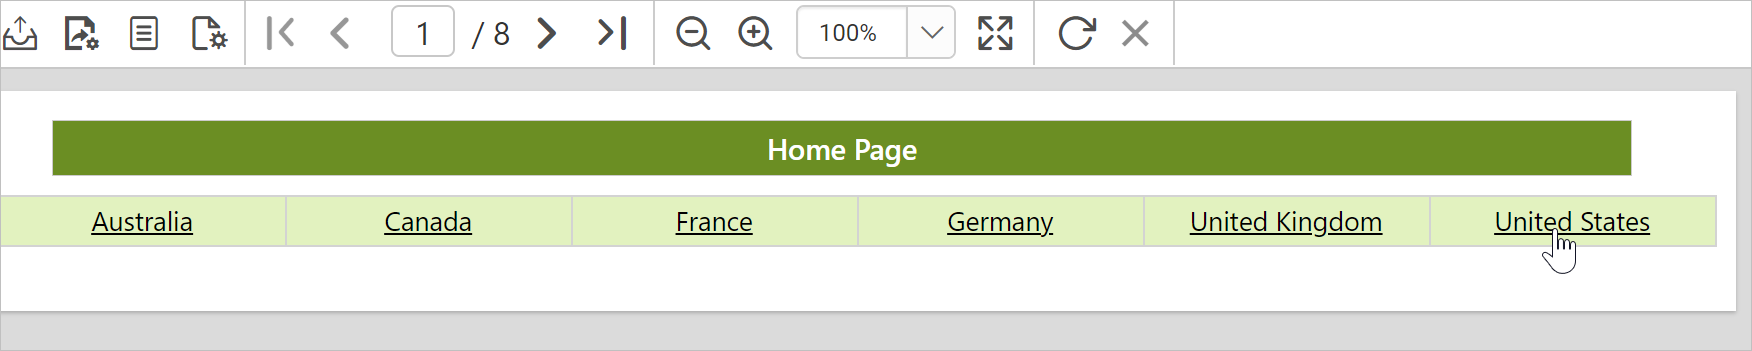
On report preview, first page of the report looks like below,

Clicking on a country name will display respective group.
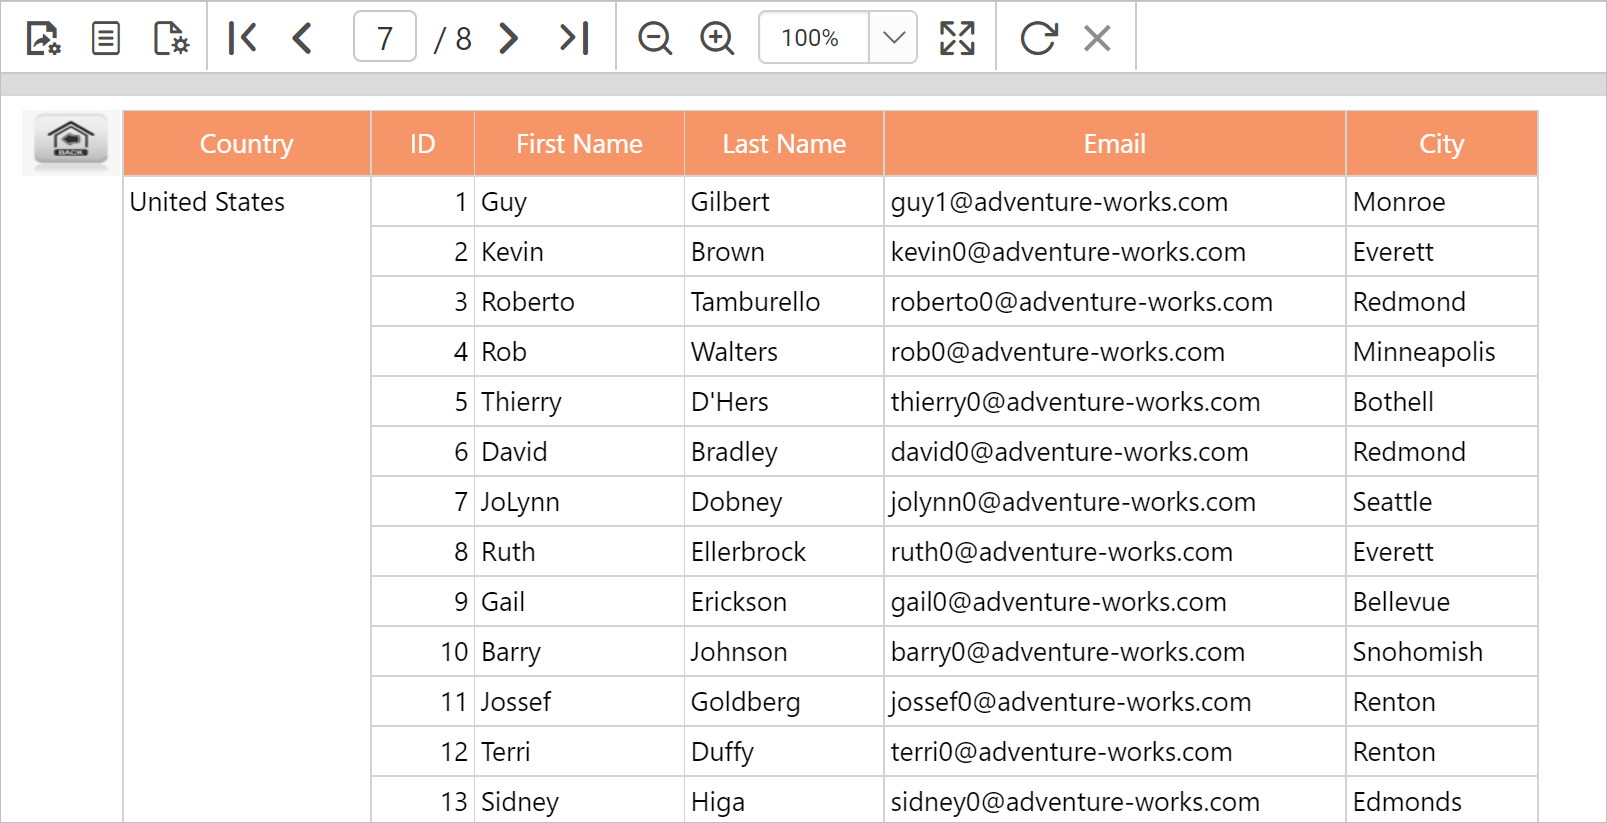
Clicking on the image will navigate to the main page of the report.
Download the above report design from the link