Upgrading Bold Reports® to latest version
This section explains how to upgrade Bold Reports® to the latest version in your Docker environment. You can refer to the features and enhancements in the Release Notes.
Back up the existing data
Before upgrading Bold Reports® to the latest version, make sure to back up the following items:
- Files and folders from the shared location that you have mounted to the deployments via volume.
- Database backup - Take a backup of the database to restore in case the upgrade is not successful or if the applications do not work properly after the upgrade.
Proceeding with upgrade for single container
Bold Reports® updates the database schema of your current version to the latest version. The upgrade process retains all resources and settings from the previous deployment.
-
If you are using the docker compose YAML file for deployment, you can download the latest docker-compose file from this link and use the below command to bring down the containers from where you deployed the docker compose file.
docker-compose down -
Copy the latest downloaded files and replace the existing files in the deployed folder. Then, enter the required values in the necessary fields, as already configured in the existing Bold Reports® application.
-
Finally, run the command below to upgrade Bold Reports®.
docker-compose up -d -
If you are using the command to deploy Bold Reports® in a single container, please follow the steps below to upgrade. Then, use the command provided below to list all the containers.
docker ps -a
Now we need to remove the container without deleting the persistent volume that is already mounted to it. You can use the command below to remove the container.
docker rm --force <containername>Example:
docker rm --force boldreportsNow we need to create a container with the same container name and persistent volume path.
docker run --name boldreports -p 80:80 -p 443:443 \
-e APP_URL=<app_base_url> \
-e OPTIONAL_LIBS=<optional_library_names> \
-v <existing_host_path_for_appdata_files>:/application/app_data \
-v <existing_host_path_for_nginx_config>:/etc/nginx/sites-available \
-d syncfusion/boldreports:<tag>
Example: docker run —name boldreports -p 80:80 -p 443:443 -e APP_URL=
"http://10.103.215.44"-e OPTIONAL_LIBS=“mysql,oracle,postgresql,snowflake,googlebigquery,monogodb” -v “/home/Admin123/upgrade/app_data”:/application/app_data -v “/home/Admin123/upgrade/nginx”:/etc/nginx/sites-available -d syncfusion/boldreports:10.1.11Note: When upgrading Bold Reports®, ensure that the volume mount remains the same, and only the tag needs to be changed. Once you run the container, please wait a couple of minutes to access the url.
After upgrading the Bold Reports® application, Please refer to this documentation to enable puppeteer.
Proceeding with upgrade for multiple container
Bold Reports® updates the database schema of your current version to the latest version. The upgrade process will retain all the resources and settings from the previous deployment.
You can download the latest docker-compose file and default.conf from this docker-compose and default.conf, and use the below command to down the containers from where you deployed the docker compose file.
docker-compose downCopy the latest downloaded files and replace them in the existing deployed folder. Then provide the values in the required fields, as already done for the existing Bold Reports® application. Run the below command to upgrade Bold Reports®.
docker-compose up -dAfter upgrading the Bold Reports® application, please refer to this documentation to enable Puppeteer.
Upgrade Failure Notification
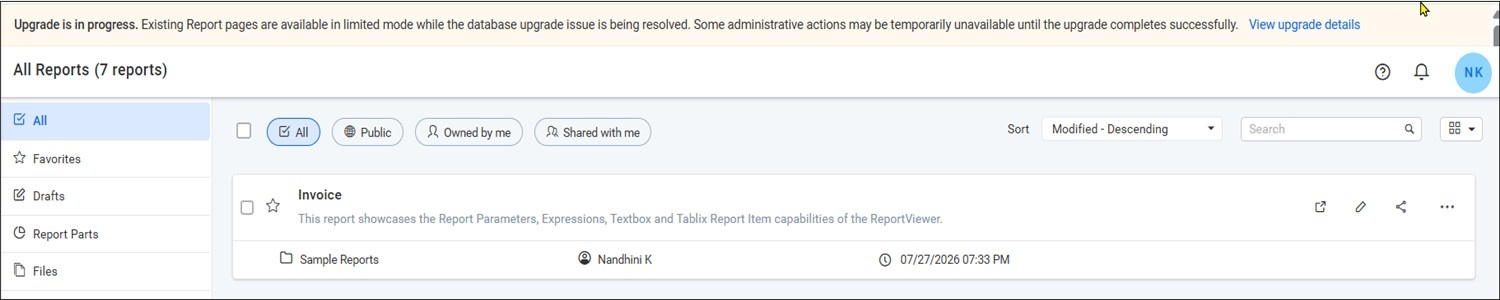
During an application upgrade, if a database script execution fails, the upgrade process continues without interrupting access to existing reports. In such cases, a notification banner is displayed indicating that the upgrade is still in progress and that some administrative actions may be temporarily unavailable until the issue is resolved.
Click View upgrade details to view information about the upgrade failure, including the upgrade status, database provider, version details, failed script information, and error message.
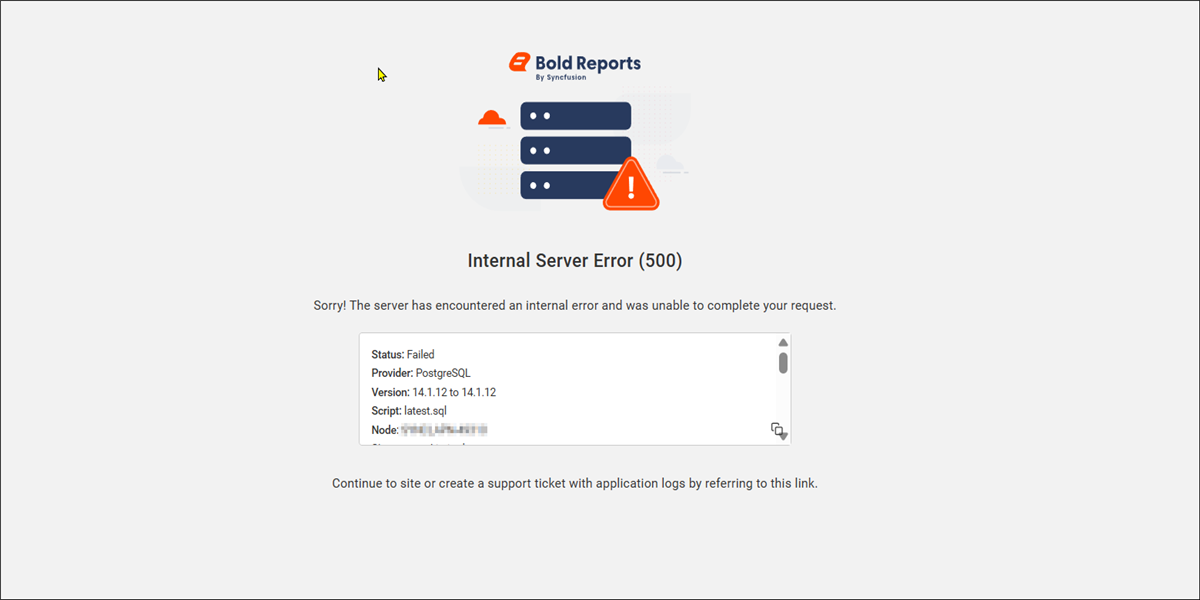
Note: If this notification banner is displayed, it indicates that the upgrade process encountered an issue. To resolve the issue, please contact us and share the upgrade-related logs with the support team for further investigation.
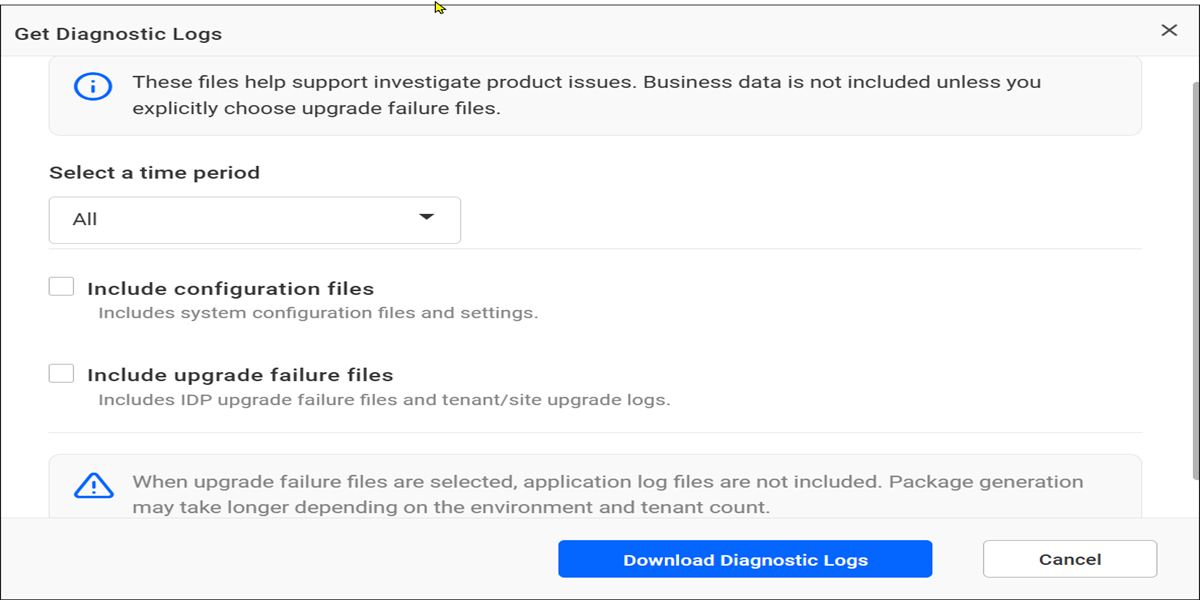
- Navigate to UMS > Sites, click the Help icon in the upper-right corner, and select Get Diagnostic Logs. Select Include upgrade failure files and click Download Diagnostic Logs to download the upgrade-related logs.