How to configure custom report item extension
This section explains the steps required to register and load custom report item in Web Report Designer ASP.NET core application. For demonstration purpose one-dimensional and two-dimensional barcodes configuration steps are explained. You can add any other report item by following same procedure.
Create report designer ASP.NET core application
Refer Getting Started and create a Report Designer ASP.NET core application.
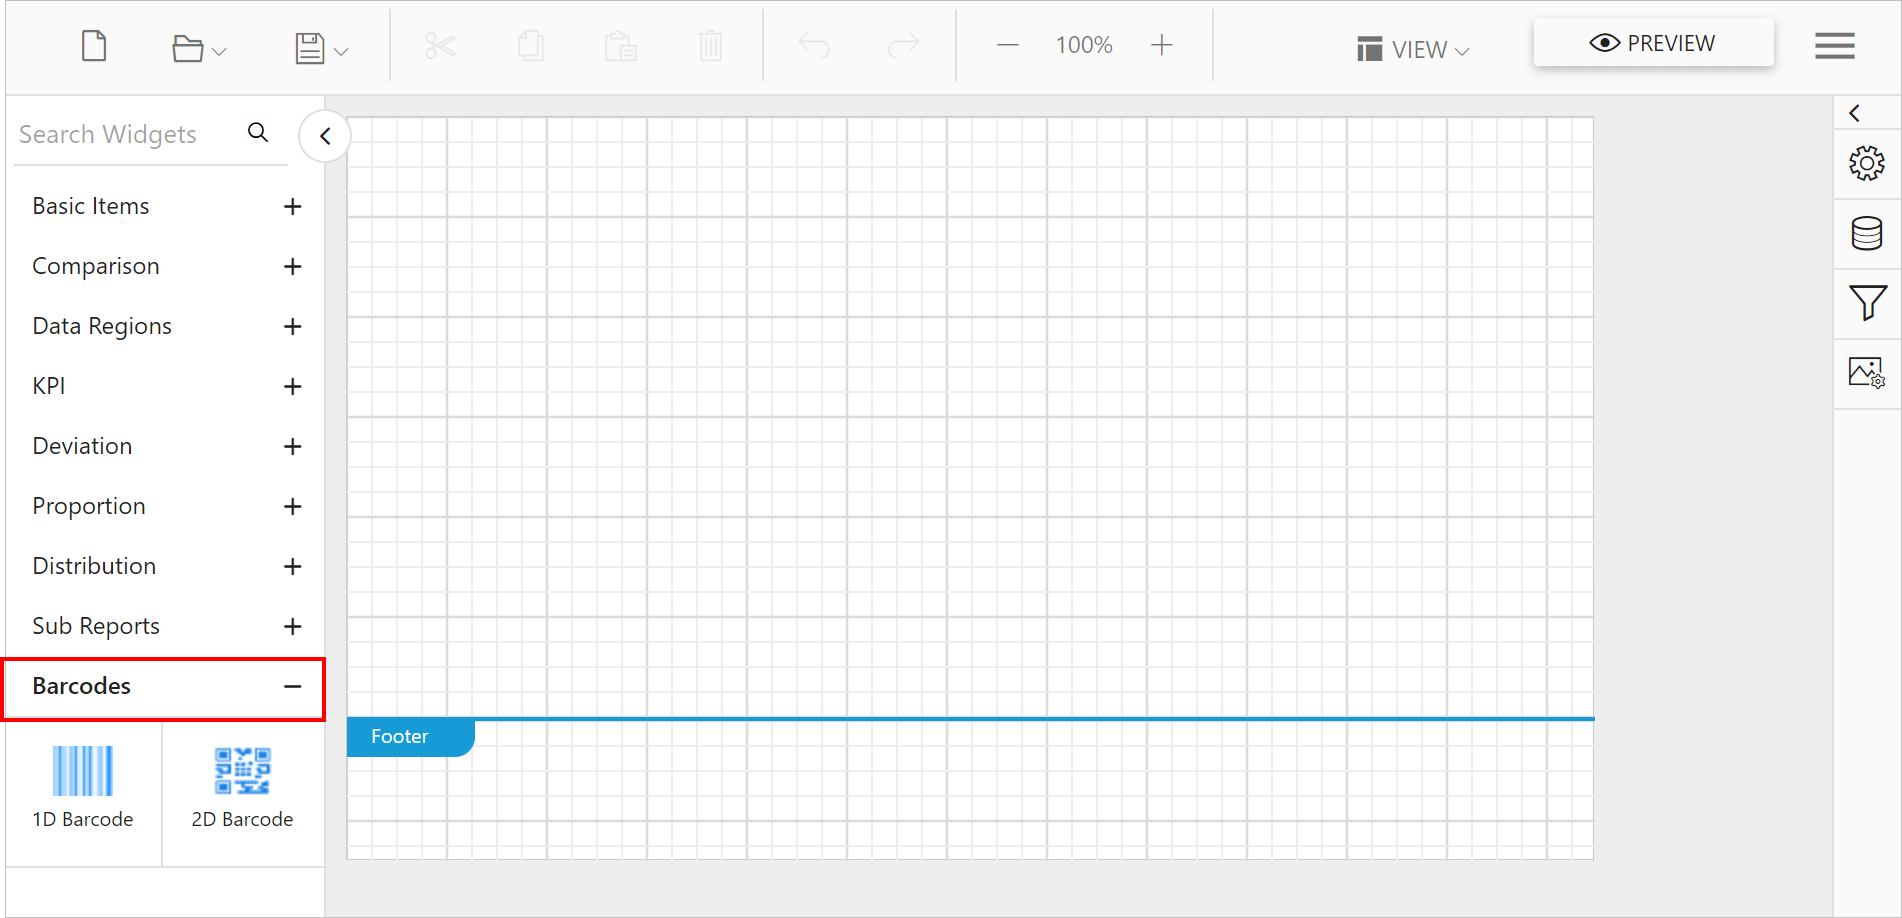
Adding barcodes under designer item panel
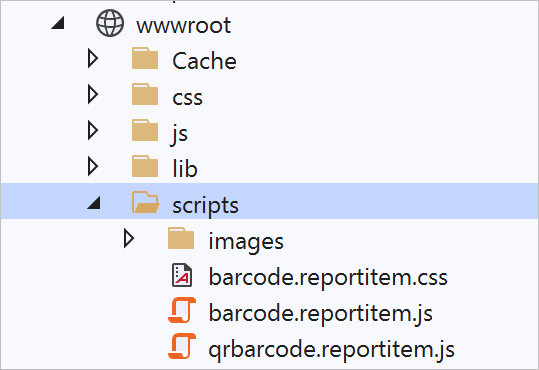
Copy the sample script and css for one-dimensional and two-dimensional barcode report items from installed location, {Installed_location}\Samples\Common\Javascript\assets\scripts\extension and place inside the wwwroot folder.
You can also install the BoldReports.JavaScript.Extensions NuGet package to get the one-dimensional and two-dimensional barcode report items scripts.
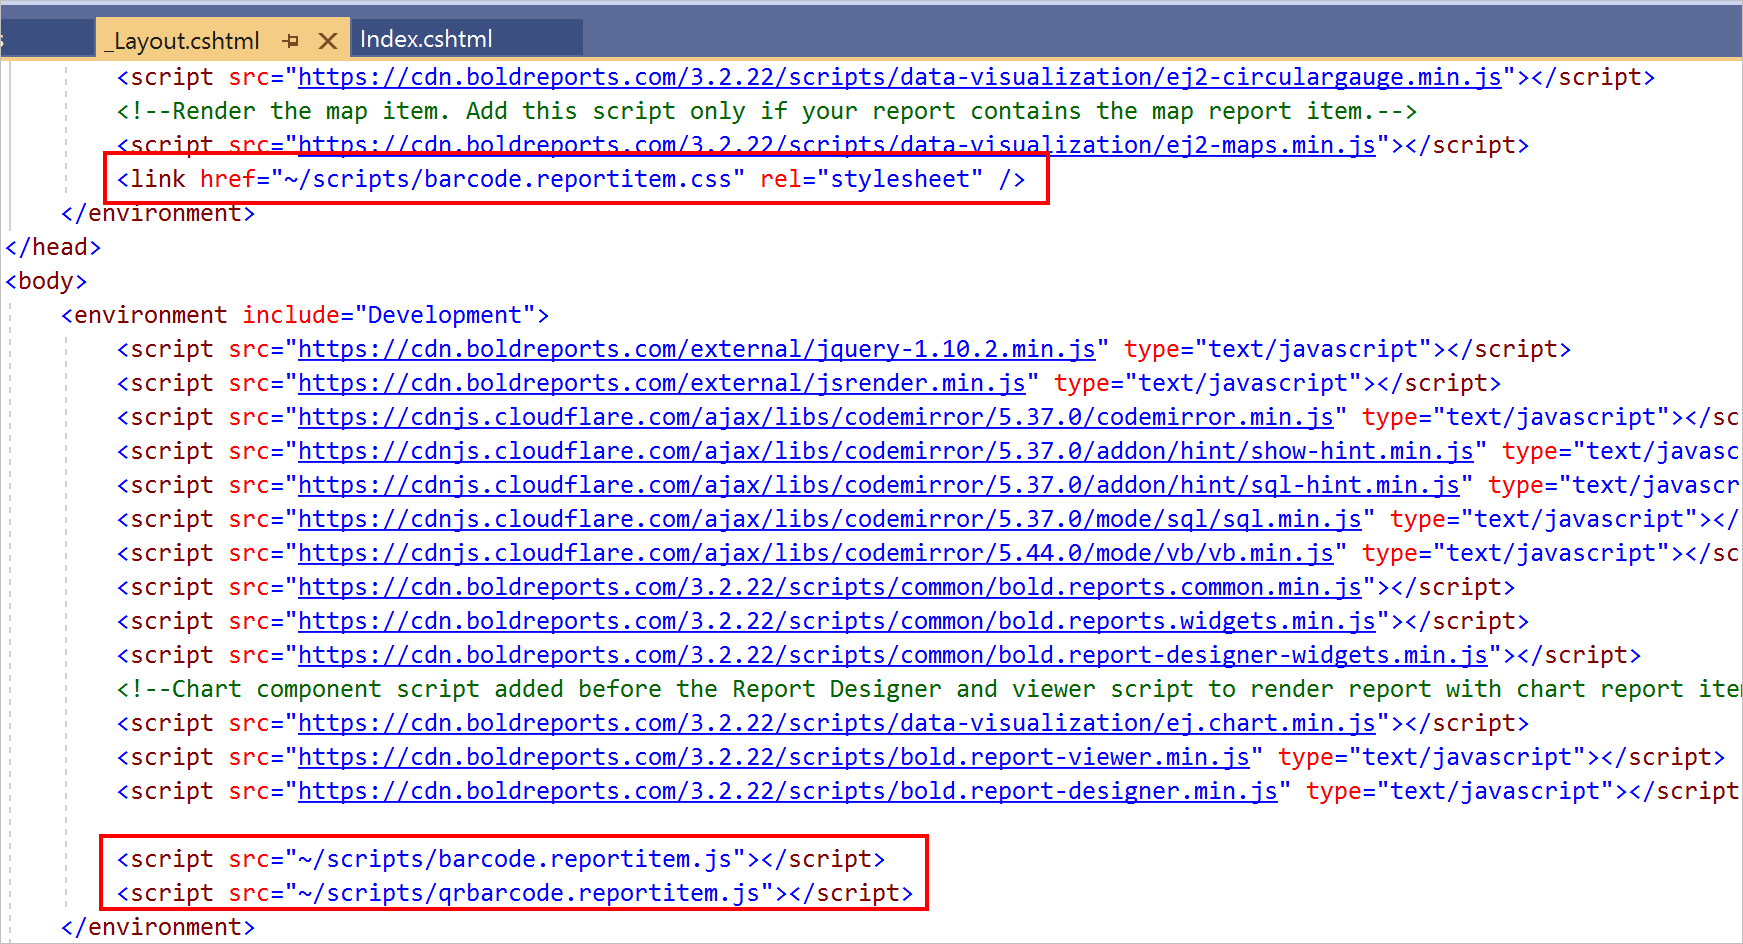
Refer barcode scripts and css into head section of \Views\Shared\_Layout.cshtml page.
In HomeController.cs add the one-dimensional and two-dimensional barcode report items information as shown in below code sample.
 public class HomeController : Controller
    {
        public IActionResult Index()
        {
            ViewBag.ReportItemExtensions = new List<BoldReports.Models.ReportDesigner.ReportItemExtensionsModule>();
            var ReportItemExtension = new BoldReports.Models.ReportDesigner.ReportItemExtensionsModule();
            ReportItemExtension.Name = "barcode";
            ReportItemExtension.ClassName = "EJBarcode";
            ReportItemExtension.ImageClass = "customitem-barcode";
            ReportItemExtension.DisplayName = "1D Barcode";
            ReportItemExtension.Category = "Barcodes";
            ViewBag.ReportItemExtensions.Add(ReportItemExtension);
            ReportItemExtension = new BoldReports.Models.ReportDesigner.ReportItemExtensionsModule();
            ReportItemExtension.Name = "matrixbarcode";
            ReportItemExtension.ClassName = "EJQRBarcode";
            ReportItemExtension.ImageClass = "customitem-qrbarcode";
            ReportItemExtension.DisplayName = "2D Barcode";
            ReportItemExtension.Category = "Barcodes";
            ViewBag.ReportItemExtensions.Add(ReportItemExtension);
            return View();
        }
    }
Set report-data-extensions property in Index.cshtml file with ViewBag as shown in below code example.
<div style="height: 500px;width: 100%;">
    <bold-report-designer id="designer" service-url="/api/ReportingAPI" report-item-extensions="@ViewBag.ReportItemExtensions"></bold-report-designer>
</div>
</script>
Now, one-dimensional and two-dimensional barcodes will be added under item panel.
Install barcode custom report item extension NuGet
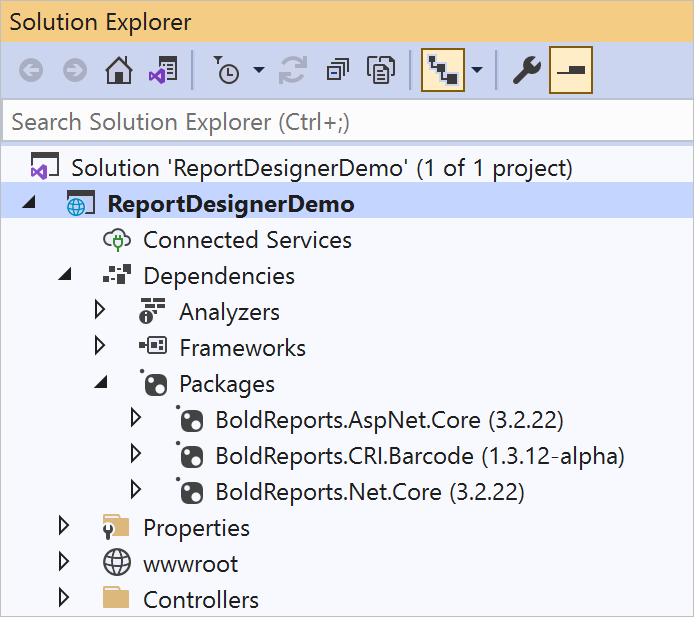
To render the one-dimensional and two-dimensional barcodes in designer and preview install BoldReports.CRI.Barcode package in the application.
Right-click the project or solution in the Solution Explorer tab, and choose Manage NuGet Packages. Alternatively, select the Tools > NuGet Package Manager > Manage NuGet Packages for Solution menu command.
Refer to the NuGet Packages to learn more details about installing and configuring Report Designer NuGet packages.
Search for BoldReports.CRI.Barcode NuGet package, and install it in your application.
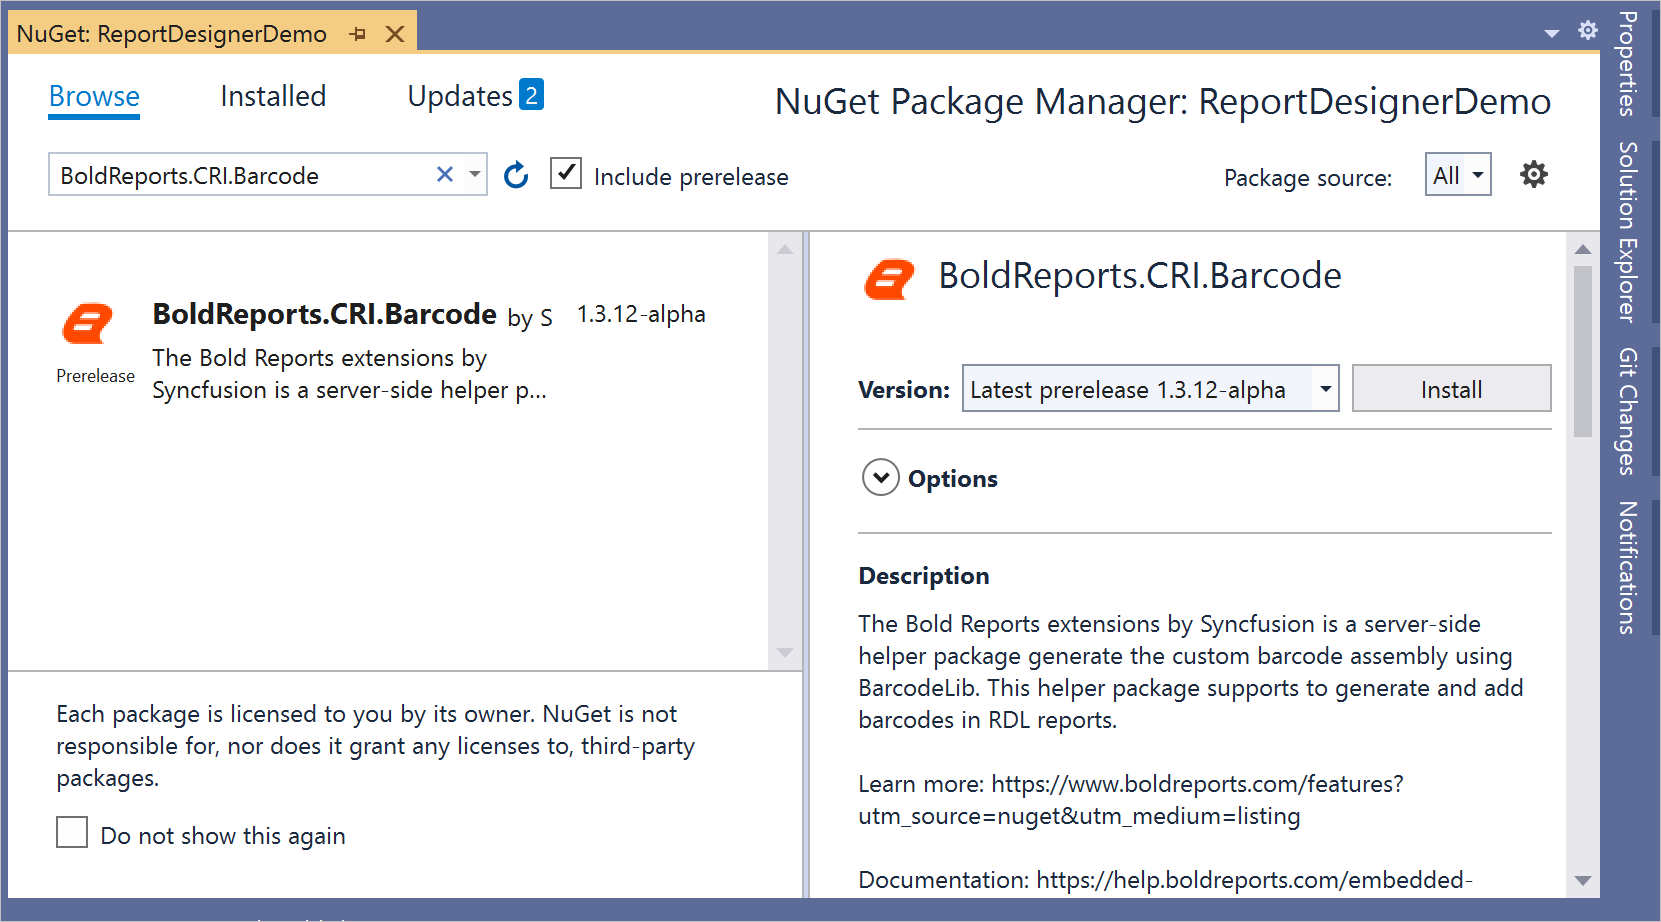
BoldReports.CRI.Barcode will install into your application. Click OK. Now, the assembly will be added in the respective project references.
BoldReports.CRI.Barcode NuGet package is available with Bold Reports® release version 3.3 and above. Both one-dimensional and two-dimensional barcodes can be rendered with this single assembly.
Register barcode custom report item extension in application startup
To register the extension in the application, follow the below steps.
-
Open the code-behind file
Startup.csand add the following using statement.using BoldReports.Web; -
Then add the the following code to register extension assembly in
Startupmethod.public Startup(IConfiguration configuration, IWebHostEnvironment _hostingEnvironment) { //Use the below code to register extensions assembly into report designer ReportConfig.DefaultSettings = new ReportSettings().RegisterExtensions(new List<string> { "BoldReports.CRI.Barcode" }); Configuration = configuration; env = _hostingEnvironment; }
To register multiple custom report item extensions in the application, provide the assembly name’s as list of strings. Here both one-dimensional and two-dimensional barcodes rendering can be done with BoldReports.CRI.Barcode assembly, so single assembly name is added in the list.
Build and run the application. Now, you could able to render barcode in designer and preview. Refer Barcode report item section and design barcode reports in the Report Designer.