Upgrading the Bold Reports® Linux package to the Latest Version
You can upgrade the Bold Reports® Linux package from any version to a newer version by running the install-boldreports.sh script with the upgrade option. Upgrades from v3.x or v5.x also need Nginx configuration changes.
How do I upgrade the Bold Reports® Linux package?
You upgrade the Bold Reports® Linux package by installing the prerequisites, downloading the new package, and running the install script with -i upgrade.
-
Register and download the Bold Reports® Linux package from the getting started guide.
-
Install the
pvtool by running the following command:sudo apt-get install pv -
Install python 3.9 or later by running the following command:
Ubuntu Version:22.04 :
sudo apt-get install -y python3Ubuntu Version:20.04 :
sudo apt update && sudo apt install wget software-properties-common && sudo add-apt-repository ppa:deadsnakes/ppa && sudo apt update && sudo apt install python3.9 -
Install the pip dependency packages for the ETL service by running the following command:
sudo apt-get install python3-pip && sudo python3 -m pip install --upgrade pip && sudo pip install duckdb===1.1.2 dlt===0.4.12 pymysql pyodbc pg8000 poetry pandas===2.2.2 numpy===1.26.4 "dlt[parquet]" "dlt[filesystem]" -
Download the Bold Reports® Linux package by running the following command:
sudo wget {Bold Reports Linux package link} -
Extract the zip file.
sudo unzip {Bold Reports Linux package zip file} -
Change the directory to
BoldReports_EnterpriseReporting-Linuxby running the following command:cd BoldReports_EnterpriseReporting-Linux -
Run the following command to deploy Bold Reports® on your Linux machine:
sudo bash install-boldreports.sh -i {upgrade} -u {user} -h {host URL}-
i: Installation type. Specifies whether it is a new or upgraded installation.
-
u: The user or group that manages the service.
-
h: Domain or IP address of the machine with the HTTP protocol.
-
Example for upgrading the installation:
sudo bash install-boldreports.sh -i upgrade -u www-data -h http://linux.example.comWhat do I do after the upgrade completes?
After the Bold Reports® upgrade completes, install the optional client libraries and open the application in a browser.
-
Follow the optional client libraries installation guide and install the optional client libraries after the installation is completed.
-
Open the host URL in the browser and use the upgraded Bold Reports® application.
NOTE: The Bold Reports® Linux package backup file will be available in the following location: /var/www/.
Upgrade breaking changes v3.x to latest
Bold Reports® upgrades from v3.x need extra Nginx configuration for the report viewer and ETL service locations.
The following breaking changes apply only when you upgrade the Bold Reports® application from version v3.x to a later version.
Automatic Nginx configuration:
-
If you chose automatic Nginx configuration during the initial installation, the following prompt message appears. Choose Yes to proceed with the installation.

-
If you choose No, follow the manual Nginx configuration step.
Manual Nginx configuration:
-
If you manually configured Nginx during the initial installation, the following message appears.

-
For manual Nginx configuration, modify the default Nginx configuration file in location
/etc/nginx/sites-available. Open it in a text editor and add the following code, as shown in the image:location /reporting/viewer { proxy_pass http://localhost:6554/reporting/viewer; proxy_http_version 1.1; proxy_set_header Upgrade $http_upgrade; proxy_set_header Connection keep-alive; proxy_set_header Host $host; proxy_cache_bypass $http_upgrade; proxy_set_header X-Forwarded-For $proxy_add_x_forwarded_for; proxy_set_header X-Forwarded-Proto $scheme; } location /etlservice/ { root /var/www/bold-services/application/etl/etlservice/wwwroot; proxy_pass http://localhost:6509/; proxy_http_version 1.1; proxy_set_header Upgrade $http_upgrade; proxy_set_header Connection "upgrade"; proxy_set_header Host $http_host; proxy_cache_bypass $http_upgrade; proxy_set_header X-Forwarded-For $proxy_add_x_forwarded_for; proxy_set_header X-Forwarded-Proto $scheme; } location /etlservice/_framework/blazor.server.js { root /var/www/bold-services/application/etl/etlservice/wwwroot; proxy_pass http://localhost:6509/_framework/blazor.server.js; proxy_http_version 1.1; proxy_set_header Upgrade $http_upgrade; proxy_set_header Connection "upgrade"; proxy_set_header Host $http_host; proxy_cache_bypass $http_upgrade; proxy_set_header X-Forwarded-For $proxy_add_x_forwarded_for; proxy_set_header X-Forwarded-Proto $scheme; }
Nginx configuration file code:
The following screenshot shows the Nginx configuration file with the added code.
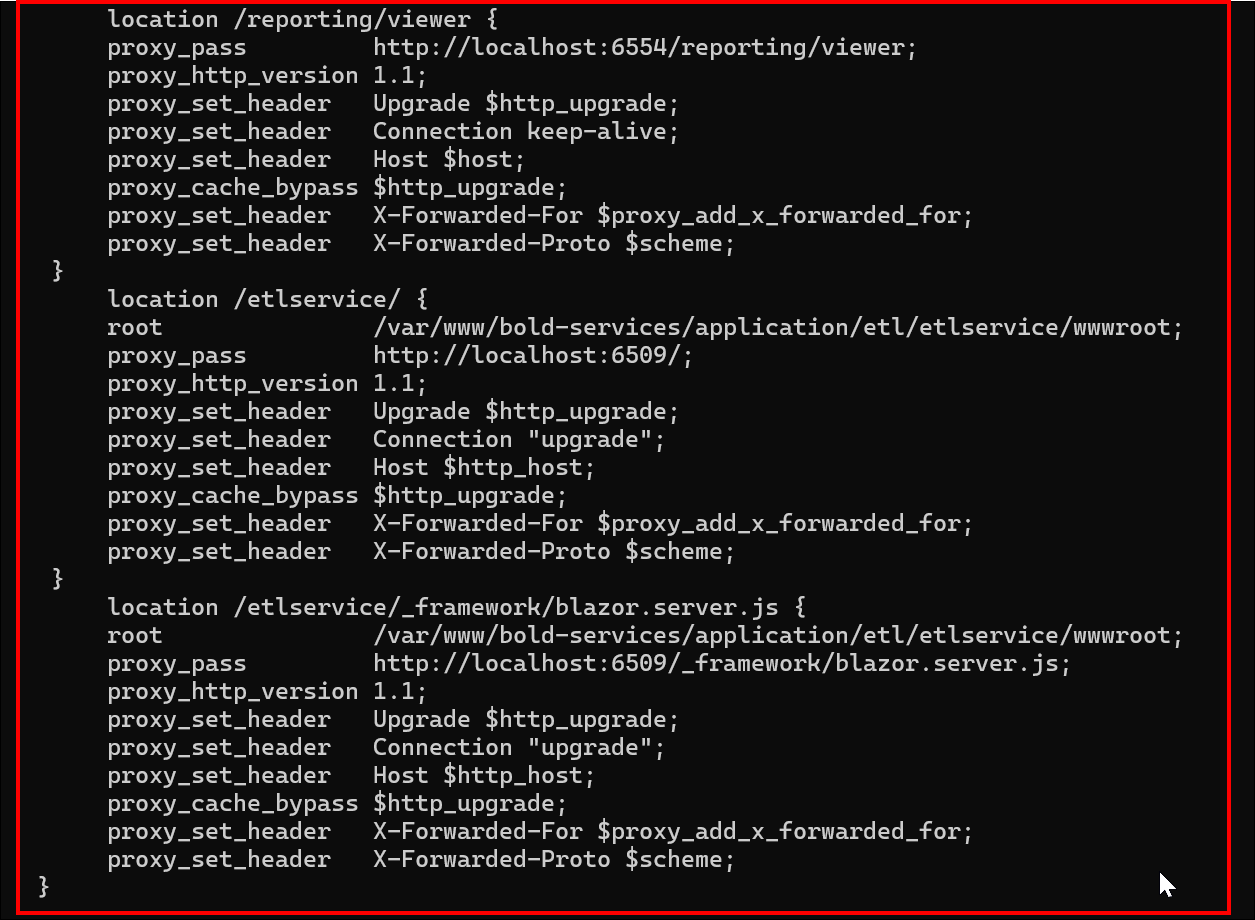
After you update the Nginx configuration, run sudo nginx -t to verify the syntax of the configuration files. If the configuration file test is successful, run sudo nginx -s reload to force Nginx to pick up the changes.
Upgrade breaking changes v5.x to latest
Bold Reports® upgrades from v5.x need extra Nginx configuration for the ETL service locations.
The following breaking changes apply only when you upgrade the Bold Reports® application from version v5.x to a later version.
Automatic Nginx configuration:
-
If you chose automatic Nginx configuration during the initial installation, the following prompt message appears. Choose
Yesto proceed with the installation.
-
If you choose
No, follow the manual Nginx configuration steps below.
Manual Nginx configuration:
-
If you manually configured Nginx during the initial installation, the following message is displayed.

-
For manual Nginx configuration, modify the default Nginx configuration file located at
/etc/nginx/sites-available. Open it in a text editor and add the following code, as shown in the image below:location /etlservice/ { root /var/www/bold-services/application/etl/etlservice/wwwroot; proxy_pass http://localhost:6509/; proxy_http_version 1.1; proxy_set_header Upgrade $http_upgrade; proxy_set_header Connection "upgrade"; proxy_set_header Host $http_host; proxy_cache_bypass $http_upgrade; proxy_set_header X-Forwarded-For $proxy_add_x_forwarded_for; proxy_set_header X-Forwarded-Proto $scheme; } location /etlservice/_framework/blazor.server.js { root /var/www/bold-services/application/etl/etlservice/wwwroot; proxy_pass http://localhost:6509/_framework/blazor.server.js; proxy_http_version 1.1; proxy_set_header Upgrade $http_upgrade; proxy_set_header Connection "upgrade"; proxy_set_header Host $http_host; proxy_cache_bypass $http_upgrade; proxy_set_header X-Forwarded-For $proxy_add_x_forwarded_for; proxy_set_header X-Forwarded-Proto $scheme; }
Nginx configuration file code:
The following screenshot shows the Nginx configuration file with the ETL service code added.
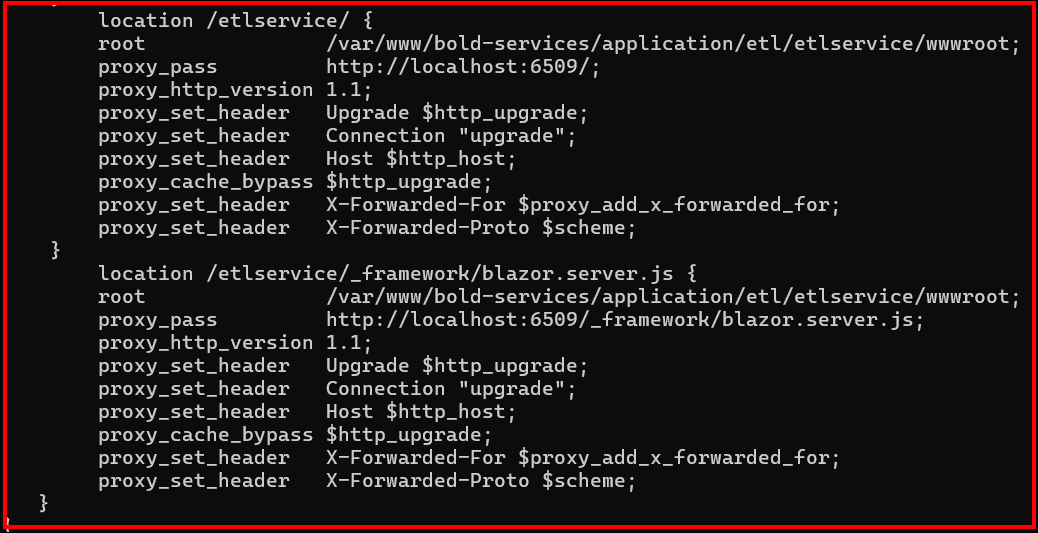
After you update the Nginx configuration, run sudo nginx -t to verify the syntax of the configuration files. If the configuration file test is successful, run sudo nginx -s reload to force Nginx to pick up the changes.
What happens if the upgrade fails?
If a database script fails during a Bold Reports® upgrade, the upgrade process continues without interrupting access to existing reports. A notification banner shows that the upgrade is still in progress and that some administrative actions may be temporarily unavailable until the issue is resolved.
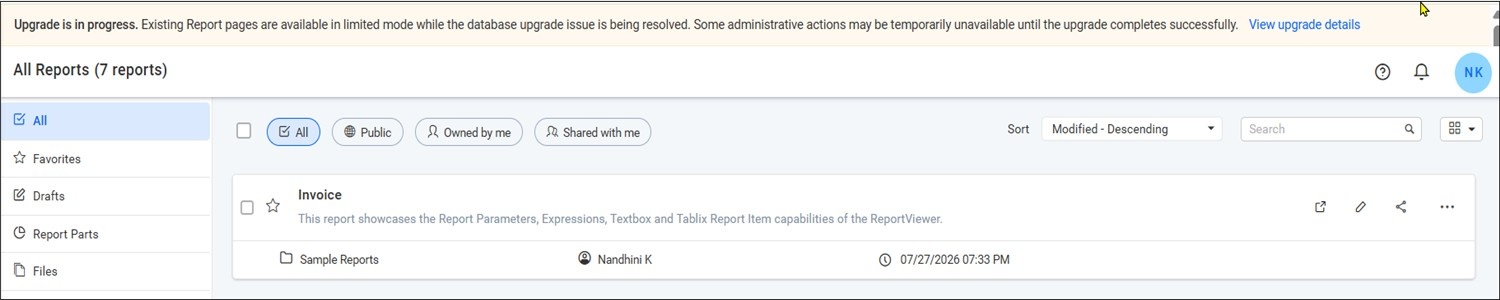
Click View upgrade details to view information about the upgrade failure. The details include the upgrade status, database provider, version details, failed script information, and error message.
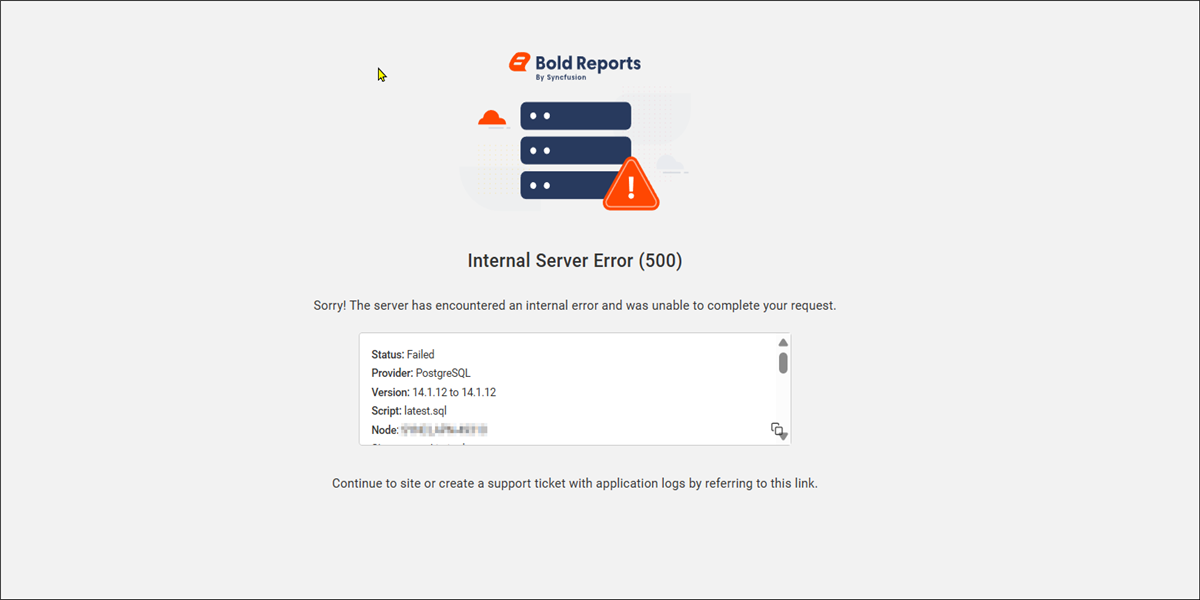
Note: If this notification banner is displayed, the upgrade process encountered an issue. To resolve the issue, contact Bold Reports® support and share the upgrade-related logs with the support team for further investigation.
How do I download the upgrade failure logs?
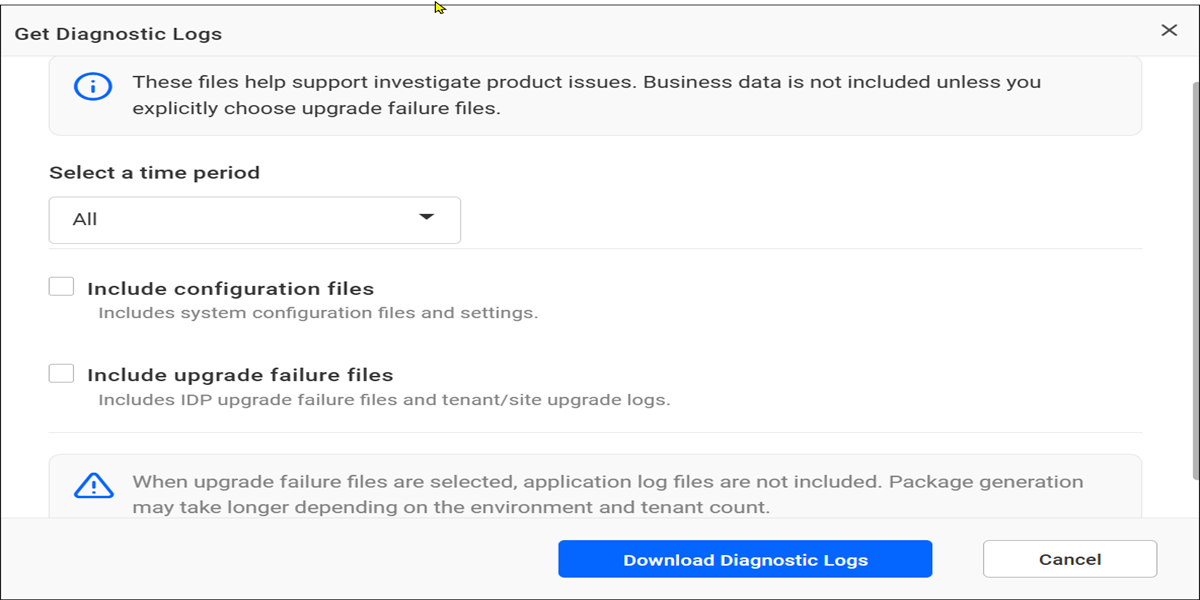
You download the Bold Reports® upgrade failure logs from the Get Diagnostic Logs option in UMS.
- Navigate to UMS > Sites, click the Help icon in the upper-right corner, and select Get Diagnostic Logs. Select Include upgrade failure files and click Download Diagnostic Logs to download the upgrade-related logs.
Frequently asked questions
Where is the Linux package backup file stored after an upgrade?
The Bold Reports® Linux package backup file is available in /var/www/.
Can I still open reports if the upgrade fails?
Yes. If a database script fails, the Bold Reports® upgrade continues without interrupting access to existing reports.