Self-Deploy a Bold Reports® Server on an AWS Virtual Machine
The following steps guide you through deploying Bold Reports® on an AWS EC2 instance. Follow the steps according to your instance type.
Deploying Bold Reports® on an AWS Windows EC2 instance
Install and run the Bold Reports® server on an AWS EC2 instance by following these steps.
Set up an AWS EC2 instance
-
Sign into the AWS portal.
-
From the EC2 console dashboard, choose
Launch instancefrom the options that appear.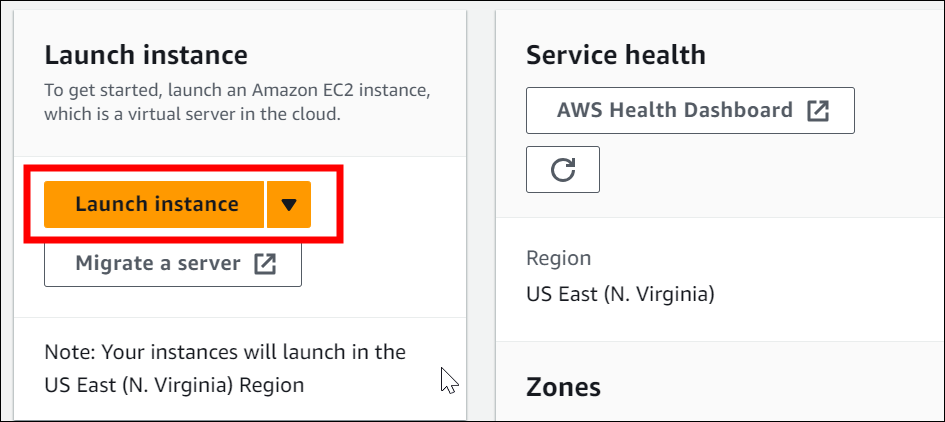
-
Enter a descriptive
Nameand tags for your instance.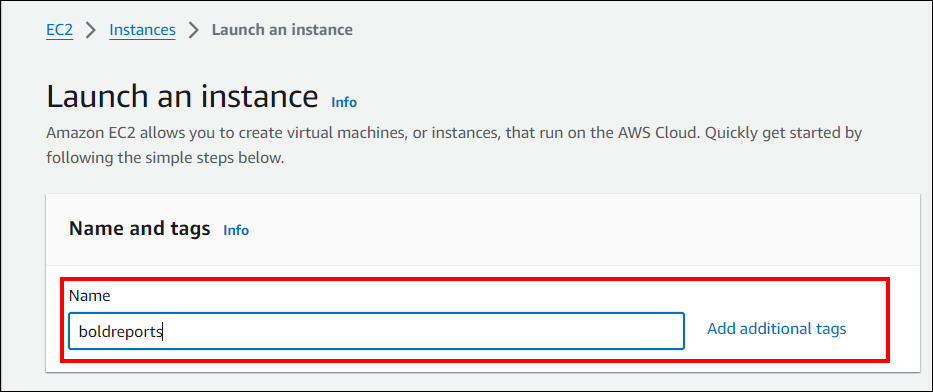
-
Choose
Windowsunder Application and OS Images (Amazon Machine Image).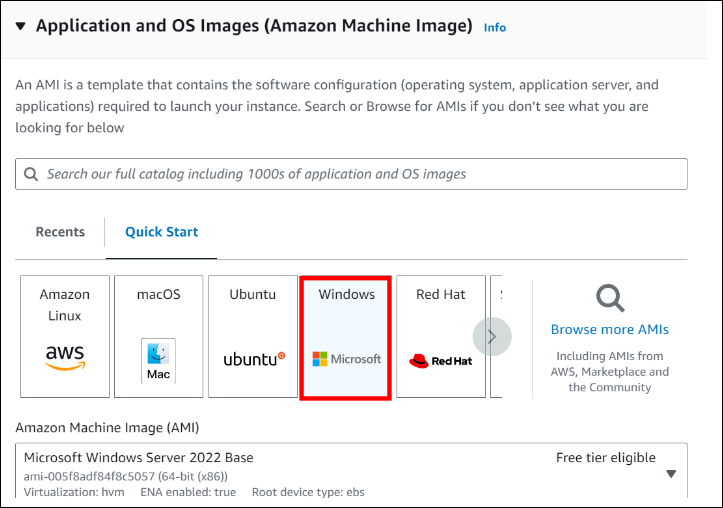
-
From the Instance type list, select the hardware configuration for your instance. You can find the minimum required hardware configuration here.
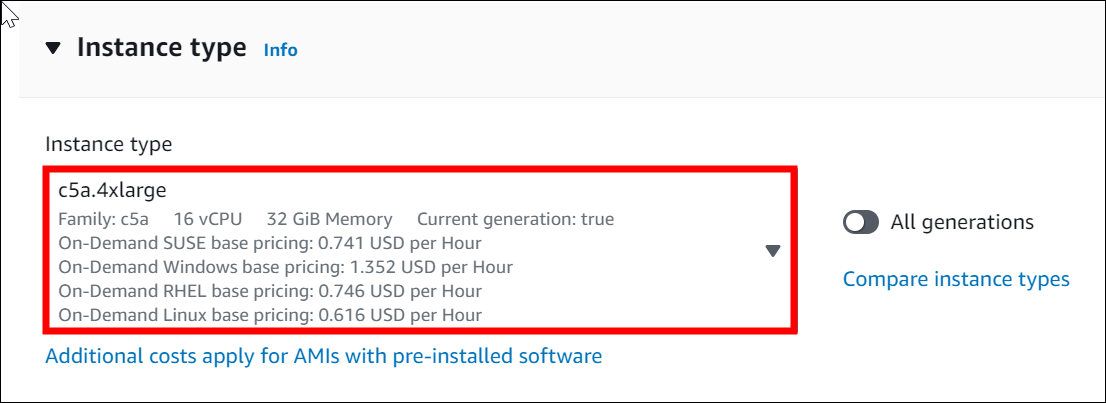
-
Under the
Key Pair (login)section, you can either create a new RSA key pair or select an existing one.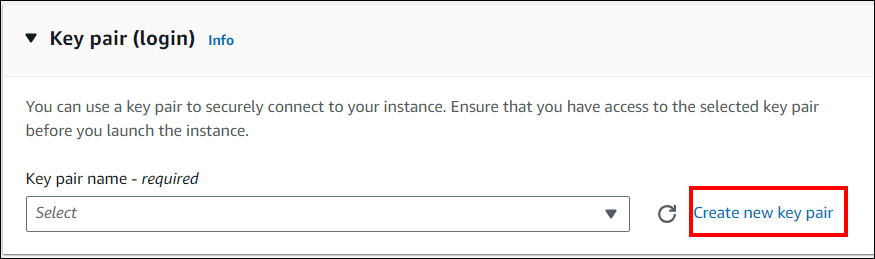
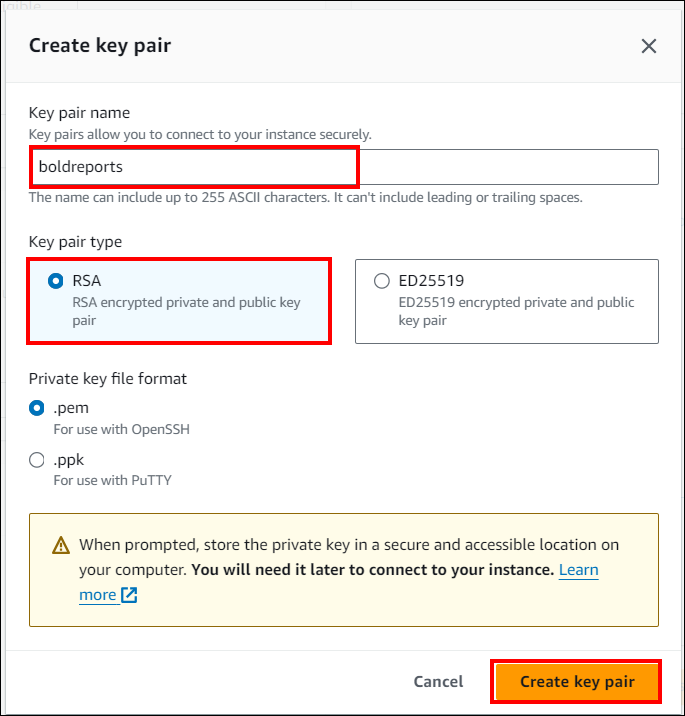
-
Next to Network settings, select Edit. For the Security group name, you will notice that the wizard has created and chosen a security group for you. You can either use this security group or choose the one you created during the setup process.
-
Keep the default selections for the other configuration settings for your instance.
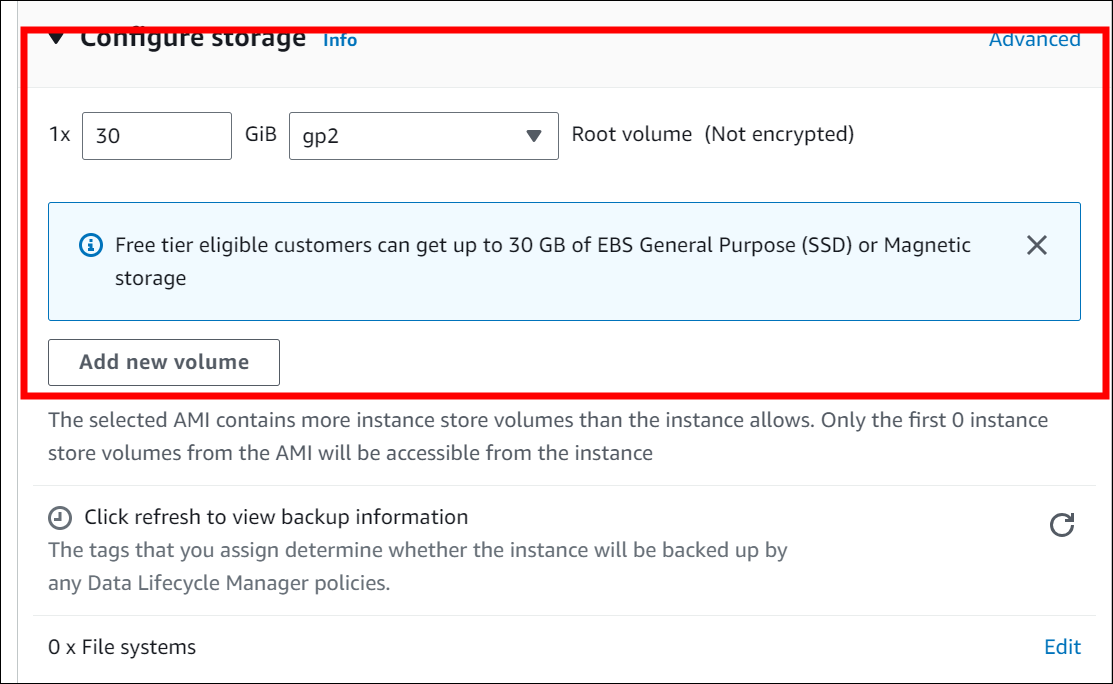
-
Review the summary of your instance configuration and then click
Launch instance.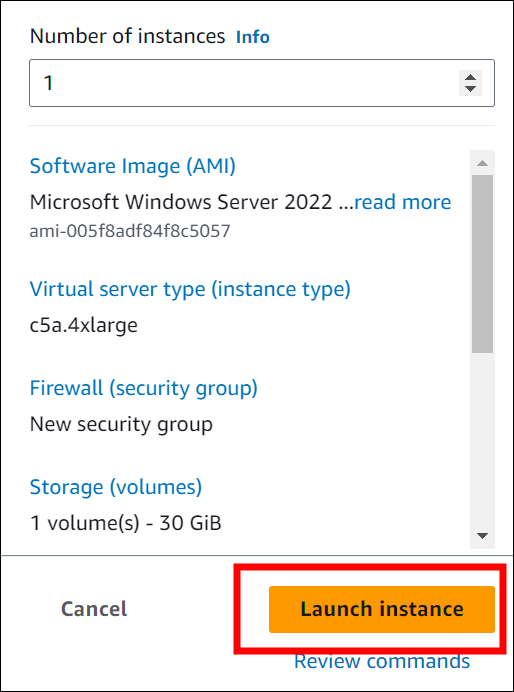
-
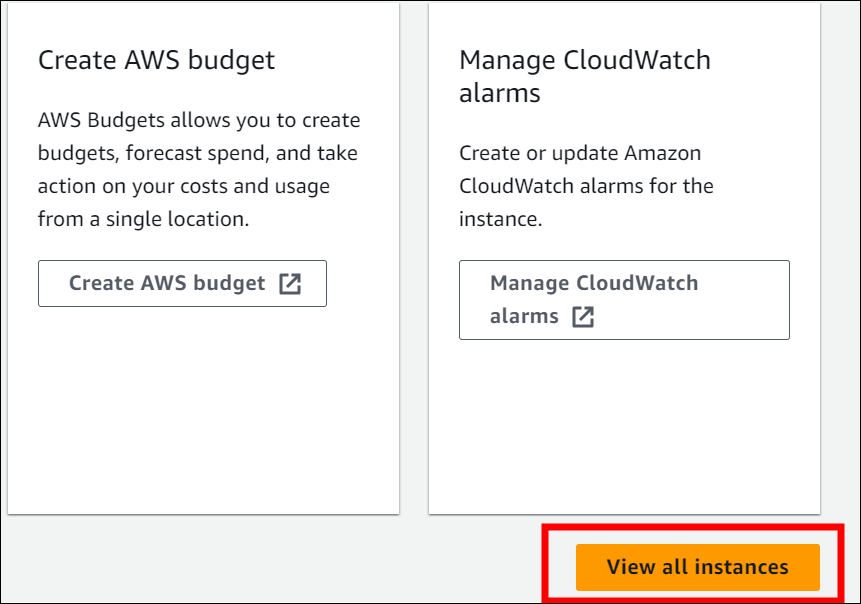
A confirmation page will inform you that your instance is launching. To close the confirmation page and return to the console, select
View all instances.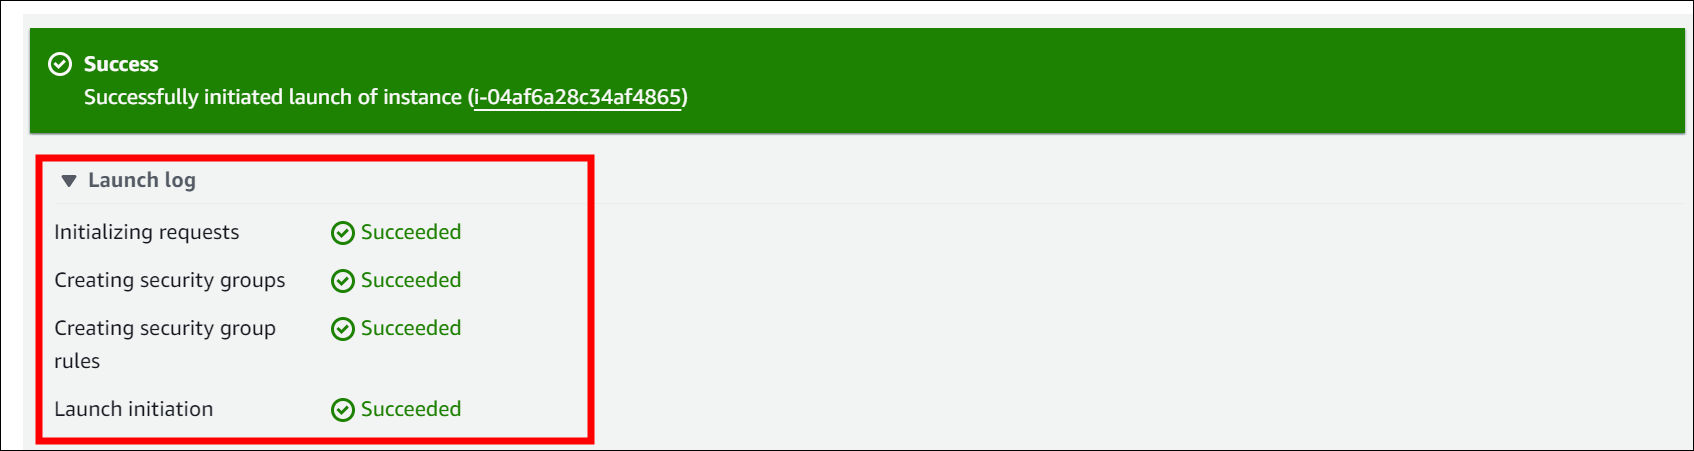
-
On the Instances List page, you can view the status of instance creation. It takes a few moments for an instance to be created. When you launch an instance, its initial state is pending. After the instance starts, its state changes to running, and it receives a public DNS name. If the Public IPv4 DNS column is hidden, click on the settings icon in the top-right corner, enable Public IPv4 DNS, and click on Confirm.

-
It may take a few minutes for the instance to be ready for you to connect to it. Please ensure that your instance has passed its status check in the Status check column.

Connect to the EC2 instance
-
Navigate to the newly created EC2 instance from the AWS console.

-
In the
Connectinstance section, navigate to the RDP client tab and select “Get Password”.
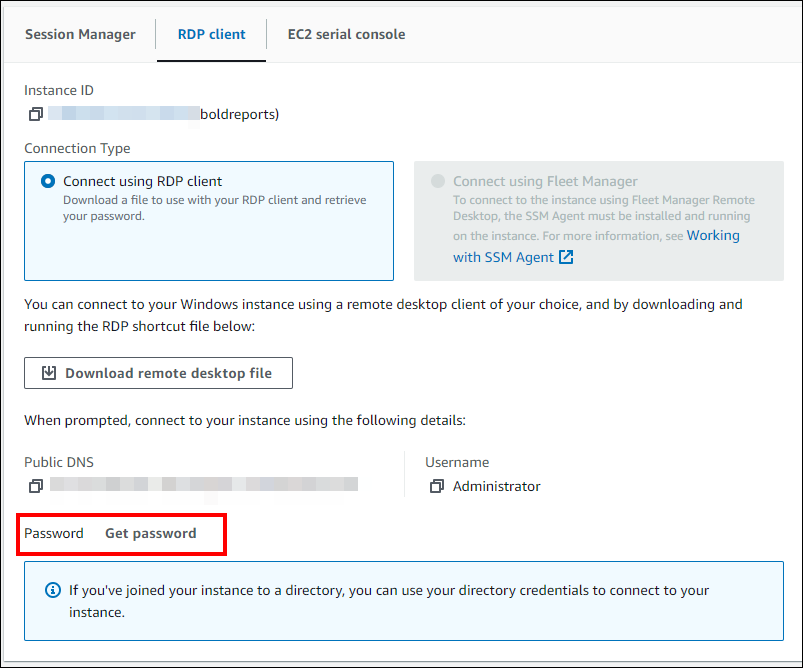
-
Upload the RSA (.pem) key pair that was downloaded during instance creation and click on
Decrypt Password.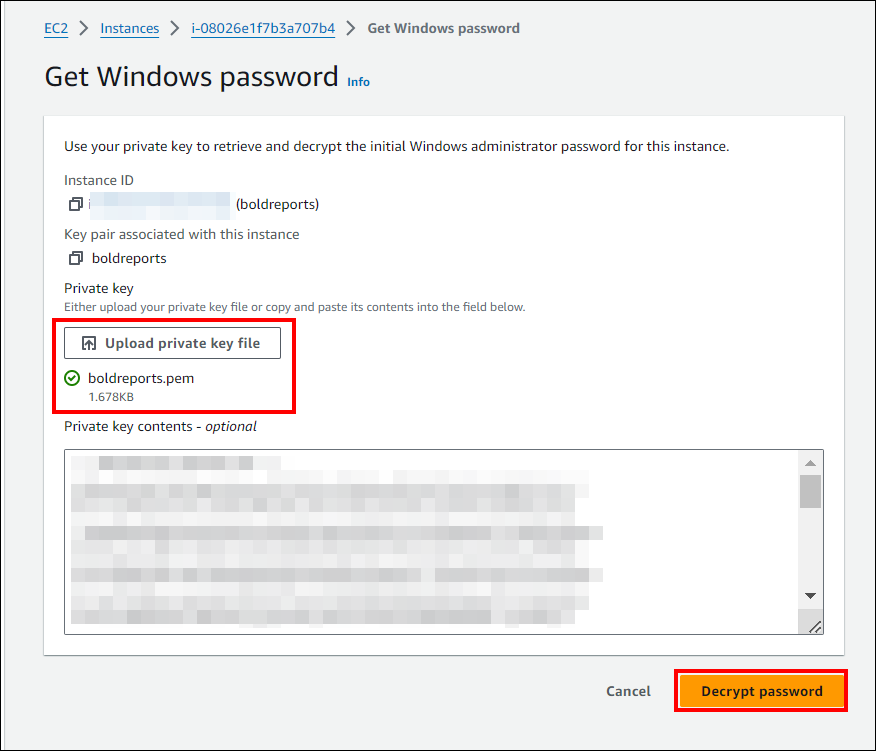
-
Now download the Remote Desktop File (RDP) and copy the admin password.
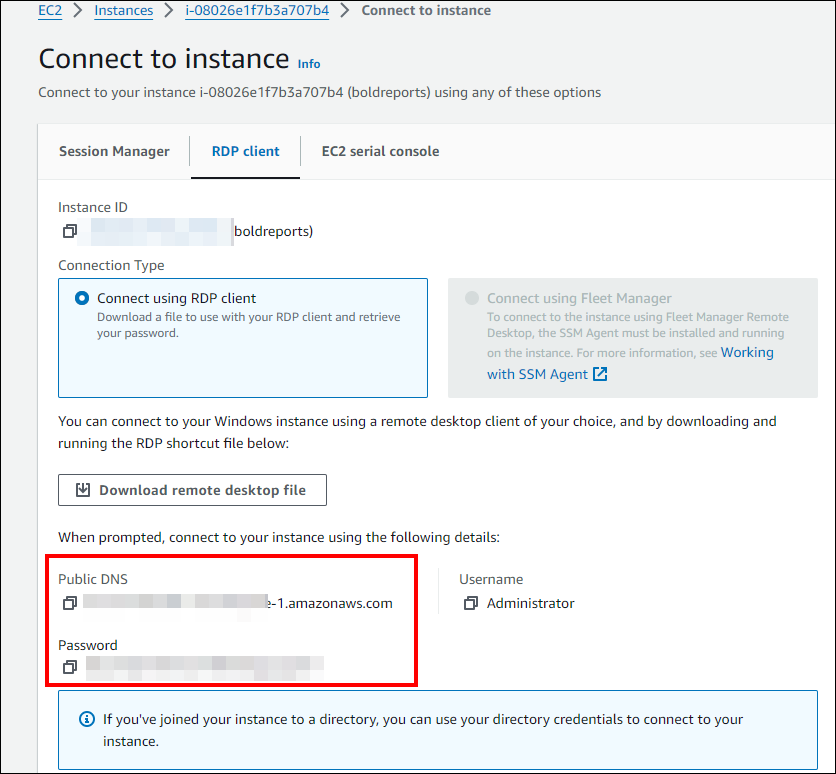
-
Open the .rdp file and click
Connectwhen prompted with the unknown publisher warning. It will then ask for a password. Enter the password that you copied from the AWS EC2 console.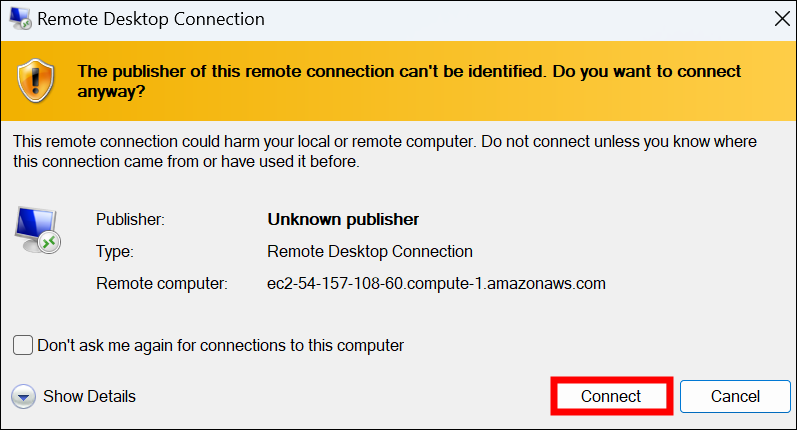
-
On a successful connection, the identity verification window will be displayed. Click
Yesto accept the certificate problems and connect to the virtual machine.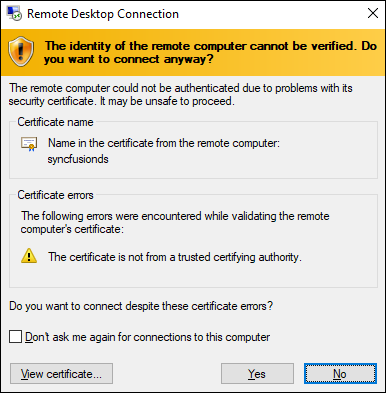
Installing and running the Bold Reports® Server
This section provides instructions on how to install and run the Bold Reports® server on a virtual machine (VM).
-
Install the Bold Reports® server on the created virtual machine (VM) in the AWS portal using the installation and deployment guide.
-
Launch your application either by default or through the desktop shortcut. For example,
start Bold Reports<sup>®</sup> in IIS. Then, provide the application startup details and complete the setup process by selecting the appropriate license.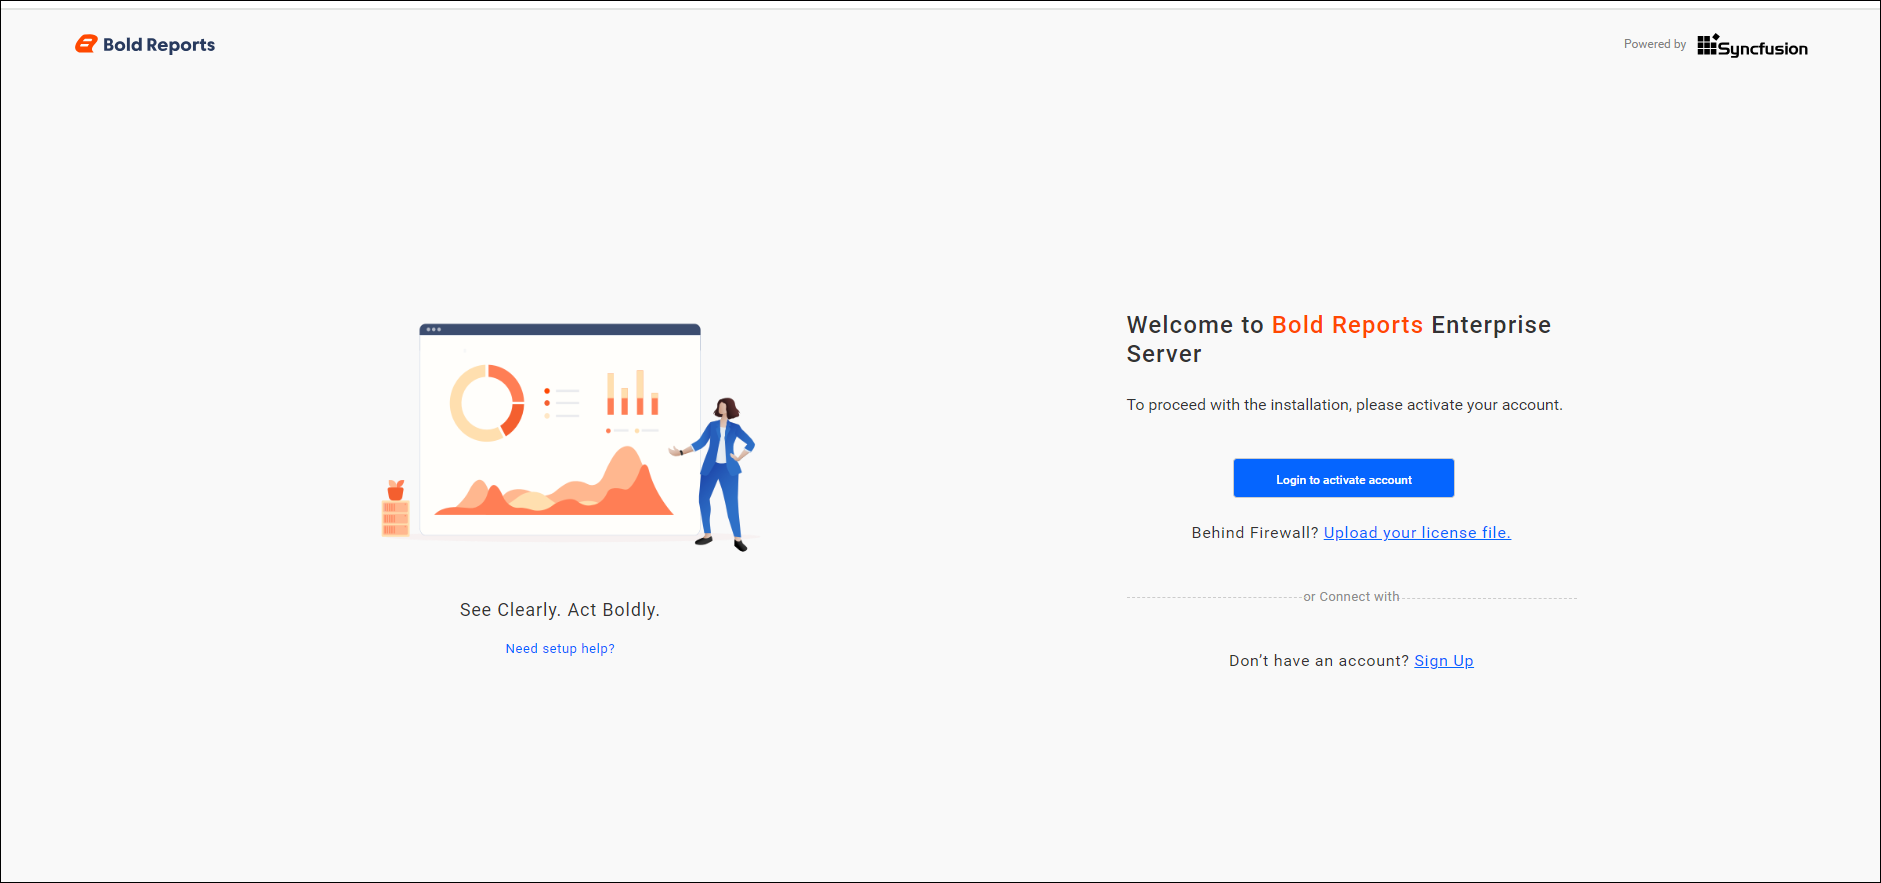
-
Follow the steps provided in the link to initiate the application startup.
Deploying Bold Reports® on an AWS Linux EC2 instance
This topic explains how to create an AWS Linux EC2 instance and deploy the Bold Reports® Server on it. The steps are applicable to Ubuntu, Red Hat Enterprise Linux (RHEL), and CentOS instances. The only difference is the operating system image selected during instance creation and the installation guide used for the selected distribution.
Set up an AWS Linux EC2 Instance
-
Sign in to the AWS Management Console: https://console.aws.amazon.com/ec2/
-
From the EC2 console dashboard, click Launch Instance.
-
Under Name and Tags, enter a descriptive name for your instance.
-
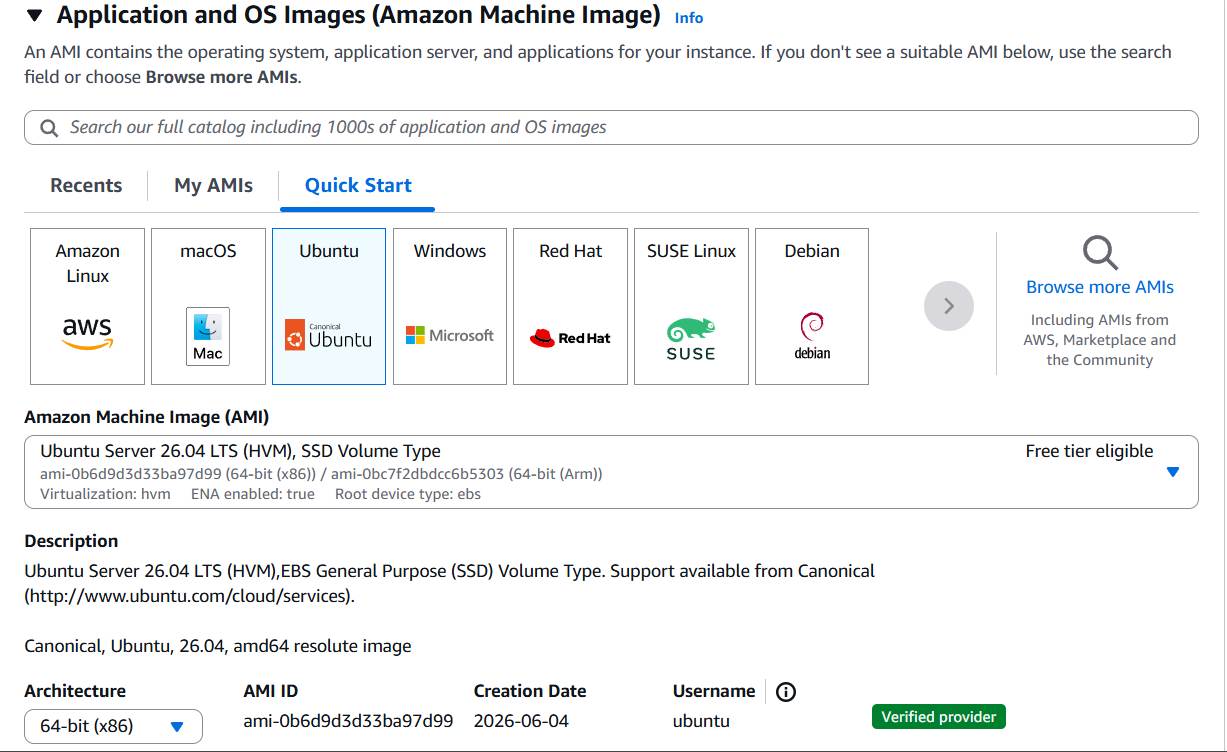
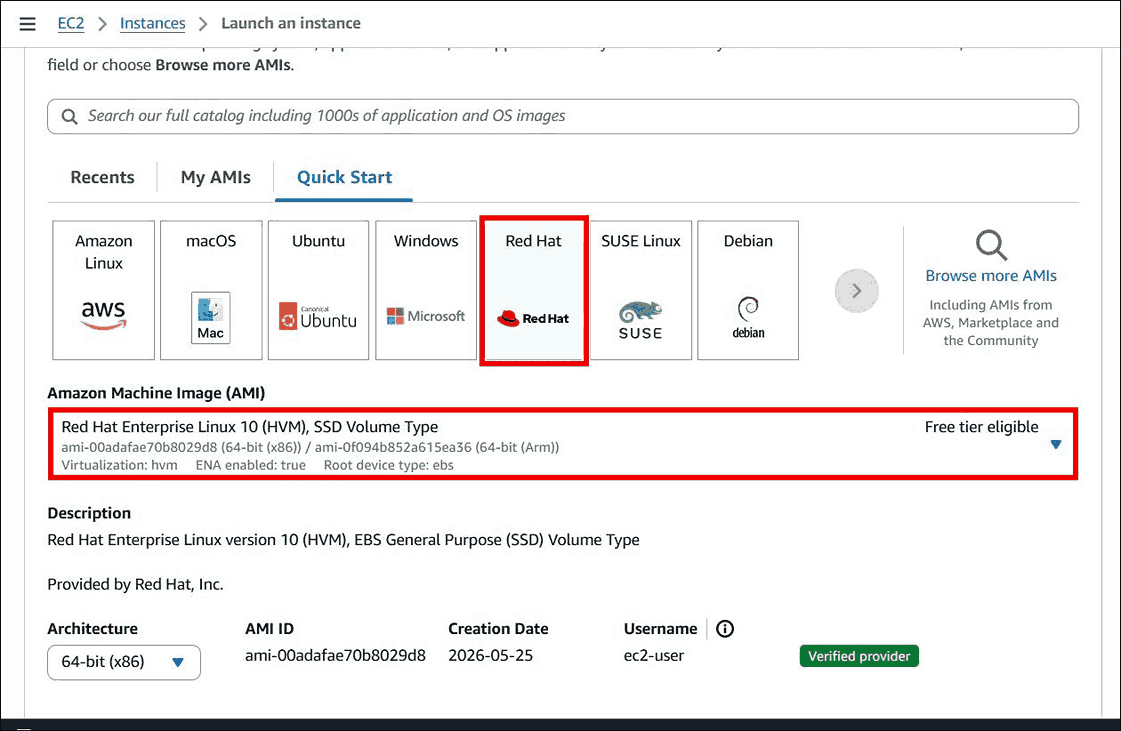
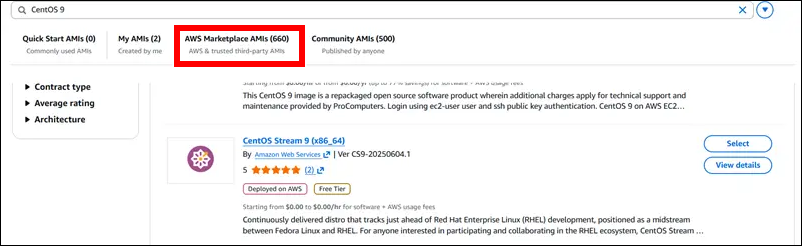
Under Application and OS Images (Amazon Machine Image), choose the Linux distribution that you want to deploy:
-
Ubuntu
- Select Quick Start.
- Choose Ubuntu.
- Select the required Ubuntu HVM version.
-
Red Hat Enterprise Linux (RHEL)
- Select Quick Start.
- Choose Red Hat.
- Select the required Red Hat Enterprise Linux version.
-
CentOS
- Select Browse more AMIs.
- Search for CentOS.
- Select the required CentOS image from the Marketplace or Community AMIs.
-
-
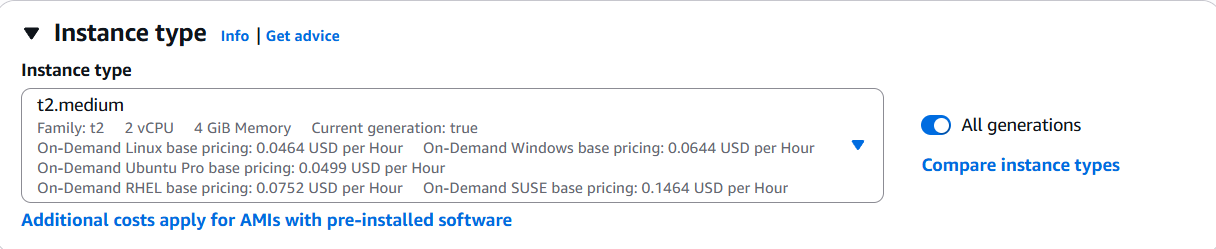
Under Instance Type, select an instance type based on your deployment requirements and expected user load.
-
Under Key Pair (login), select an existing key pair.
- If you do not have a key pair, click Create New Key Pair and download the
.pemfile for future access.

- If you do not have a key pair, click Create New Key Pair and download the
-
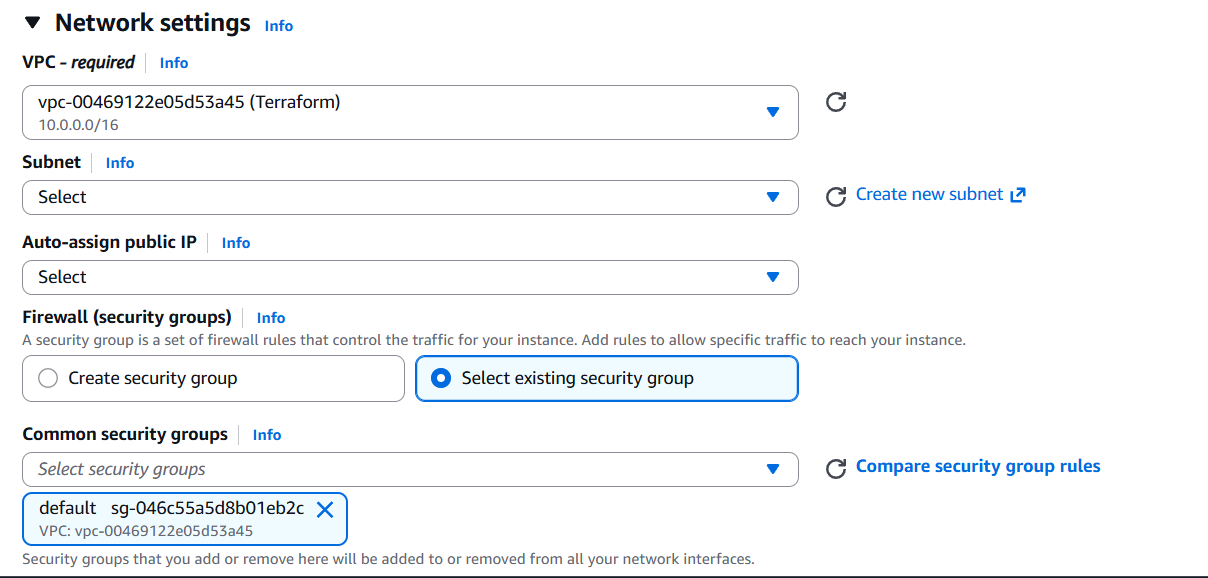
Under Network Settings, configure the firewall and security group settings.
Ensure the following ports are open as required:
- 22 - SSH
- 80 - HTTP
- 443 - HTTPS
-
Keep the default selections for the remaining settings unless your deployment requires customization.
-
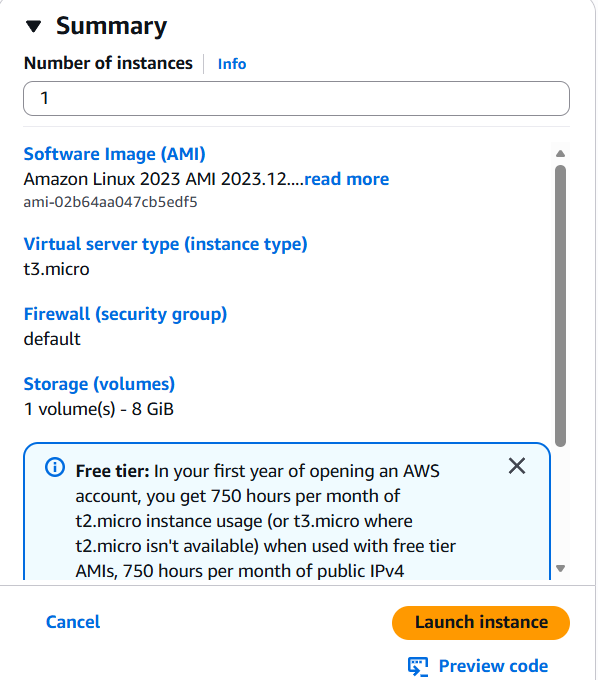
Review the configuration details in the Summary panel and click Launch Instance.
Connect to the Linux EC2 Instance
-
Connect to the instance using SSH. The default username depends on the selected Linux distribution:
- Ubuntu:
ubuntu - Red Hat Enterprise Linux (RHEL):
ec2-user - CentOS:
ec2-user
- Ubuntu:
ssh -i "my-key.pem" <username>@ec2-xx-xx-xx-xx.compute-1.amazonaws.comInstalling and running the Bold Reports® Server
This section provides instructions on how to install and run the Bold Reports® server on a virtual machine (VM).
-
Install the Bold Reports® server on the created virtual machine (VM) using the installation guide that corresponds to your Linux distribution:
- Ubuntu: installation guide
- Red Hat Enterprise Linux (RHEL): installation guide
- CentOS: installation guide
-
Launch your application either by default or through the desktop shortcut. For example,
start Bold Reports<sup>®</sup> in IIS. Then, provide the application startup details and complete the setup process by selecting the appropriate license. -
Follow the steps provided in the link to initiate the application startup.
Deploying Bold Reports® on an AWS Linux CentOS EC2 instance
To deploy Bold Reports® on an AWS CentOS EC2 instance, refer to the guide on Deploying Bold Reports® on an AWS CentOS EC2 instance. This article provides step-by-step instructions to ensure a successful installation and configuration of Bold Reports® on a CentOS environment.
Deploying Bold Reports® on an AWS Linux RedHat EC2 instance
To deploy Bold Reports® on an AWS RedHat EC2 instance, refer to the guide on Deploying Bold Reports® on an AWS RedHat EC2 instance. This article provides step-by-step instructions to ensure a successful installation and configuration of Bold Reports® on a RedHat environment.