How to migrate one sever to another server using Sql database on Windows
We can migrate Bold Reports® Server data from one server to another server without any data loss. It involves a few manual steps, as below.
-
Before proceeding with the migration, Install the same version of Bold Reports® build on your target machine.
-
After installation, do not launch or start the application.
-
We need to make some configuration changes in the files to migrate data from Server-1 to Server-2. So please Stop BoldReports_EnterpriseReporting application in IIS manager.
-
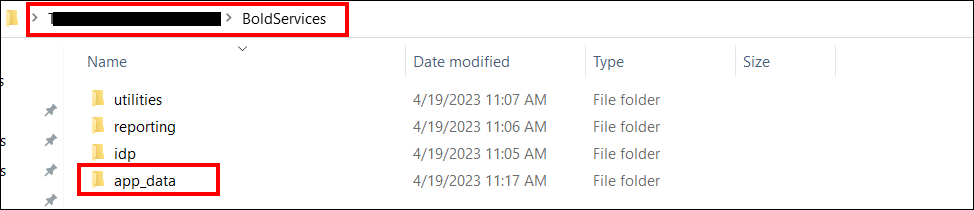
Application data will be stored in the app_data folder, and this will make the Bold Reports® a stateful application. So, we need to copy the app_data folder under Deployed location:\BoldService from Server-1 and paste that folder in the same location on Server-2.
Please follow the below steps to change the configurations on the target server,
Backup Database
Each Bold Reports® site maintains an individual metadata database. To ensure data protection for each site, you need to back up all these metadata databases used across your Bold Reports® applications. Follow the steps below to perform the backup.
-
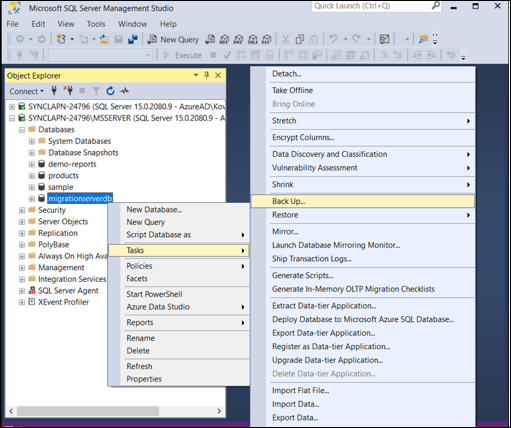
Open SSMS and connect to the SQL Server in server-1.
-
Expand Databases and select the required database.
-
Right click on the database -> Tasks -> Backup.
-
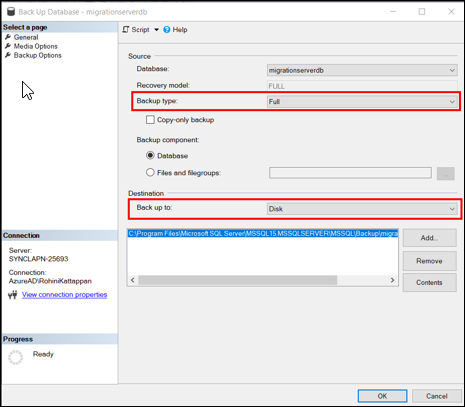
In Back Up Database window, select the Backup Type as Full and under Destination, select Back up to as Disk.
-
Select the Remove button to remove the default destination location.
-
Click on Add button to select the destination and name for the database backup file.
-
Select the required folder for the backup file and enter the file name and it should be same as database name with a .bak extension.
-
Click OK to end the backup process.
Restore SQL Database Using SSMS
Copy all the backup database files with .bak extension from server-1 to server-2. Follow the below steps to restore your SQL backup databases.
-
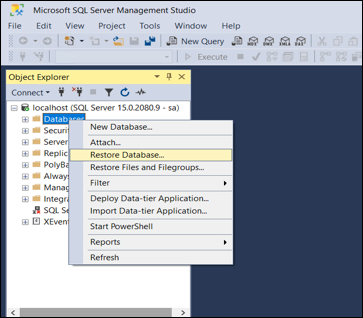
Open SSMS and connect to your database in server-2.
-
Select the Databases and right click -> Restore Database.
-
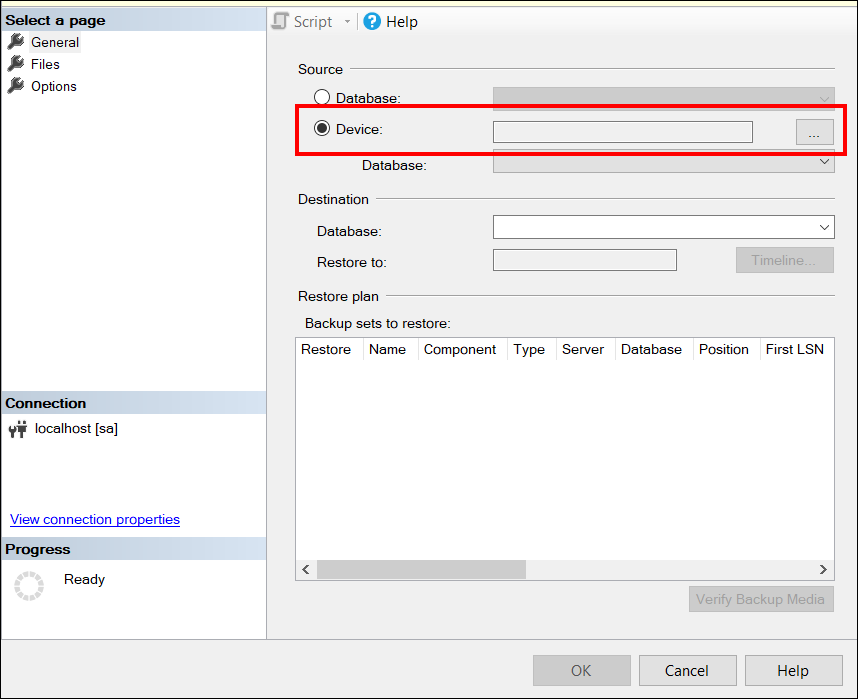
In the Restore Database window, select Device under the Source section and click the Browse button.
-
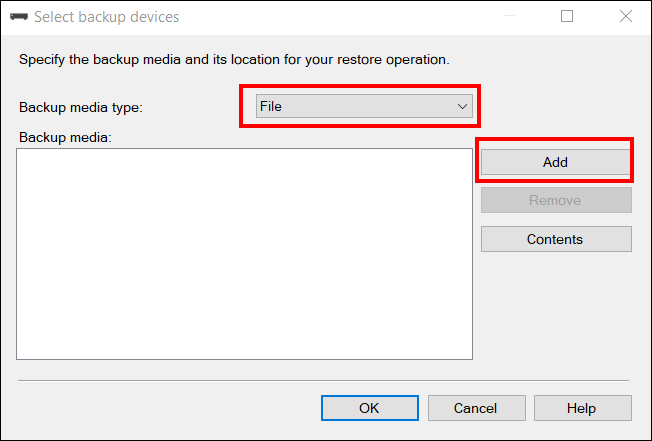
Now the Select Backup Device window will open. Select the Backup media type as File and click Add.
-
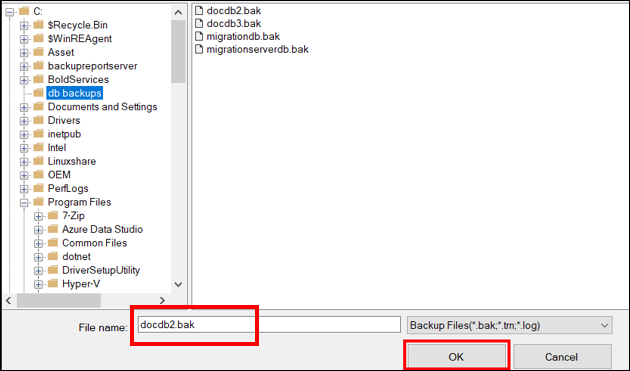
Select the backup file which you want to restore and click OK.
-
The .bak file will be listed in the Select Backup Device window. Click OK.
Update database connection string in Bold Reports®
-
We need to update the database connection string in the config.xml file under C:\BoldServices\app_data\configuration.
-
To change the database connection string, Download the utility from Utility
-
Extract the zip file.
-
Create new folder app_data\configuration in the utility as like in below screenshot.
-
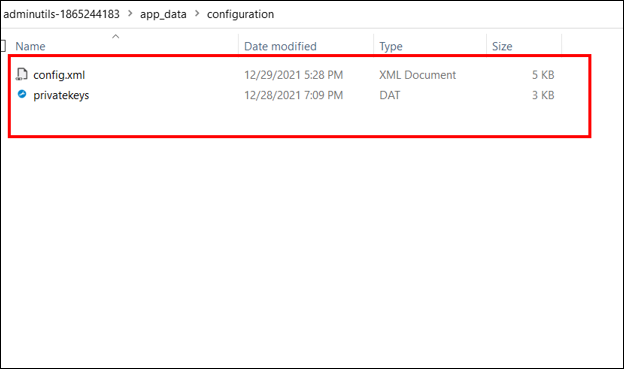
Copy the config.xml and privatekeys.dat files from C:\BoldServices\app_data\configuration and paste it under adminutils-1865244183\app_data\configuration
-
Navigate to the utility directory in command prompt and run the following command
Syncfusion.Server.Commands.Utility.exe dbconfig -servername “localhost” -databasename “BoldReportsMasterDatabase” -u “Admin” -p “Admin@12345” -iswindowsauthentication false -sslenabled false
Command details
Servername – Server hostname/IP
Database name - database name (IDP)
u – server username
p – server password
iswindowsauthentication – Is windows authentication required (this is optional)
sslenabled – Is encrypted connection required (this is optional)
-
Once it ran successfully, copy the config.xml and privatekeys.dat files from adminutils-1865244183\app_data\configuration from the utility folder and then replace it in Deployed location:\BoldServices\app_data\configuration in the server-2.
-
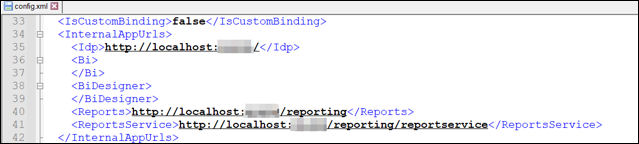
Check and update Ip address or localhost port in the config.xml file and product.json under BoldServices\app_data\configuration in Server-2. If you are using DNS leave as it is since it will be already available when copying the files from server-1 to server-2.
-
Make sure to bind your DNS in IIS in server-2 which you have used it in server-1, if not used please ignore this step.
-
Start the BoldReports_EnterpriseReporting application in IIS manager.
-
Go to site listing page of UMS application.
-
Go to settings and change the site url with your domain name like below
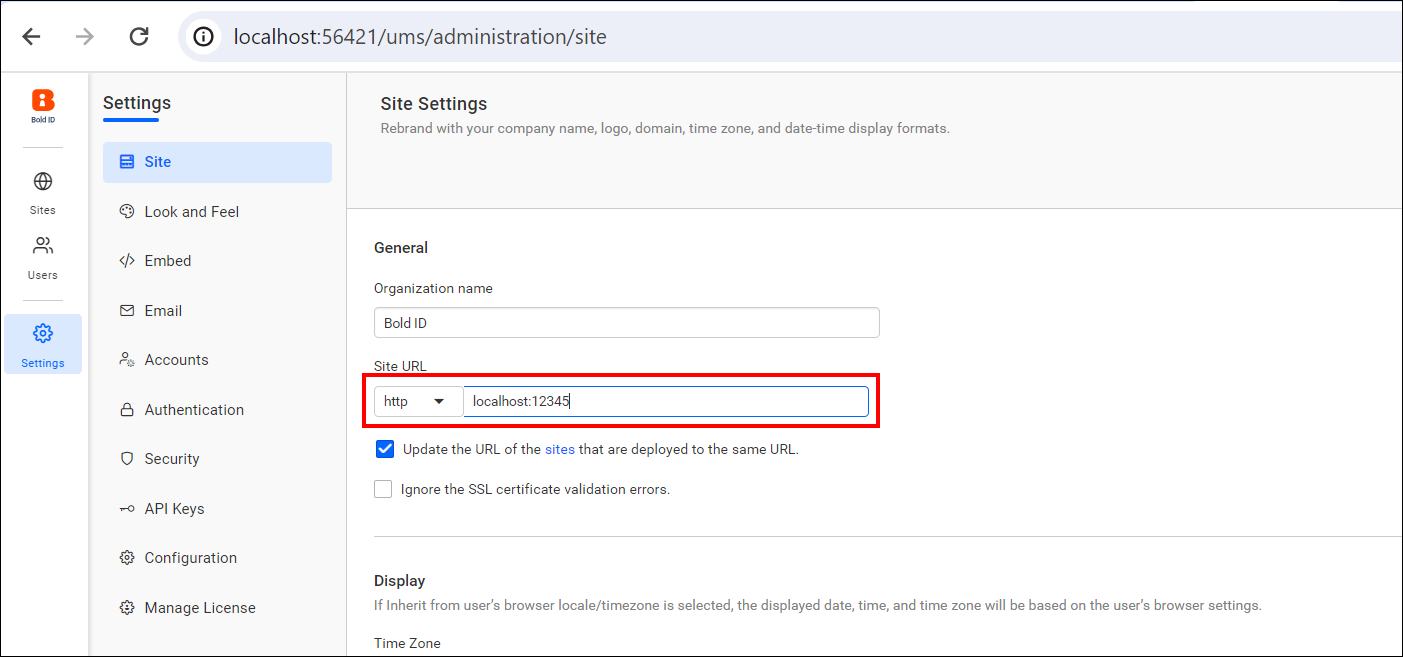
-
Now your reports sites will launch with your existing data.