Insert or Delete a Row Group
You can add row groups in the table to display data in a visual hierarchy. You can create both nested groups and adjacent groups. Row group can be added either using the cell context menu or using the group menu provided in grouping panel. In cell context menu the Row Group option will be shown only if there is a possibility to add row group in the respective place.
Insert a row group
In tablix data region the data can be grouped using the following options:
- Parent Group
- Child Group
- Adjacent Group
The parent and child group are used for creating a hierarchy, the groups depend on each other. While the adjacent grouping functionality can be used to create separate groupings in the same table.
Parent row group
To add a first row group in the basic tablix structure follow the below steps.
- Select the tablix data region in the design area, now the
Grouping Panelwill be enabled in the design view.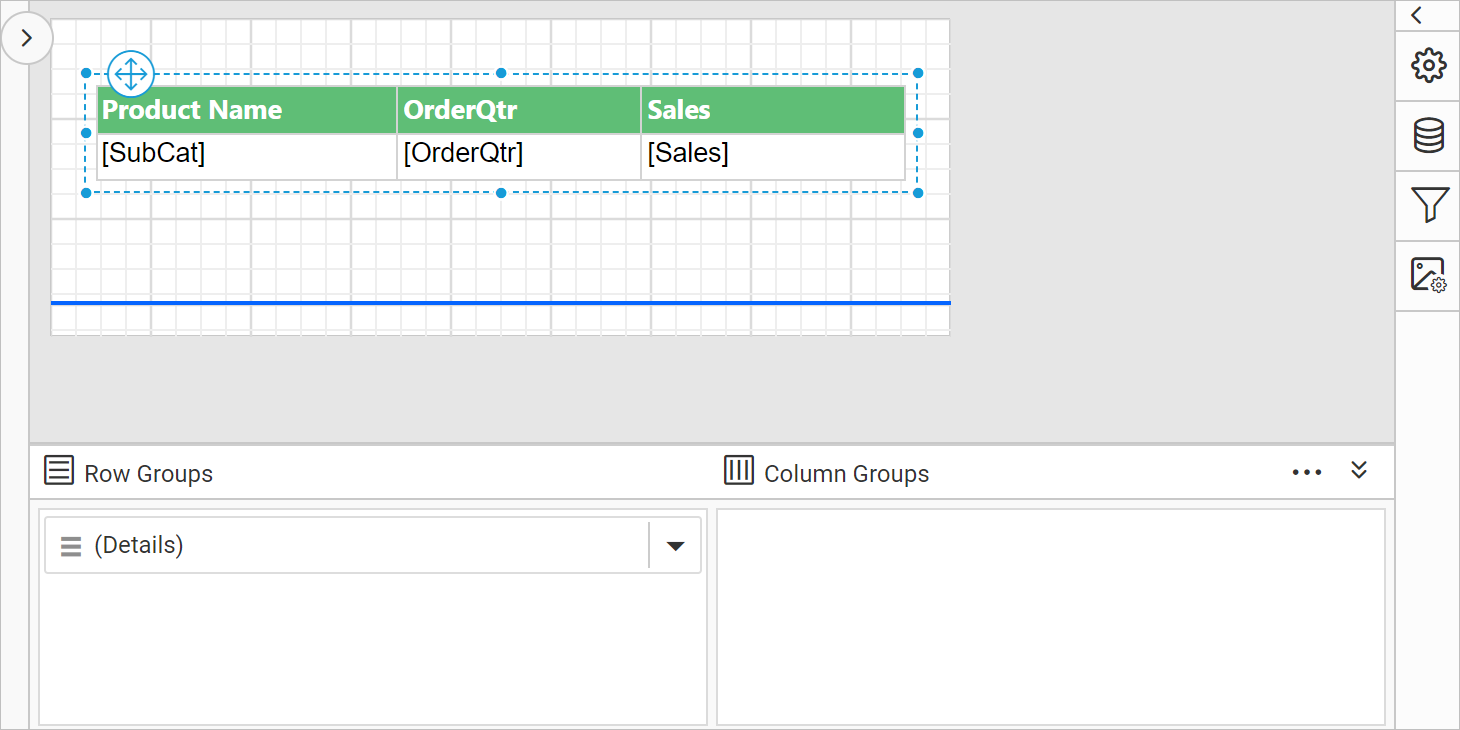
To add first row group in the basic tablix structure, use the group menu in grouping panel.
- To add a group, go to
Row Groupspane in grouping panel and open the context menu on theDetailsgroup field.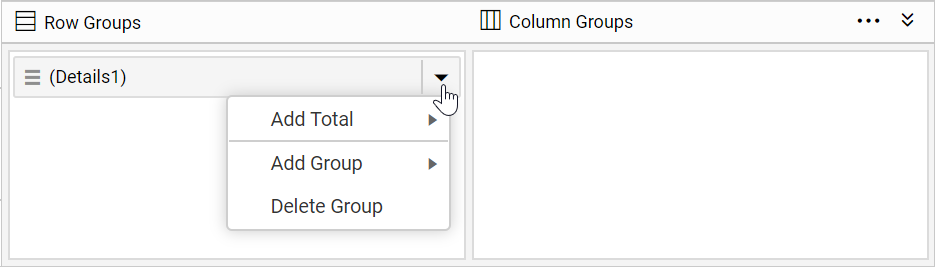
- From the context menu, click on
Parent Group...option underAdd Groupcategory.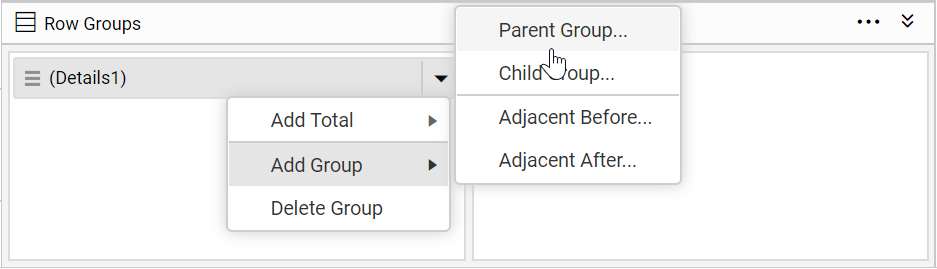
- Once you click on the
Parent Groupoption, aTablix Groupdialog will be opened to configure the grouping.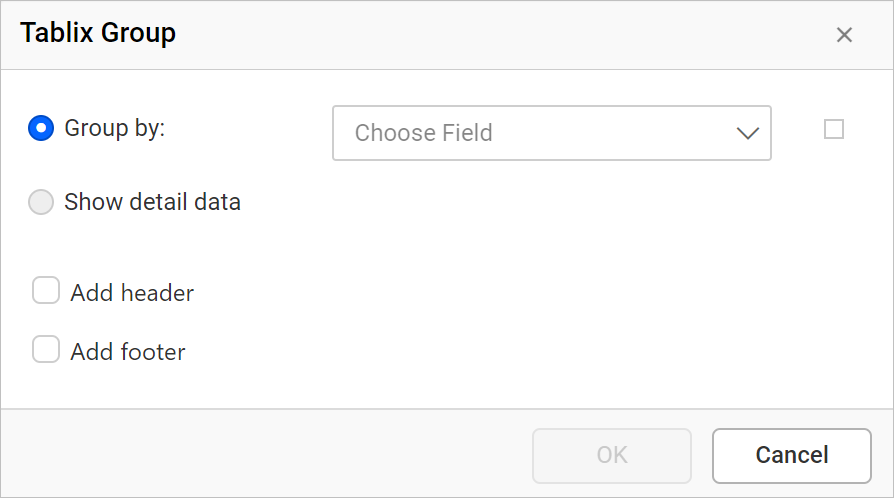
- Group By: Based on the dataset assigned to the tablix region, dataset fields will be listed in this drop-down or else click on the square icon to create an expression.
- Add Group Header: Enable this option to add a header to this group
- Add Group Footer: Enable this option to add a footer to this group
- Here,
Product Categoryfield is chosen as parent group in tablix data region. Click on theOKbutton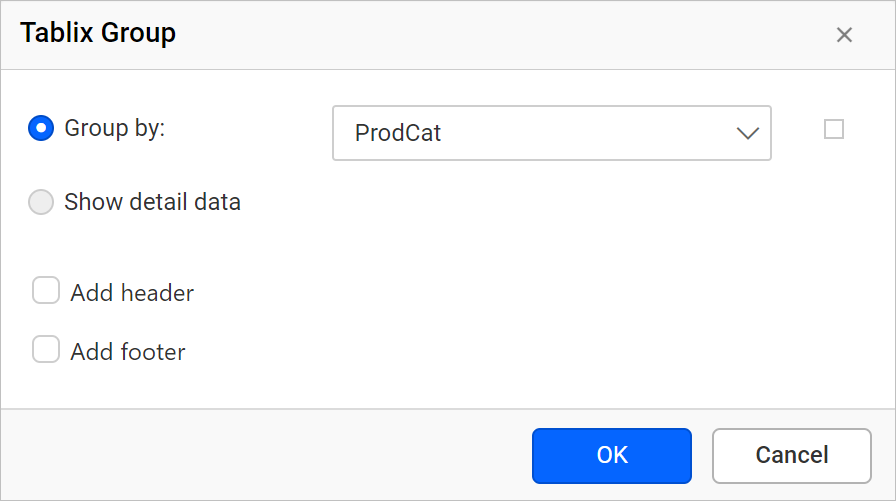
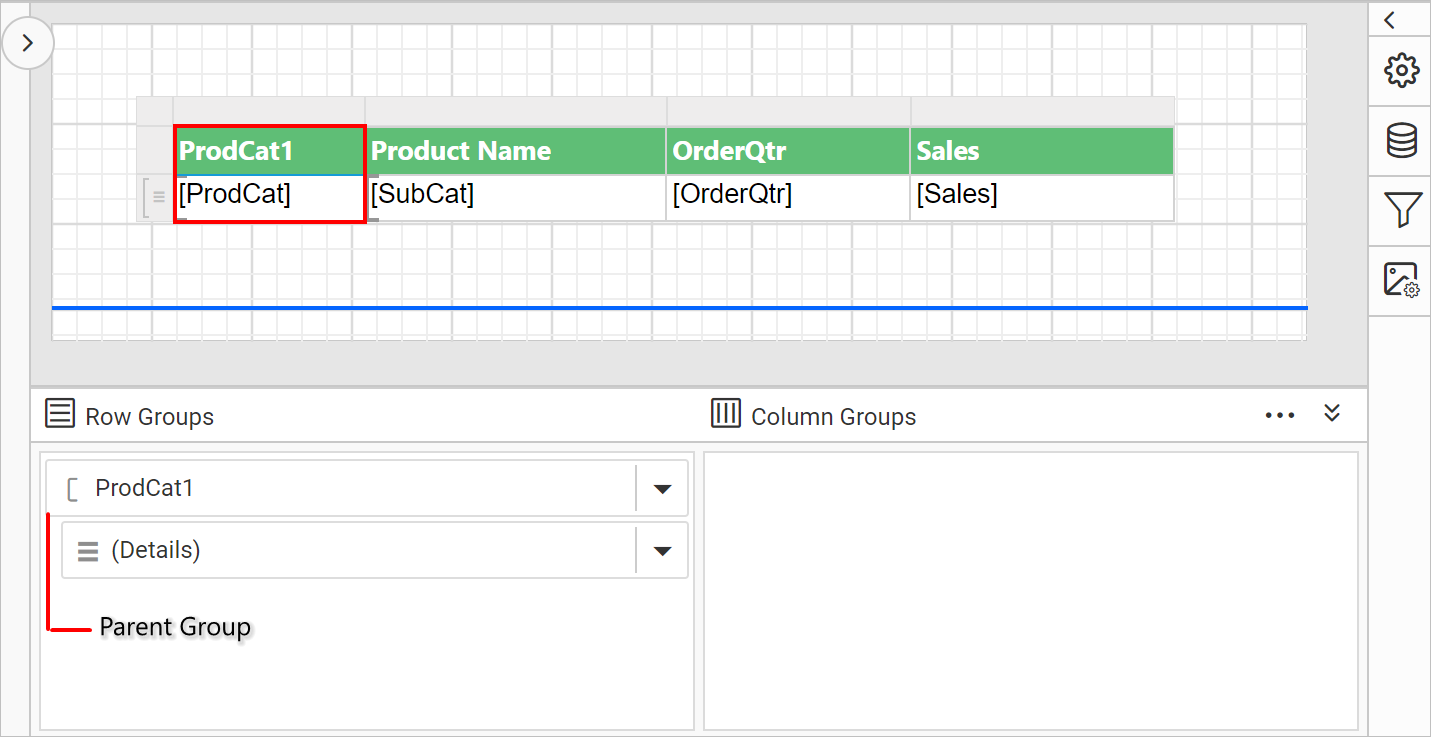
Now, a new column will be added to the right side of the detail group in tablix data region and a new group member will be added above the Detail group of Row Groups pane in grouping panel hierarchical view.
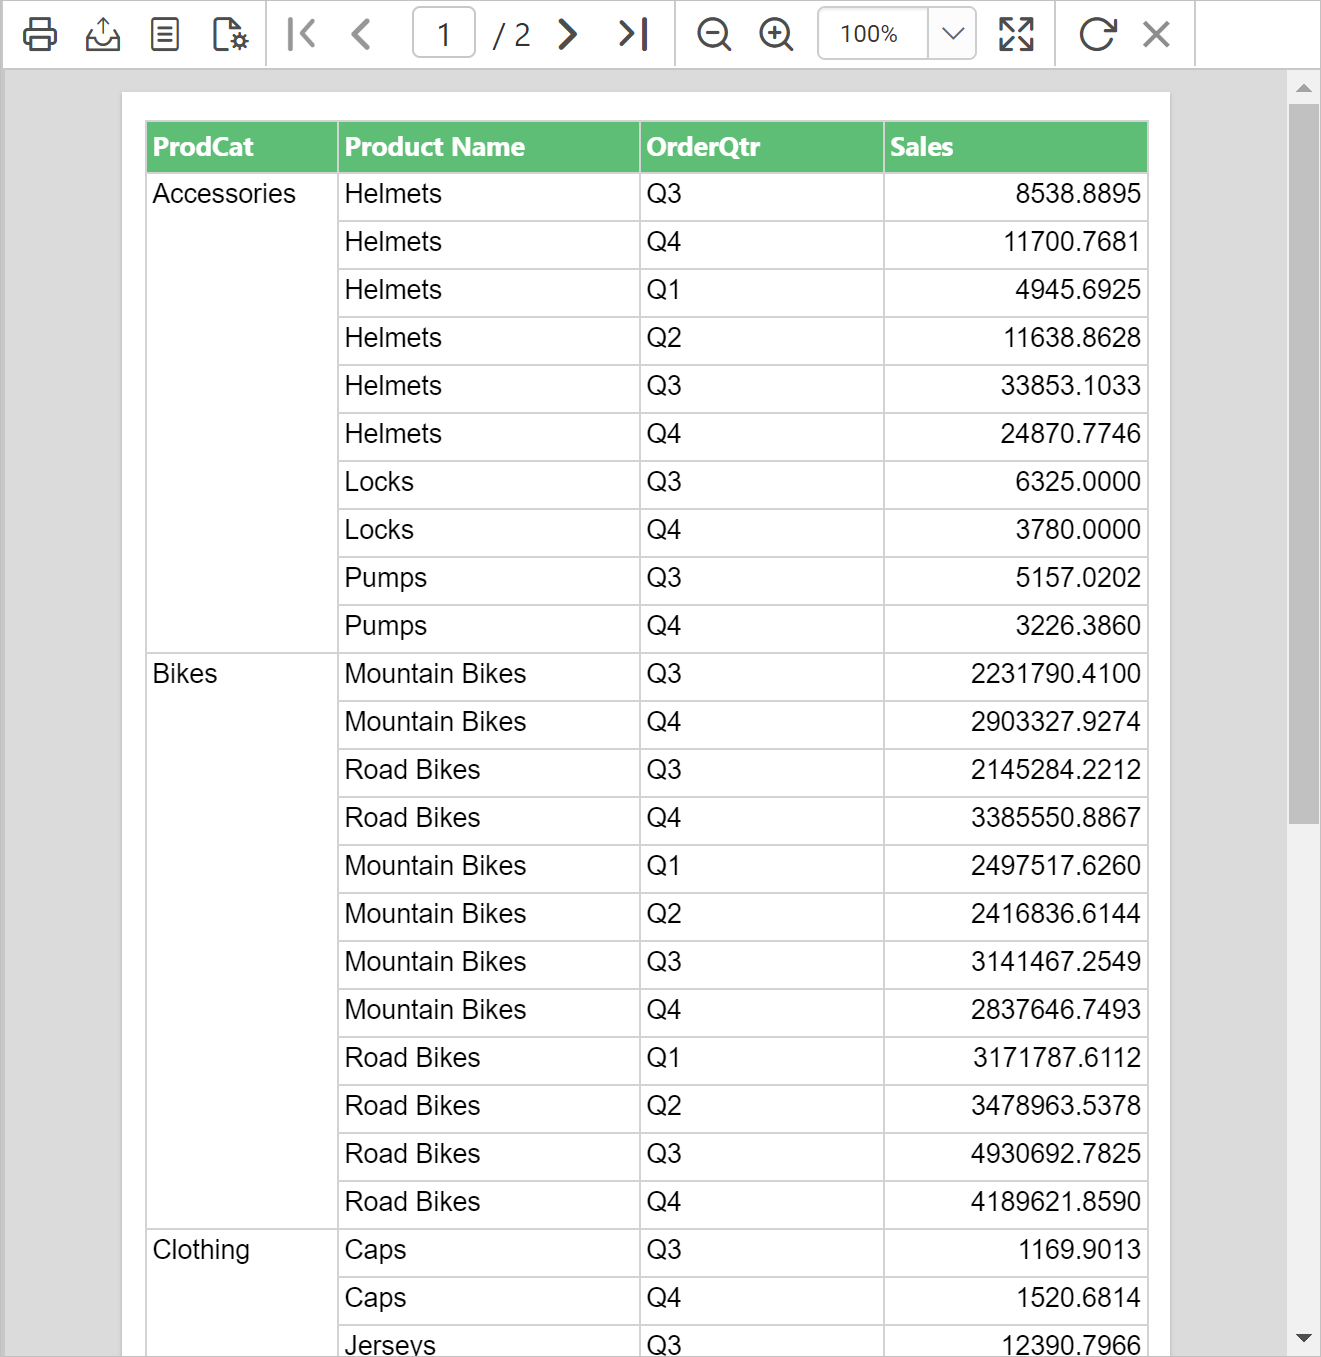
On report preview, each product sales details will be grouped based on product category.
Child row group
To sub categorize the data in tablix data region you can add child group to the tablix. Now, to add the child group we can either use the cell menu or group menu in grouping panel. In the following steps child group is added using cell menu.
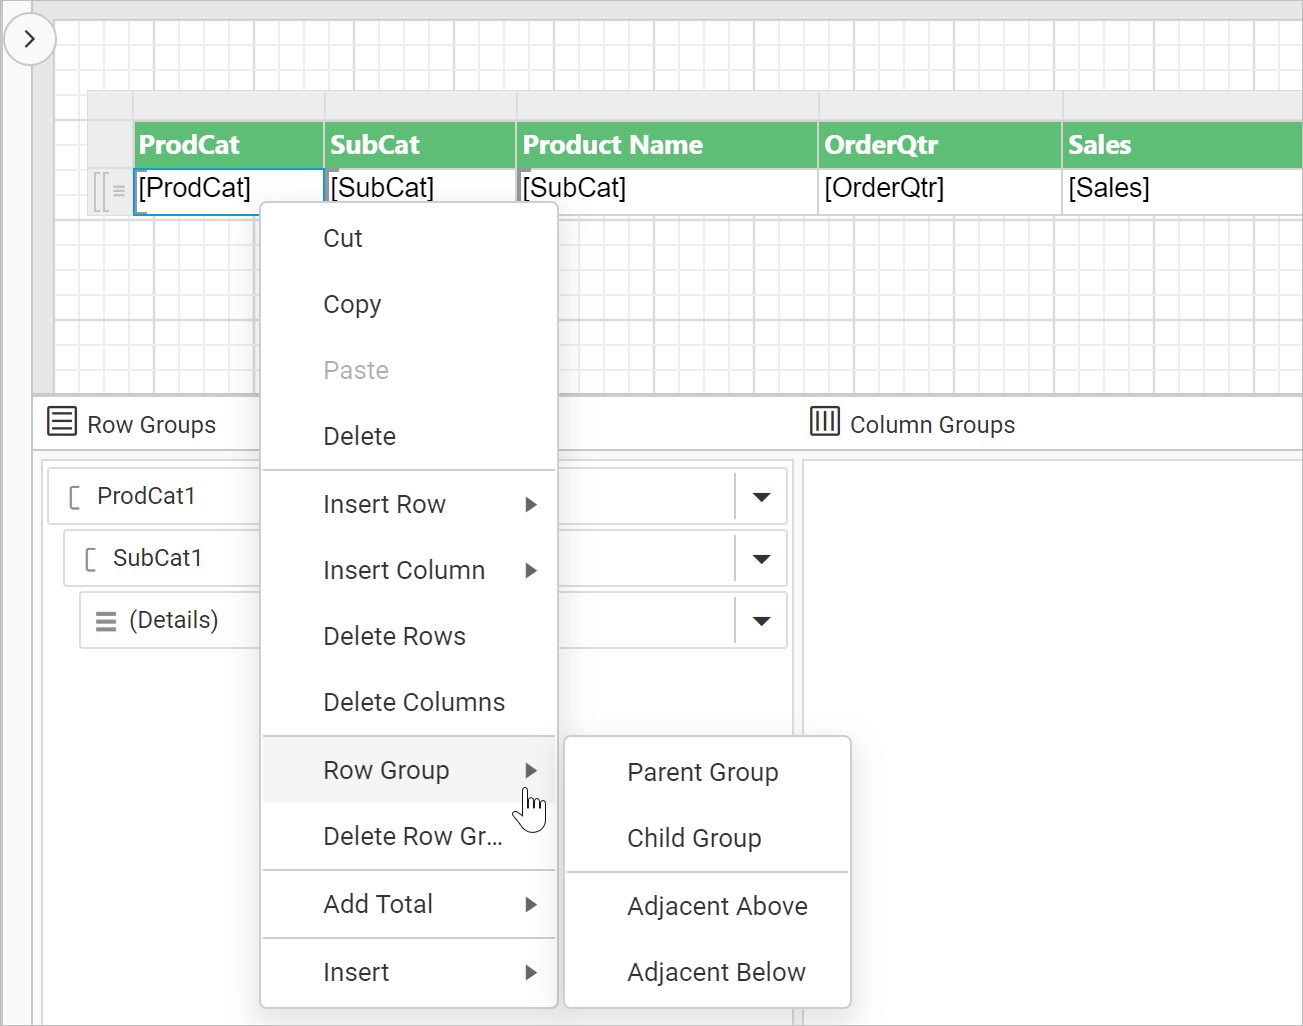
- Select and right click in the row group cell to which you need to add a child group.
- In the cell menu, click on the
Child Groupunder theRow Groupcategory.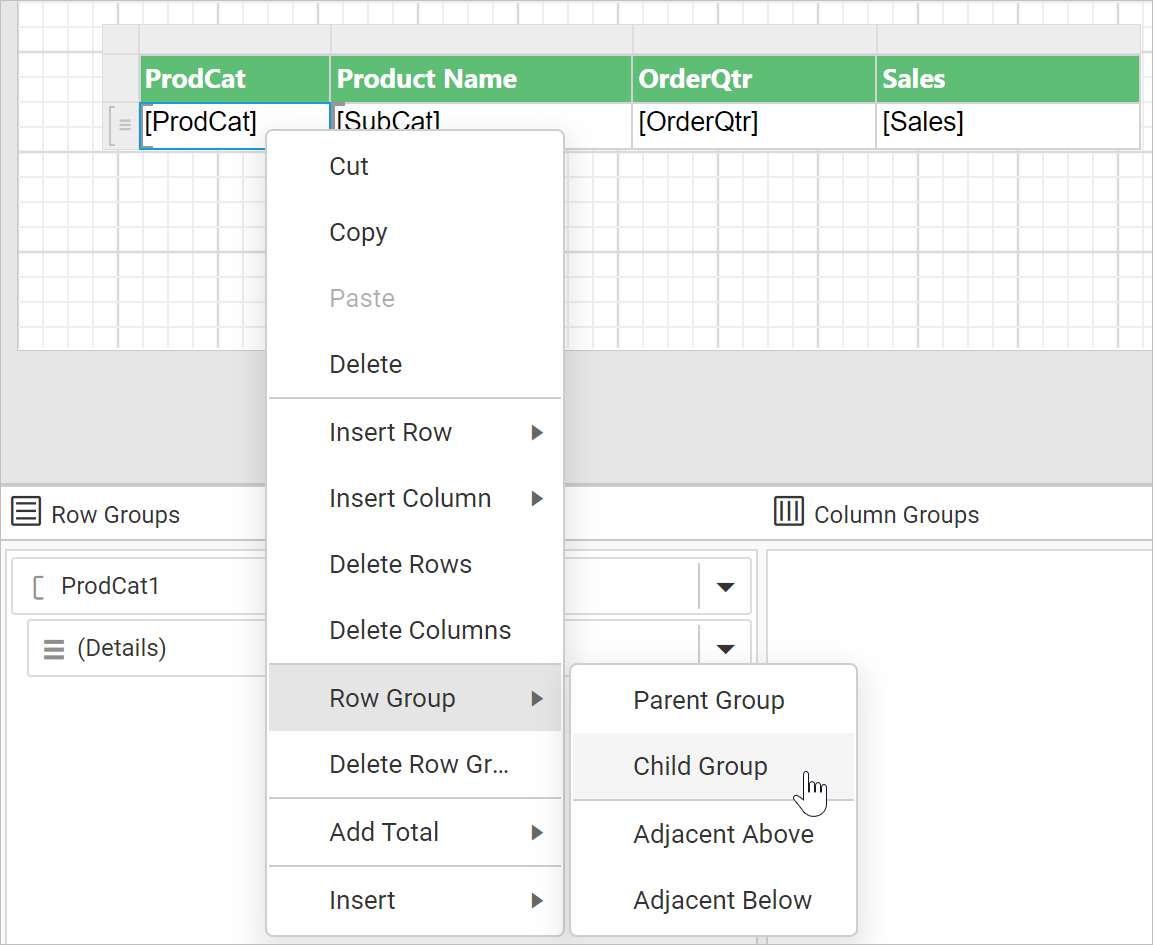
- Once you click on the
Child Groupoption, aTablix Groupdialog will be opened to configure the grouping.
- Group By: Based on the dataset assigned to the tablix region, dataset fields will be listed in this drop-down or else click on the square icon to create an expression.
- Add Group Header: Enable this option to add a header to this group
- Add Group Footer: Enable this option to add a footer to this group
- Here,
Sub Categoryfield is chosen as child group in tablix data region. Click on theOKbutton.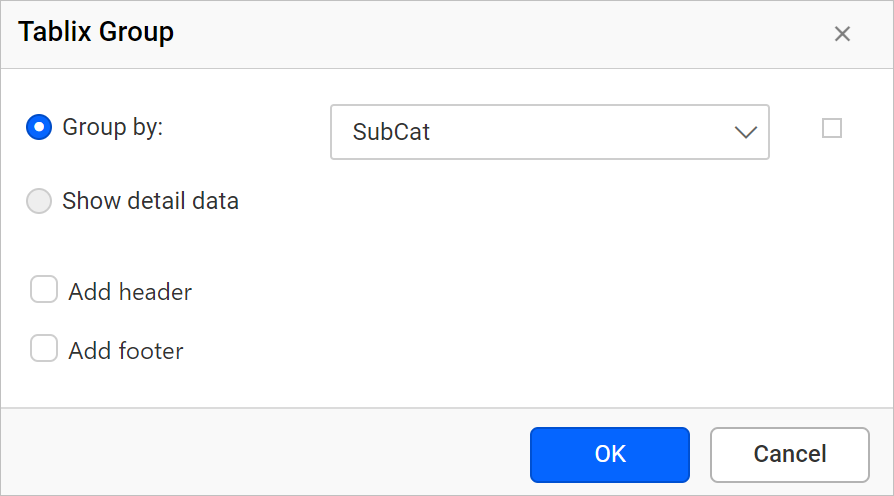
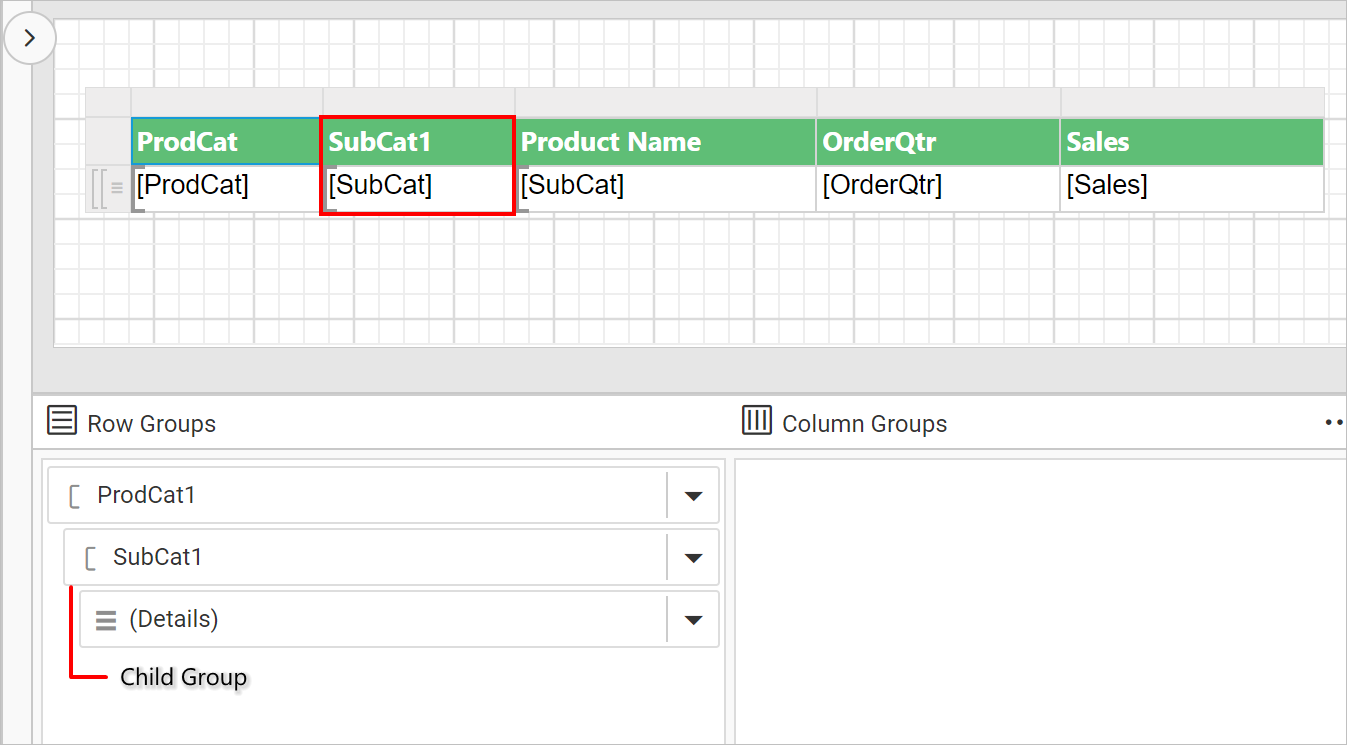
Now, a new column will be added to the right side of the Product Category row group in tablix data region and a new field will be added below of the Product Category group in hierarchical view of Row Groups pane in grouping panel.
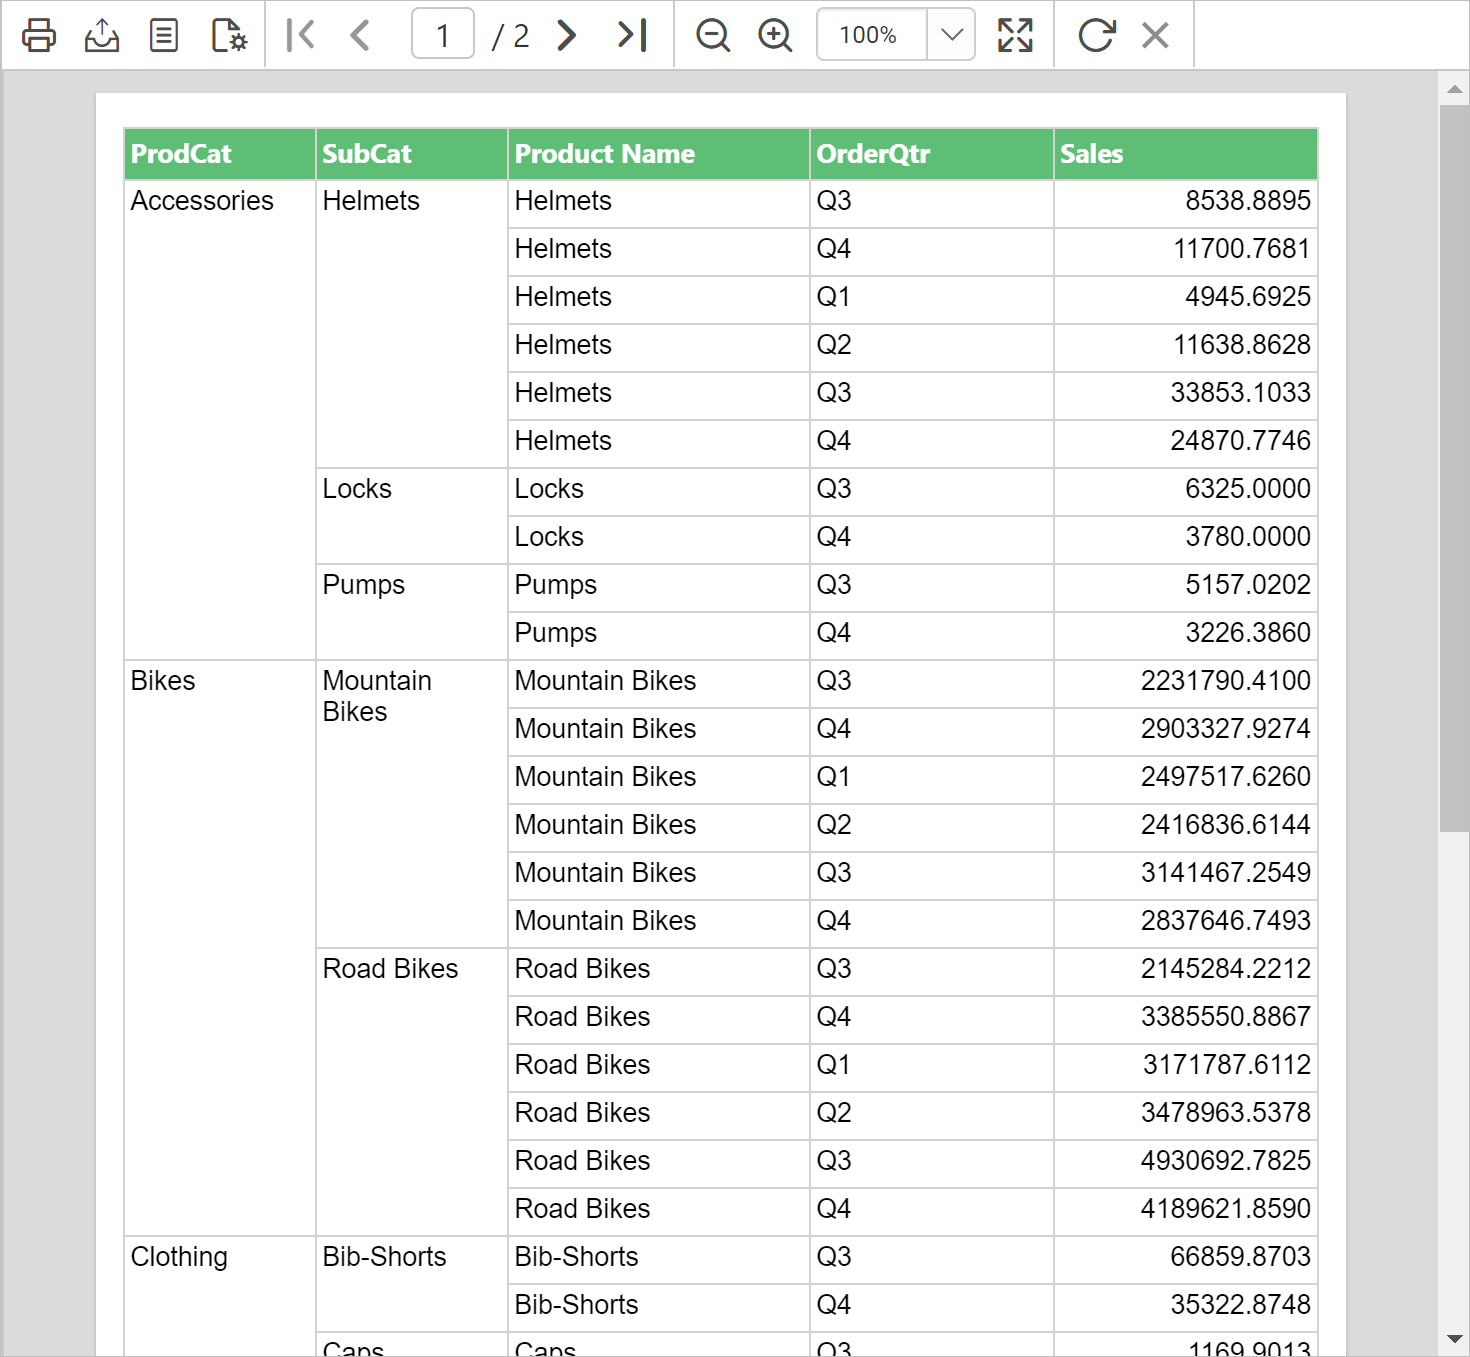
On report preview, product names will be categorized based on the product type.
To add child group using group menu in grouping panel, refer Add child group section. Download the above report design from link.
Adjacent row group
To create multiple groupings in a tablix data region adjacent grouping can be used. The adjacent row group can be added above/before or below/after of the existing group in the data region. Now, to add the adjacent group we can either use the cell menu or group menu in grouping panel. Follow the below steps to add a adjacent group.
- Select and right click in the a row group cell to which you need to create a adjacent group.
- Click on
Adjacent Aboveto create a new group before the existing group orAdjacent Belowto create a new group after the existing group. - Once you click on the
Adjacent AboveorAdjacent Belowoption, aTablix Groupdialog will be opened to configure the grouping. - Choose the required dataset field in the
Group byfield and click on theOKbutton.
Now, a new row group will be created above or below the existing group in the tablix data region.
To add adjacent group using group menu in grouping panel, refer Add adjacent group section.
Delete row group
Row group can be deleted either using the cell context menu or using the group menu provided in grouping panel.
- Select and right click on a row group which you want to delete from the tablix data region.
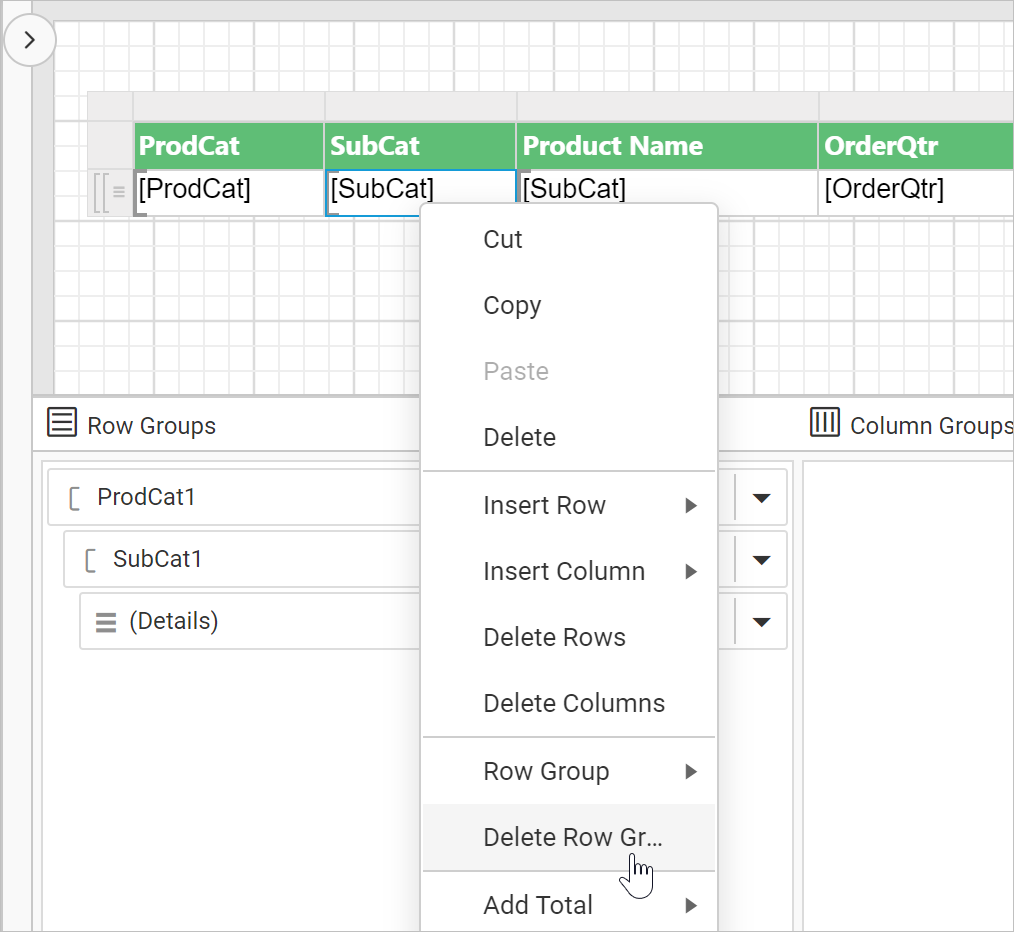
- In the cell menu, click on the
Delete Row Groupoption. Now, the following confirmation dialog will be launched.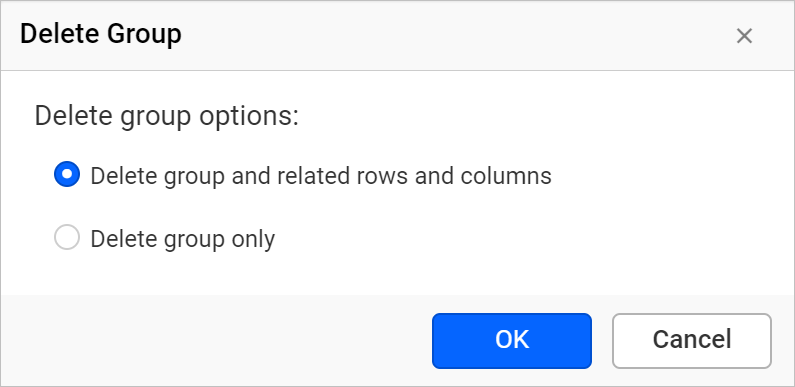
- In the
Delete Groupdialog choose one of the following options and click on theOKbutton.- Delete group and related rows and columns - Choose this option to delete the group and all related rows that display group data. For the details group, if the same row belongs to both detail and group data, only the detail data rows are deleted.
- Delete group only - Choose this option to keep the structure of the tablix data region and delete only the group definition.
Now, the respective group information will be deleted from the tablix data region.
Edit group properties
To edit a row group properties in a tablix data region, refer Tablix member properties section.