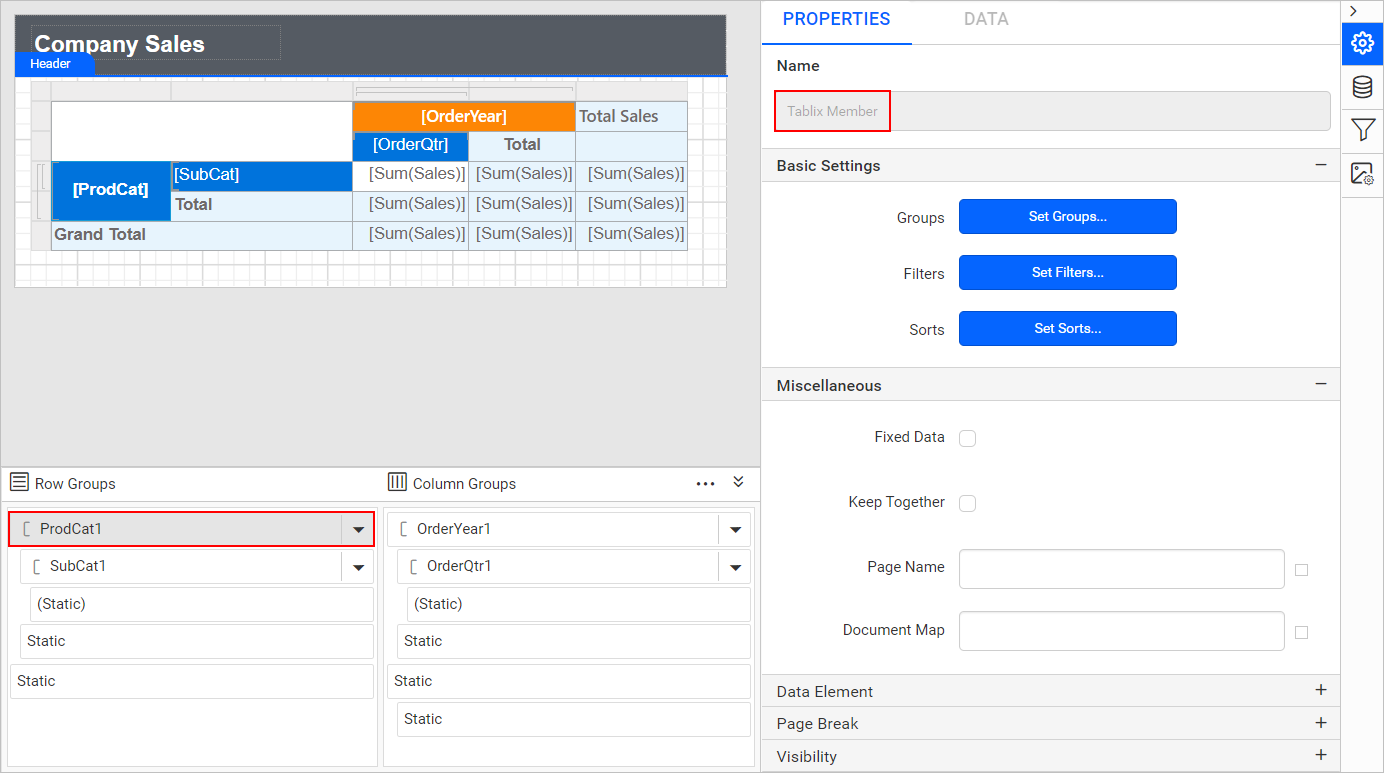
Grouping Panel
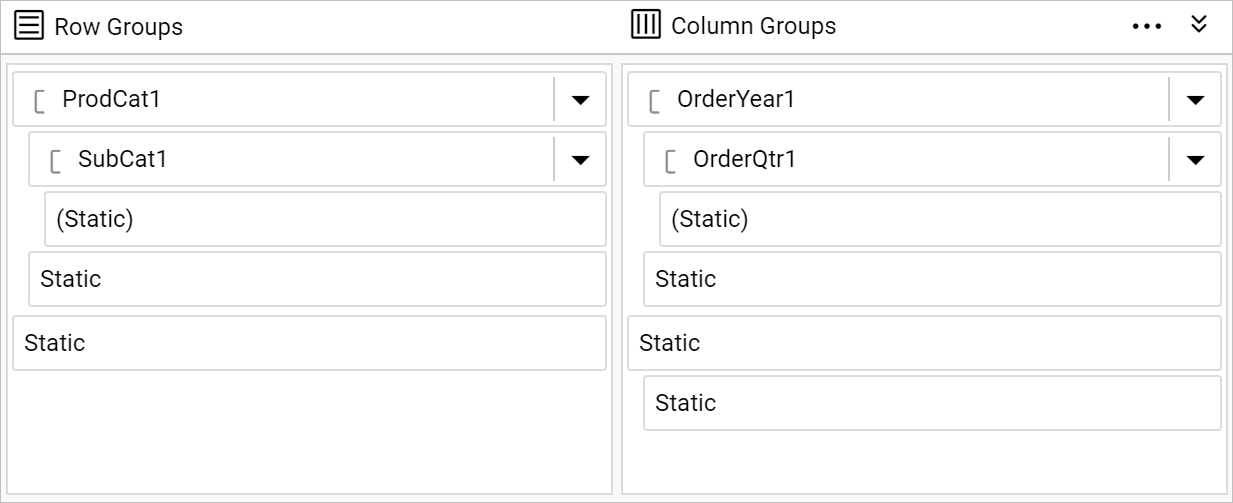
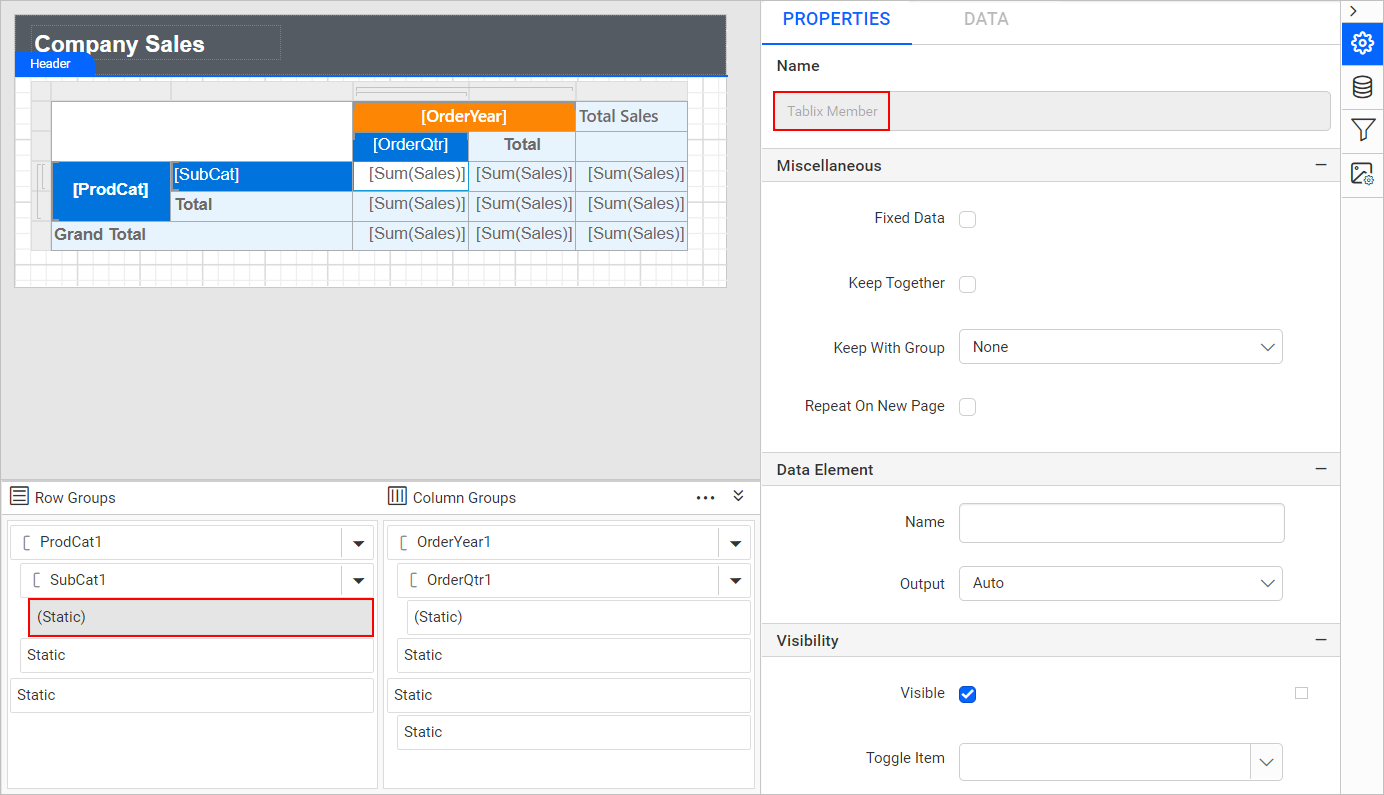
The grouping panel displays the row and column groups of the selected tablix data region in design area. The highlighted area in the below snap shows the grouping panel in design area.
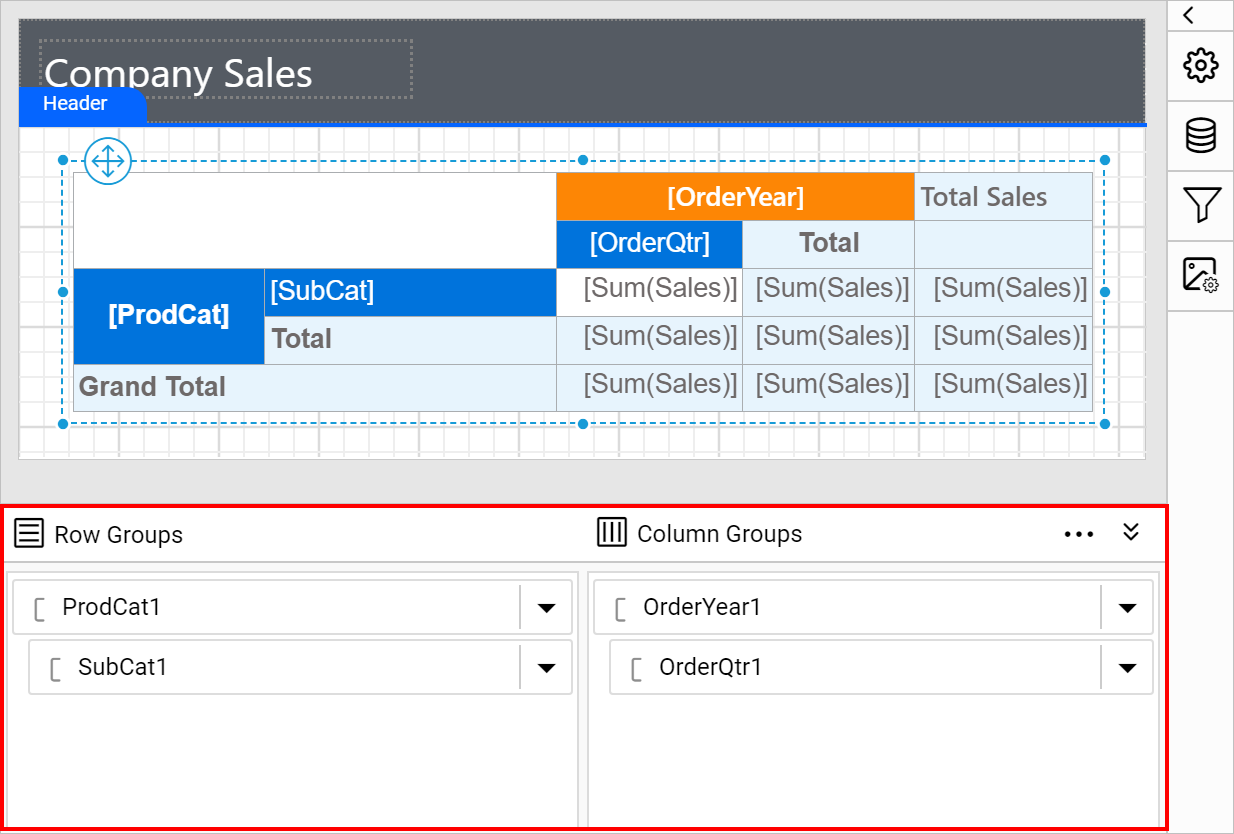
The row groups of a selected tablix are listed in the Row Groups section and column groups are listed in the Column Groups section of the grouping panel.
Show or hide grouping panel
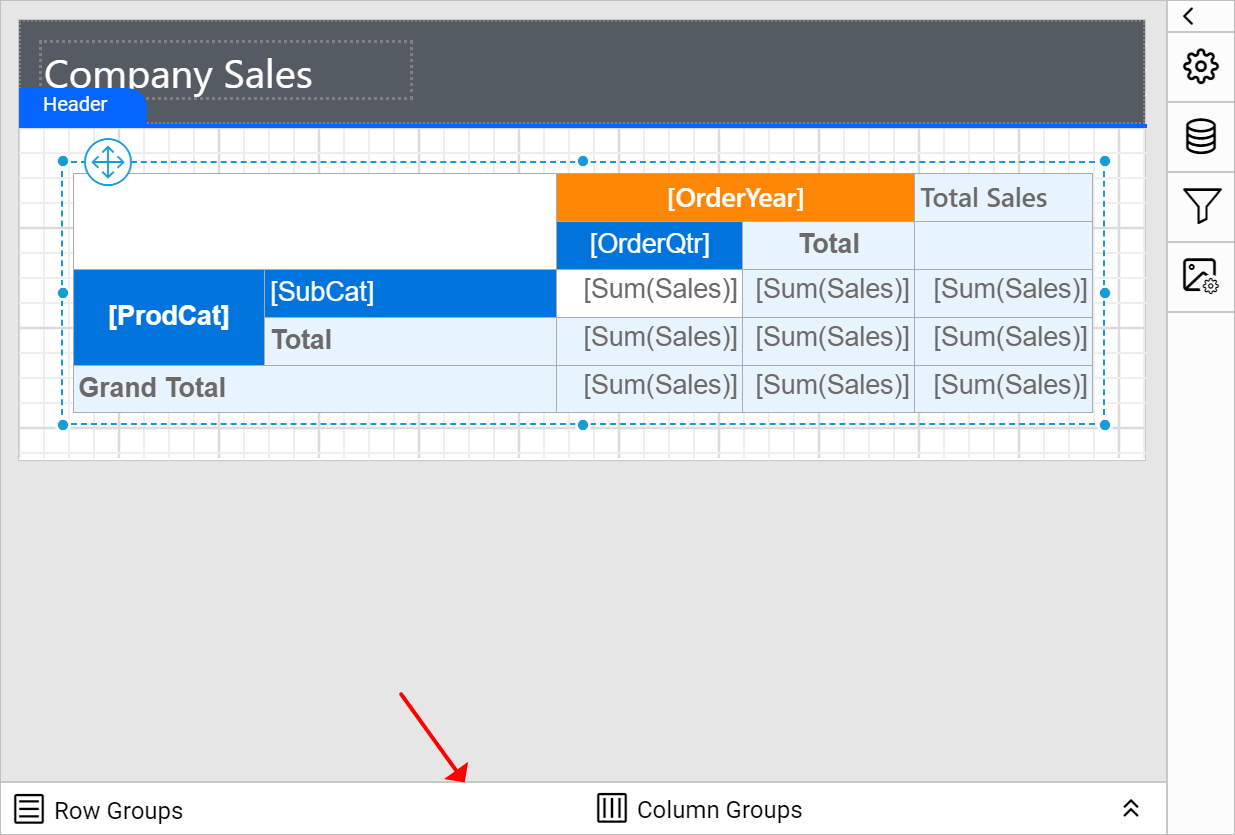
You can expand or collapse the grouping panel in the design area at design time using the expand/collapse icon provided in the right corner of the grouping panel header.
![]()
The below snap shows the collapsed view of grouping panel in the design area.
Grouping panel will be visible in design area only if a tablix report item is selected in the design area.
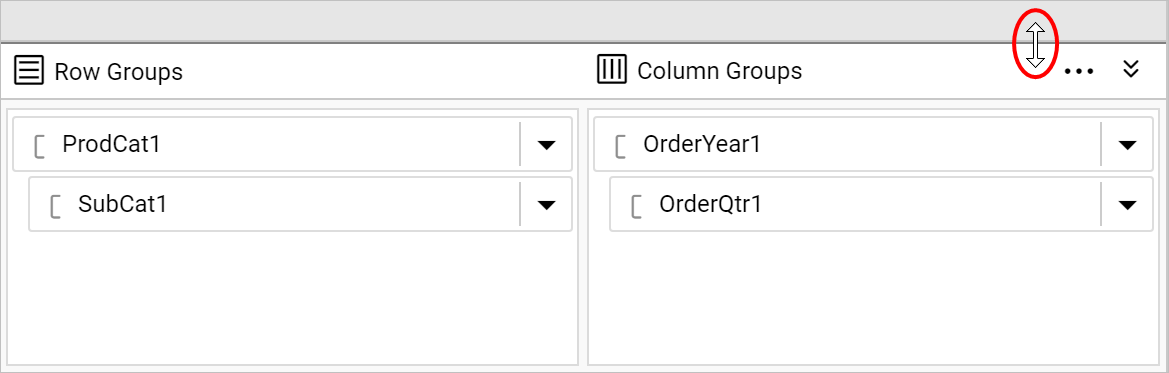
Resize grouping panel
You can increase or decrease the height of the grouping panel in the design area using the resizer.
Modes of grouping panel
Grouping panel have Default and Advanced mode.
Default Mode
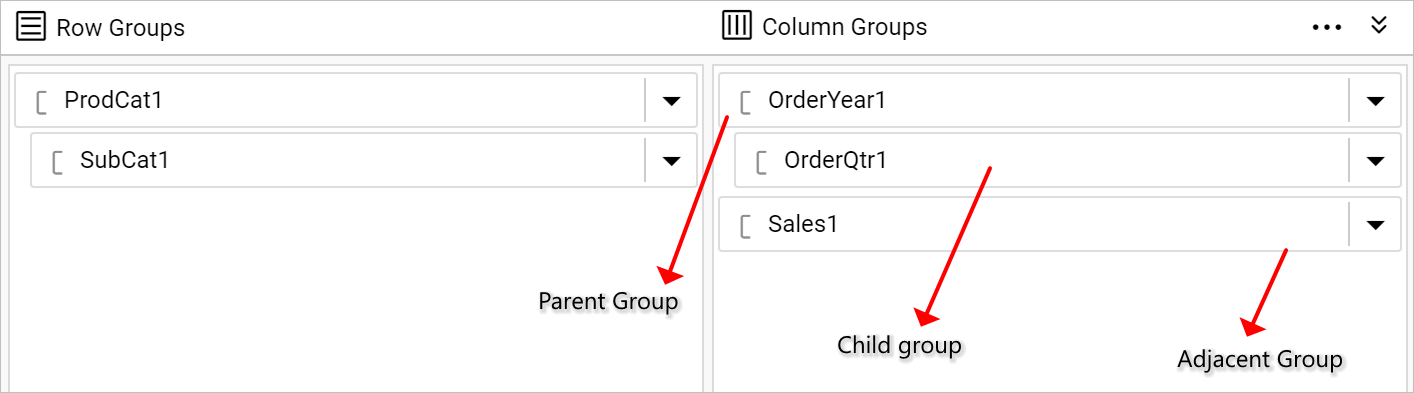
In default mode, the grouping panel displays the hierarchical view of parent, child and adjacent groups of selected tablix item in Row Groups and Column Groups pane.
Advanced Mode
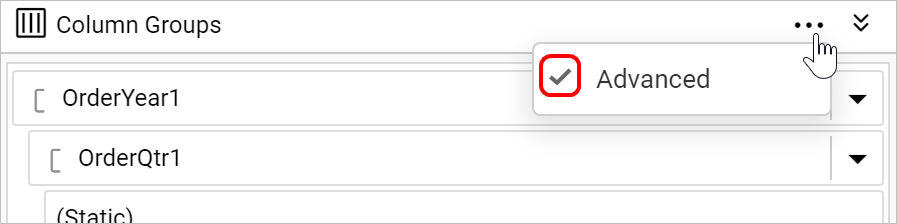
By default, grouping panel will be displayed in Default Mode, to enable advanced mode in the grouping panel, click on the icon in the right corner of the grouping panel header.
![]()
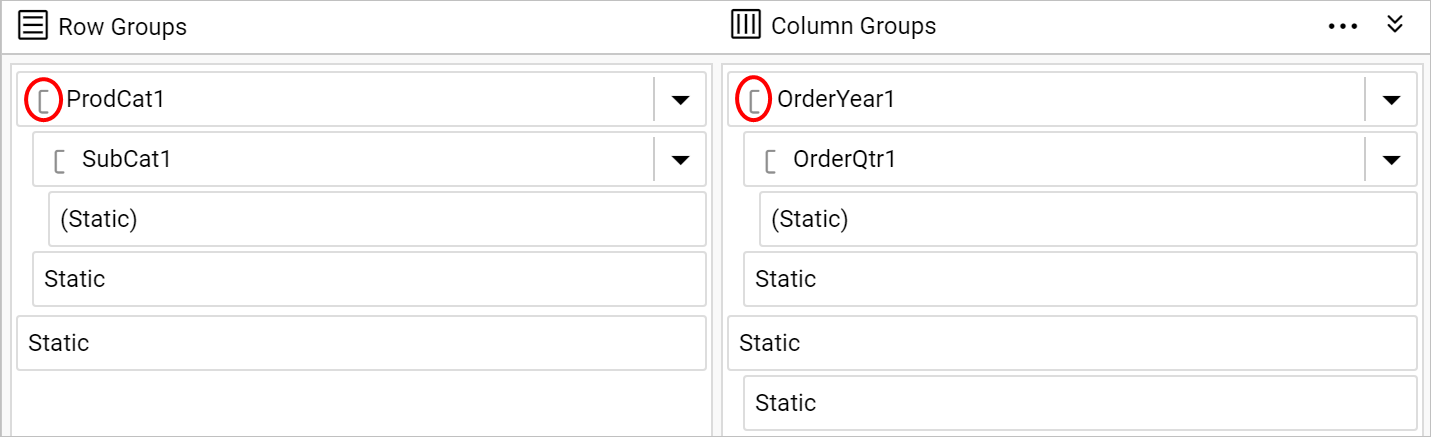
Then, click on the Advanced menu item. Now, all groups including static and dynamic tablix members will be listed in Row Groups and Column Groups pane in hierarchical view like below.
Once you enable the advanced mode, a tick mark will be indicated in the Advanced menu like below.
Visual Cues
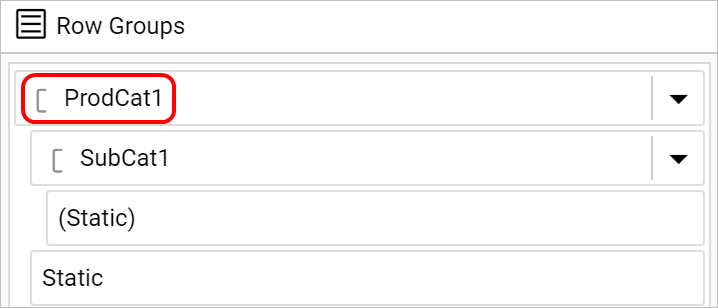
Groups
The row and column groups in the selected tablix data region will be indicated in the grouping panel using the [ symbol.
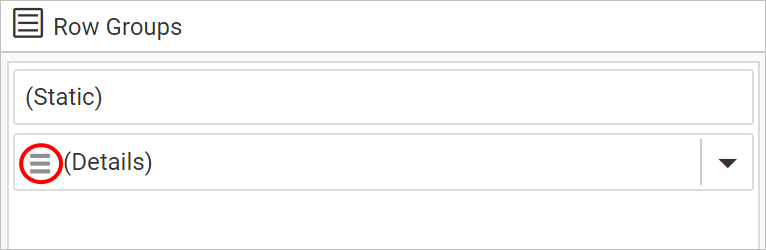
Details Group
Details group on the row group hierarchy will be indicated in the grouping panel using the highlighted symbol in the below snap.
Label convention
In the grouping panel,
Static tablix member
-
A static member with a header cell will be indicated with
Staticlabel text.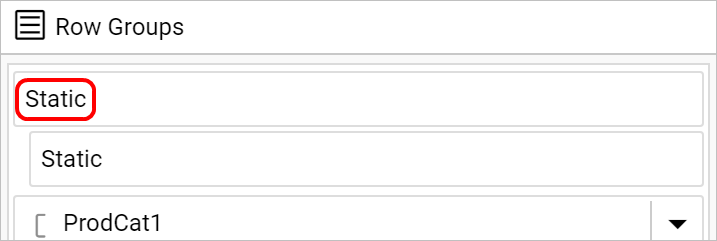
-
A static member with no header cell will be indicated with
(Static)label text.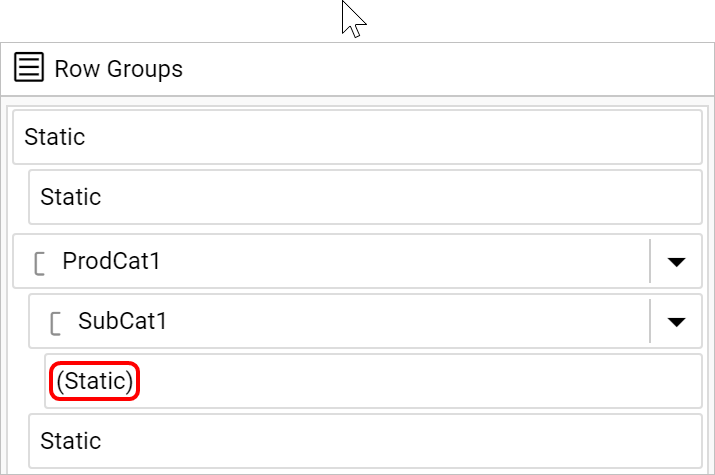
Group tablix member
The label text for group member will be surrounded by square brackets.
Tablix member properties
To edit the static and dynamic tablix member properties, select the respective member in the Row or Column Groups pane, and change the property values in the Properties panel.
Static member properties
Click on the required static tablix member in the Row Groups or Column Groups pane, now the respective tablix member properties will be listed in the properties panel.
To set and edit the properties of static tablix member, refer Static member properties section.
Group member properties
Click on the required group tablix member in the Row Groups or Column Groups pane, now the respective tablix member properties will be listed in the properties panel.
To set and edit the properties of group tablix member, refer Group member properties section.
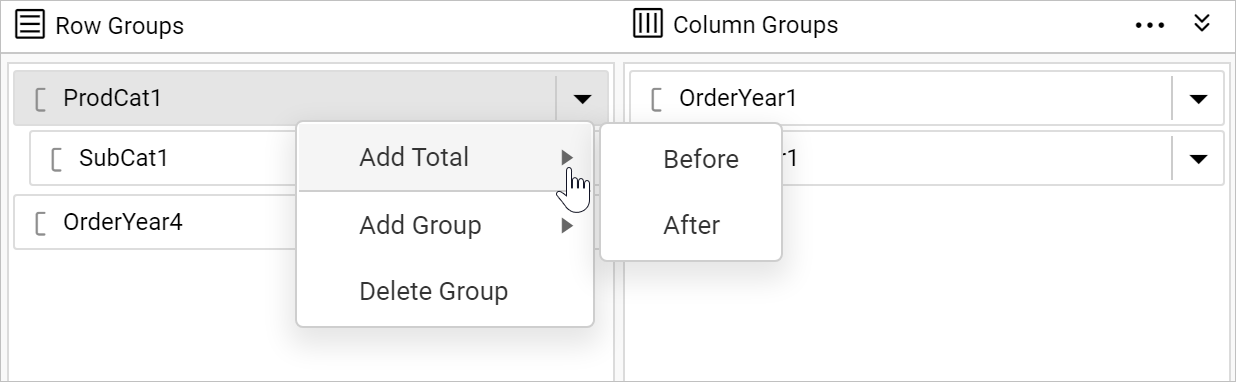
Add groups or total
You can add groups or totals to the tablix data region using the grouping panel. To open the group menu click on the icon in the right corner of the row or column group member.
![]()
Now, the group menu will open in the respective group like below,

Add parent group
- To add a parent group, click on the
Parent Group...option underAdd Groupcategory.
- Now,
Tablix Groupdialog will open like below.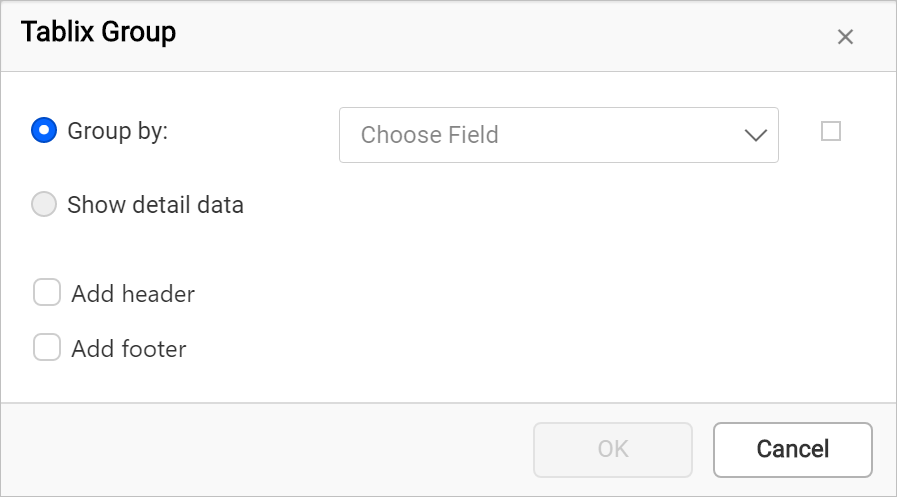
- Choose field in the group dialog and click
OKbutton.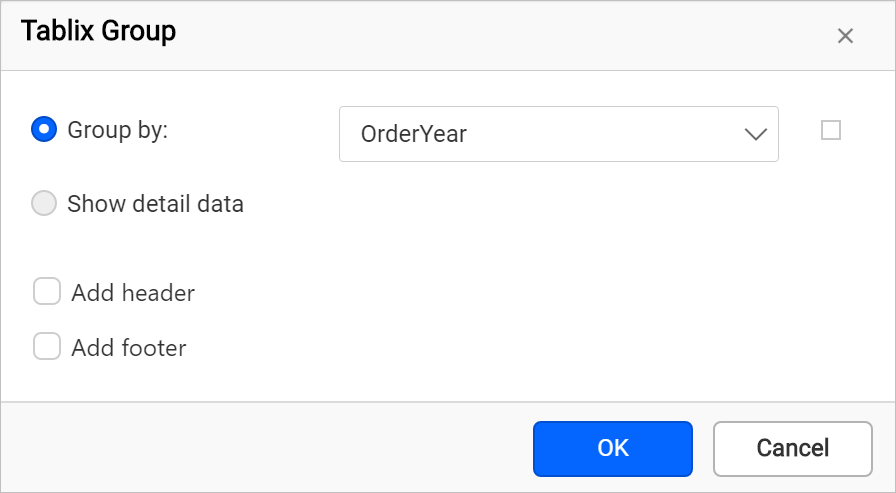
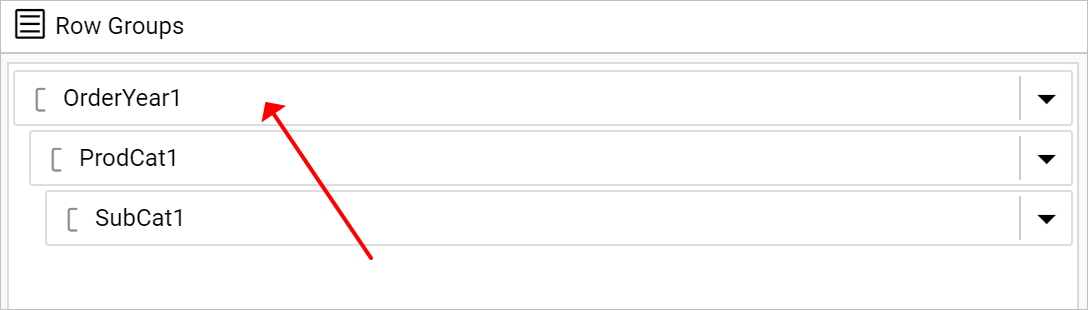
- Now, a new parent group will be added above a group in the grouping panel.
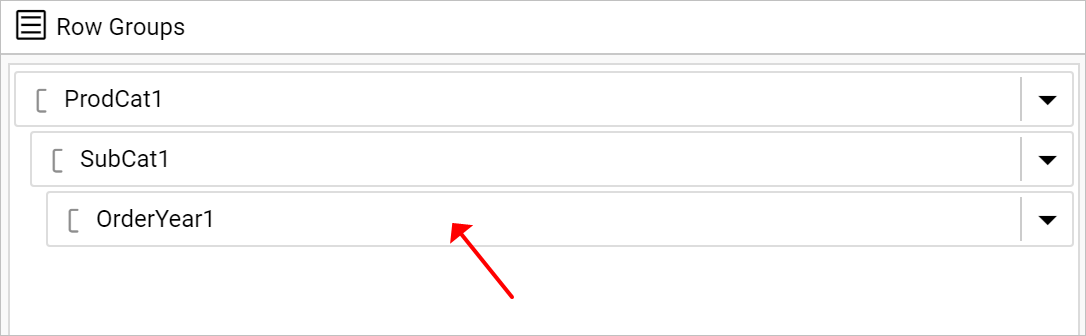
Add child group
- To add a child group, click on the
Child Group...option underAdd Groupcategory.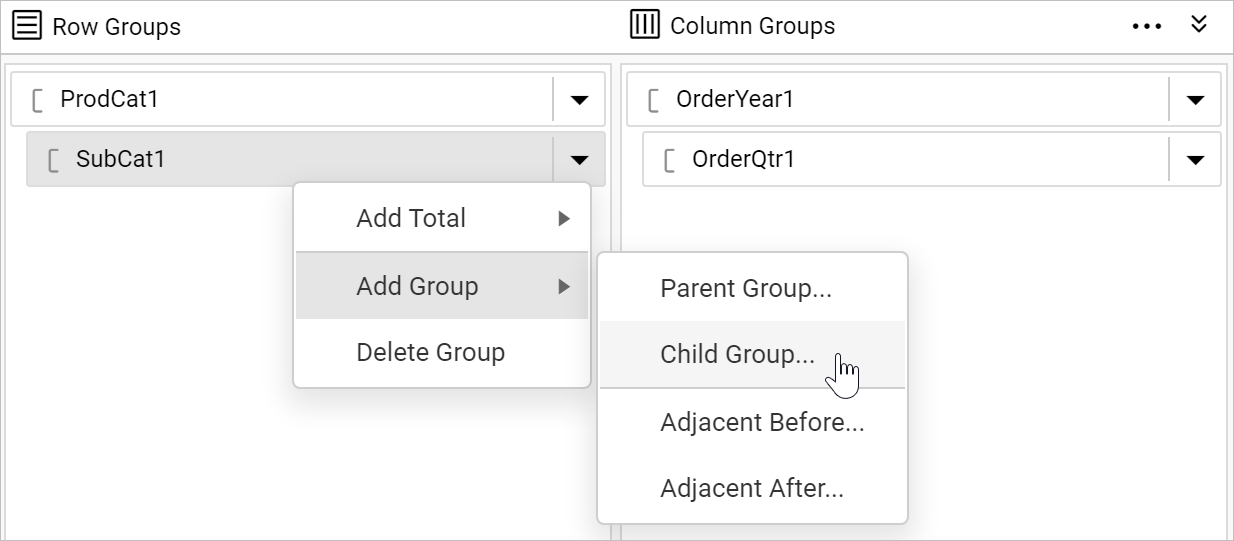
- Now,
Tablix Groupdialog will open like below. - Choose field in the group dialog and click
OKbutton. - Now, a new child group will be added under a group in the grouping panel.
You cannot add child group for
Detailsgroup.
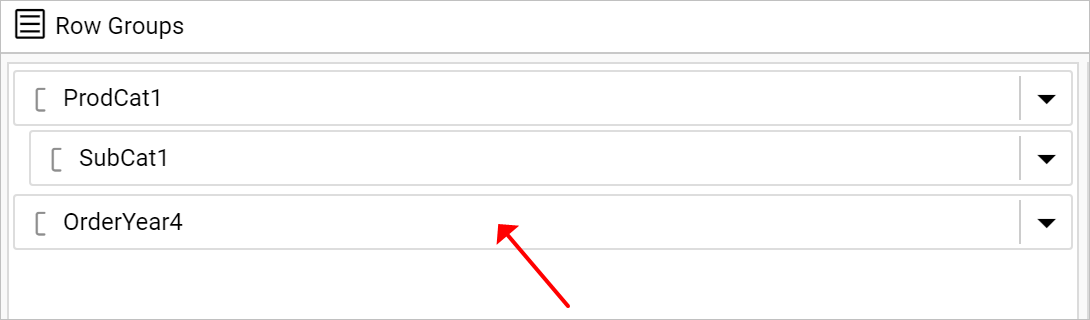
Add adjacent group
- To add a adjacent group, click on the
Adjacent BeforeorAdjacent Afteroption underAdd Groupcategory.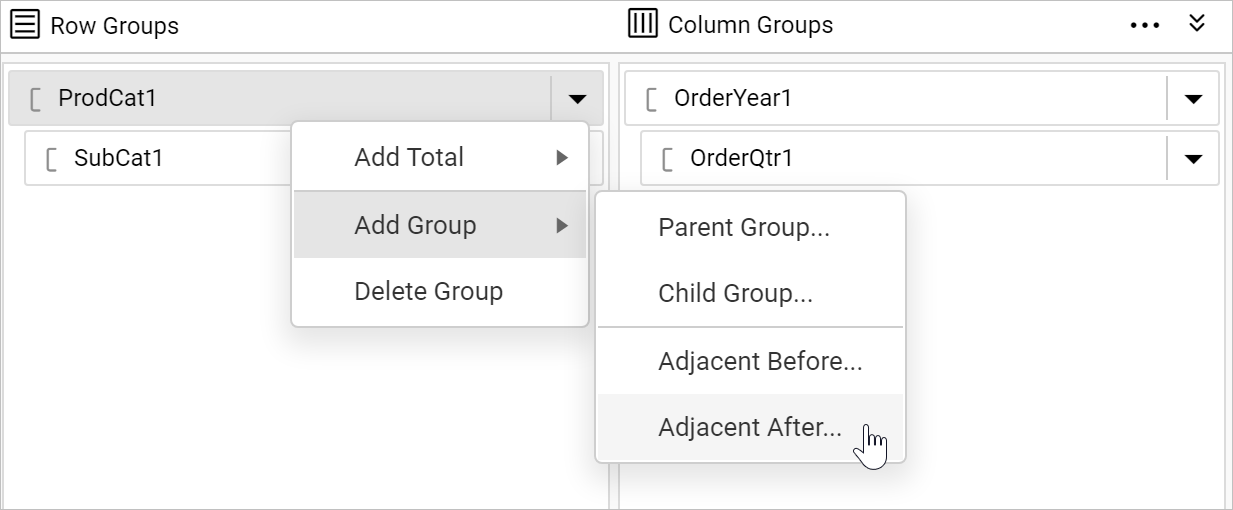
- Now,
Tablix Groupdialog will open like below. - Choose field in the group dialog and click
OKbutton. - Now, a new adjacent group will be added above or below a group in the grouping panel.
Adjacent Before
 Adjacent After
Add total
You can add total above or below a group. To add total click on the Before or After under Add Total menu.
The total row or column will be added in the tablix region for the respective group in the tablix report item in design area.
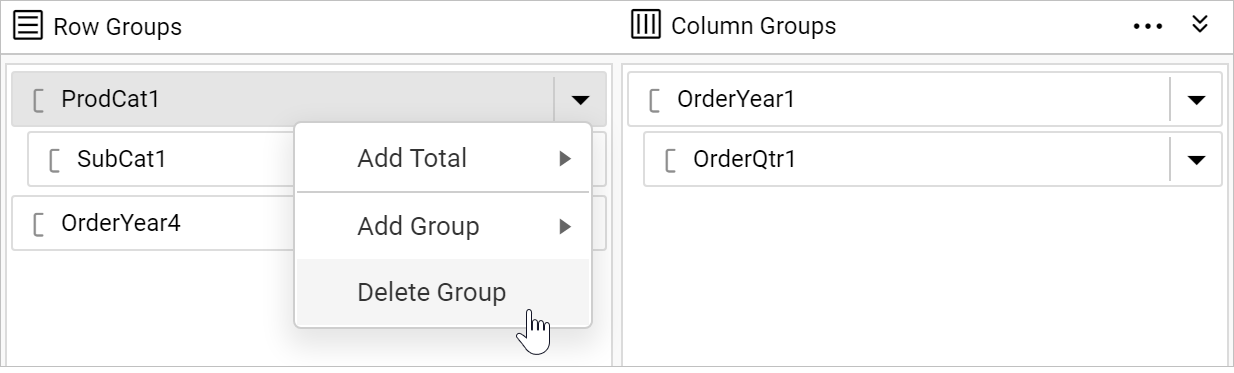
Delete Group
To delete a group using grouping panel, click on the icon in the right corner of the row or column group member. Click on Delete Group option in the menu.
Now, the following confirmation dialog will be launched.

-
Choose the
Delete group and related rows and columnsoption to delete all the rows and columns associated with the respective group. -
Choose the
Delete group onlyoption to delete the group alone.