Assign data to tablix data region
The table, matrix and list report items can display data from a single dataset. You can also assign conditional expressions to filter or sort the dataset columns.
Assign dataset
There are two ways to assign the dataset to the tablix:
- Assign dataset from data assign menu
- Assign dataset in
Datasetproperty of tablix
Assign data from data assign menu
-
Select any cell in the tablix data region. Click on the
Data assignmenu icon to open data assign menu. If the report has no dataset, then the data assign menu will have following options.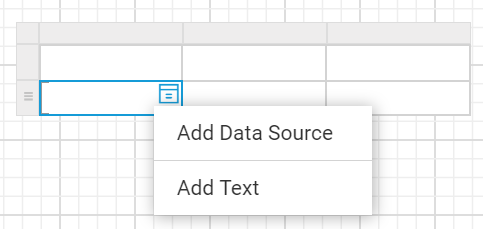
Click on the
Add Datasourceoption in the menu and add dataset using the steps provided in Create Data section. -
By default, the menu displays the fields of the first dataset in the report.
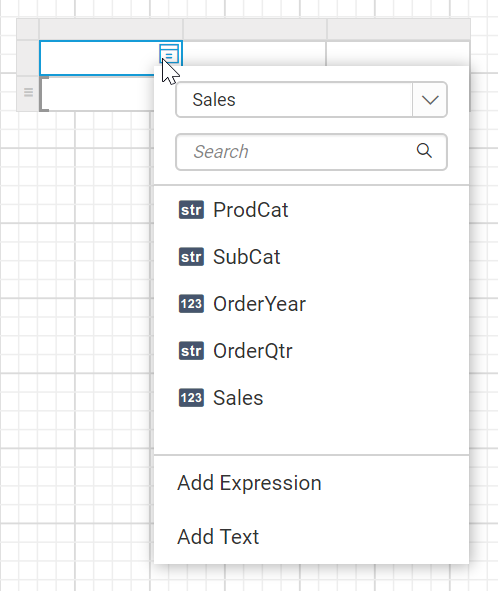
-
The available datasets in the report will be listed in the first dropdown. To assign different dataset, choose desired dataset in the dropdown.
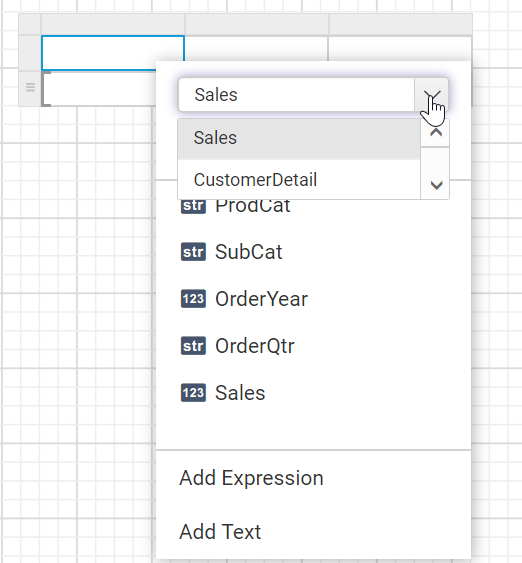
-
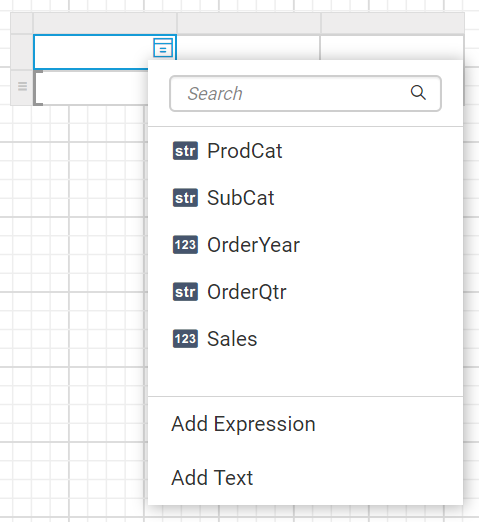
Now, the fields of selected dataset will be listed in the data assign menu like below.
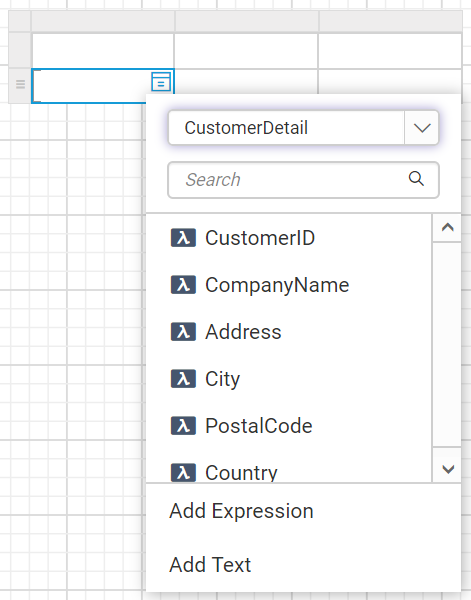
Assign data from properties panel
- Select the tablix report item in design area, now the respective tablix properties will be listed in the properties panel.
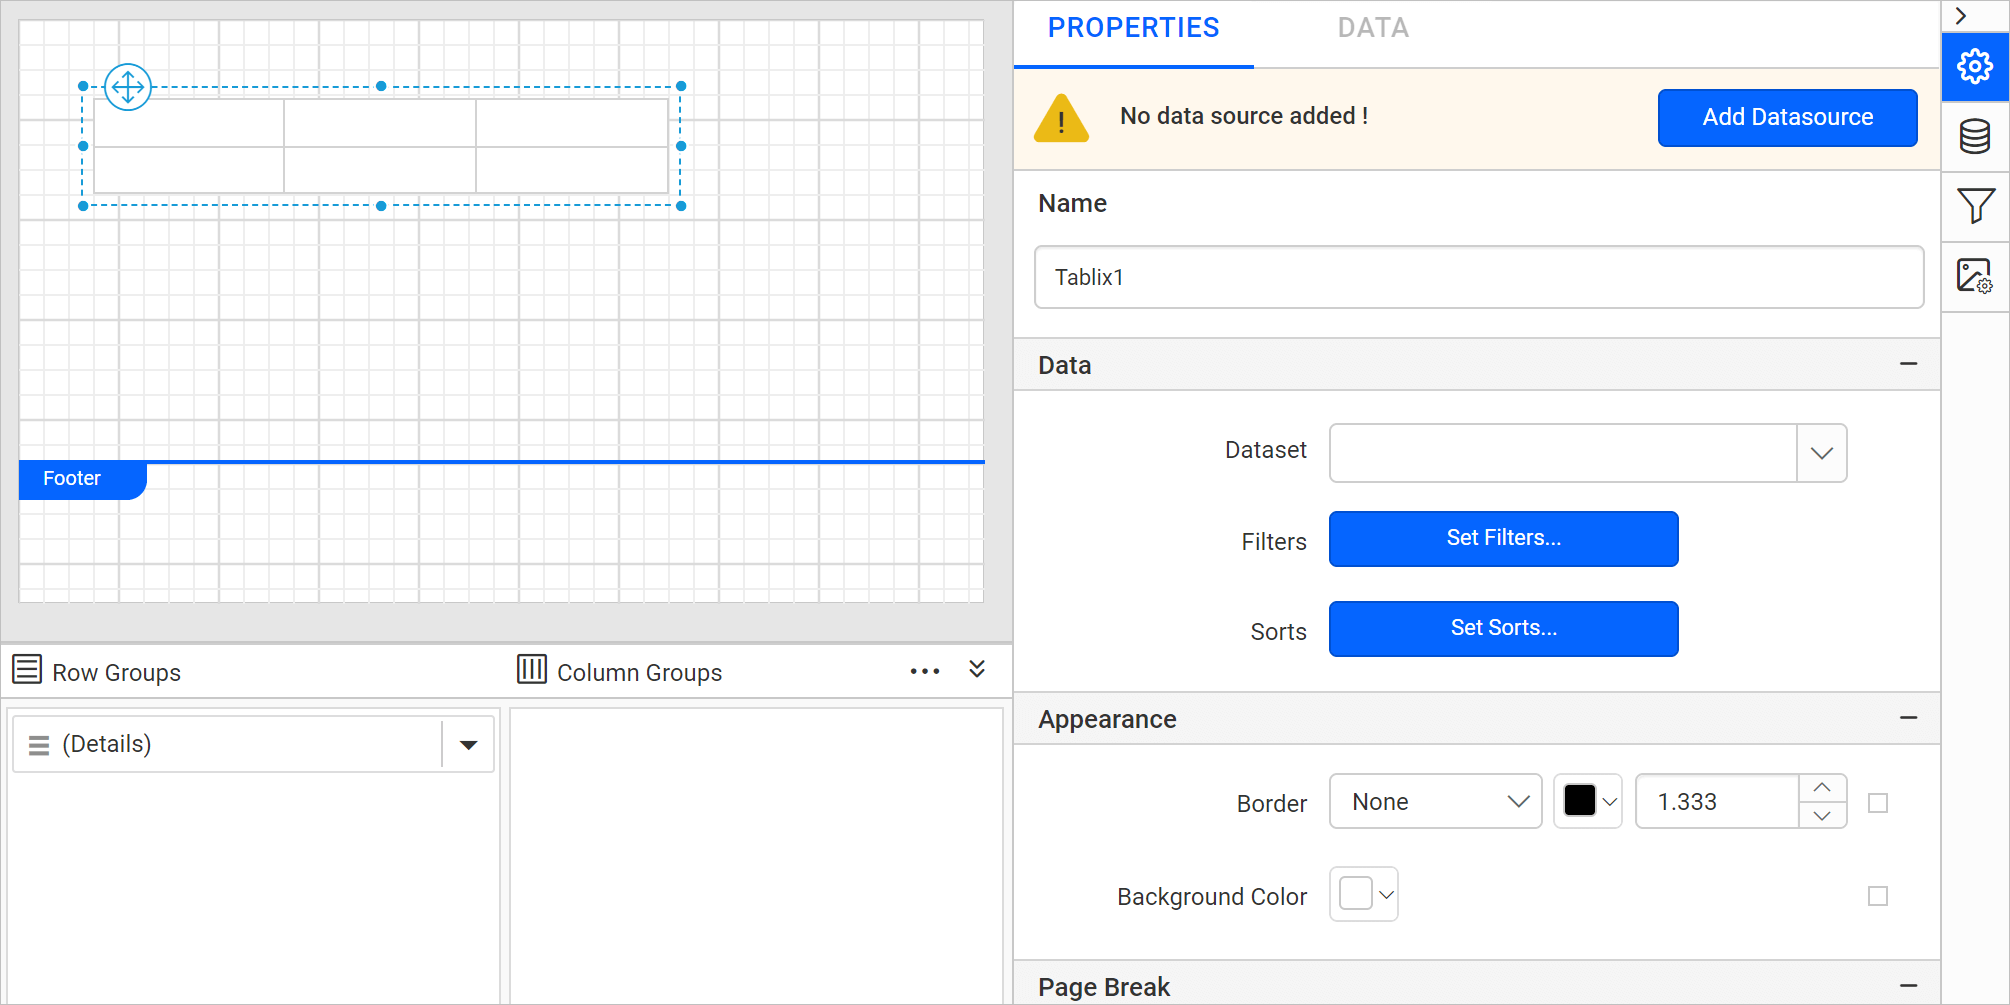
- The available datasets in the report will be listed in the
Datasetproperty dropdown. You can choose the desired dataset from the drop-down.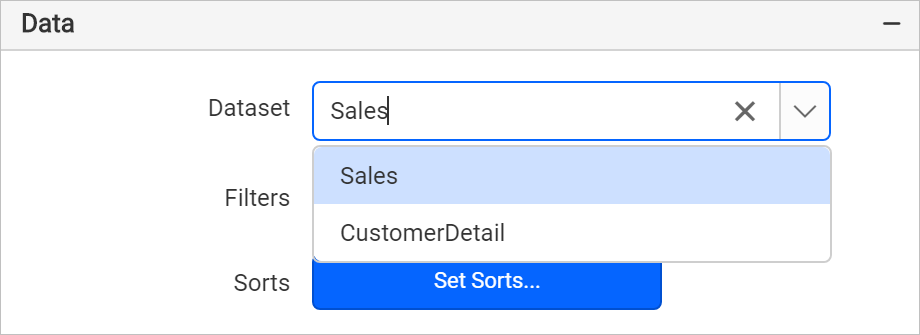
- Now, the fields of selected dataset will be listed in the data assign menu like below.
Assign fields to tablix cell
There are a few different ways to assign the fields into a tablix cell:
- Drag and drop data fields from the
DATApanel. - Select the field from the data assign menu provided in each cell.
- Go to the textbox’s properties and assign field in
Contentproperty.
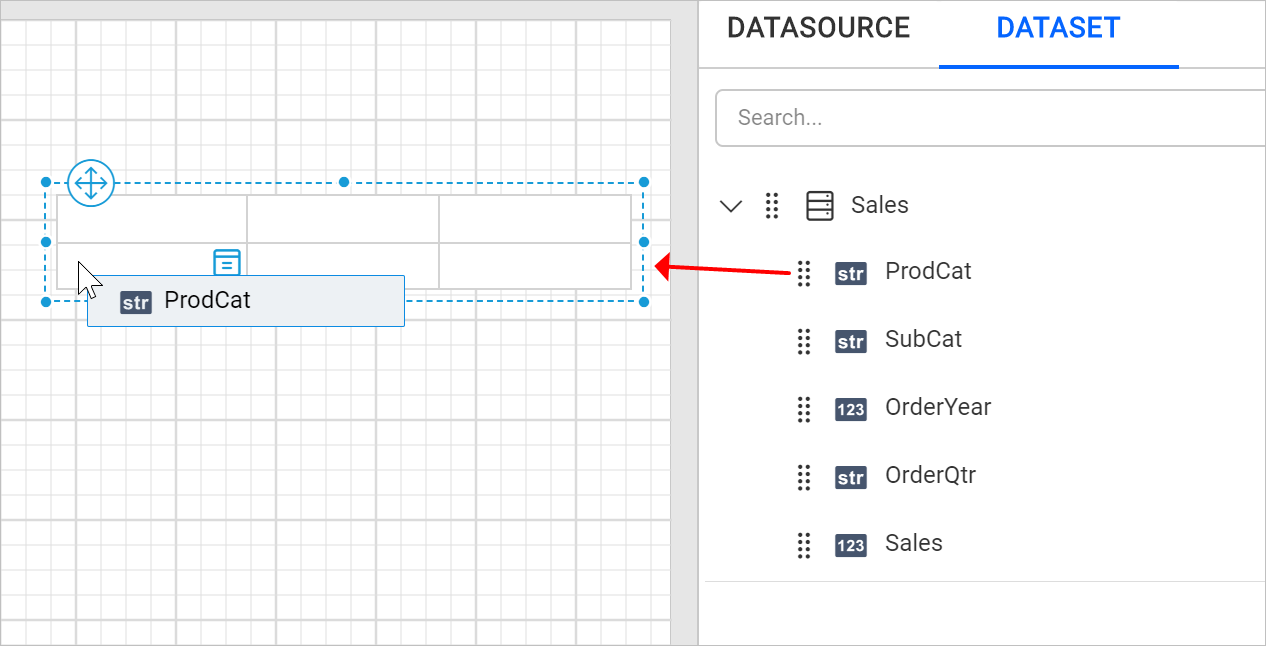
Drag and drop data fields
- Open the
DATApanel and expand the required dataset.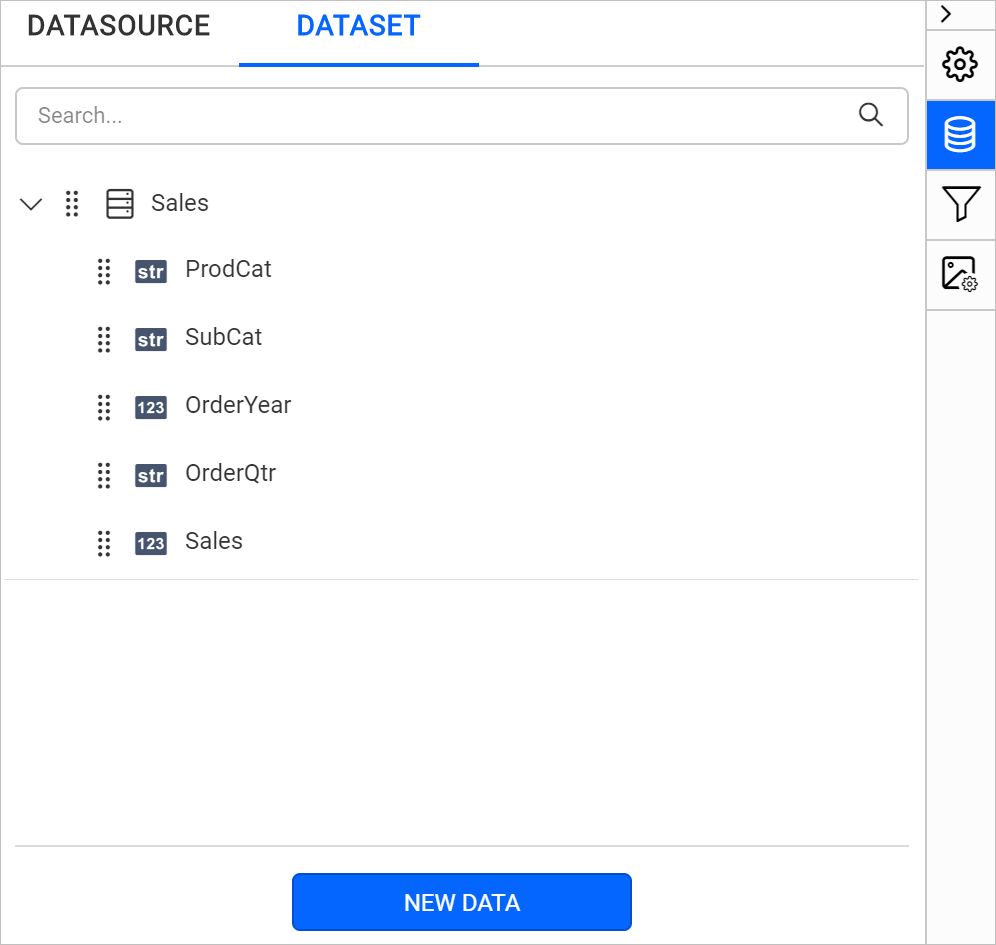
- Drag a field from the list and drop into a required cell.
Assign fields using data assign menu
-
Select the tablix cell and click on the
Data assignmenu icon to open data assign menu.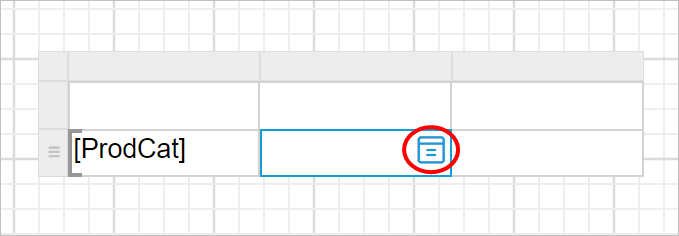
-
Click on the required data field name in the menu.
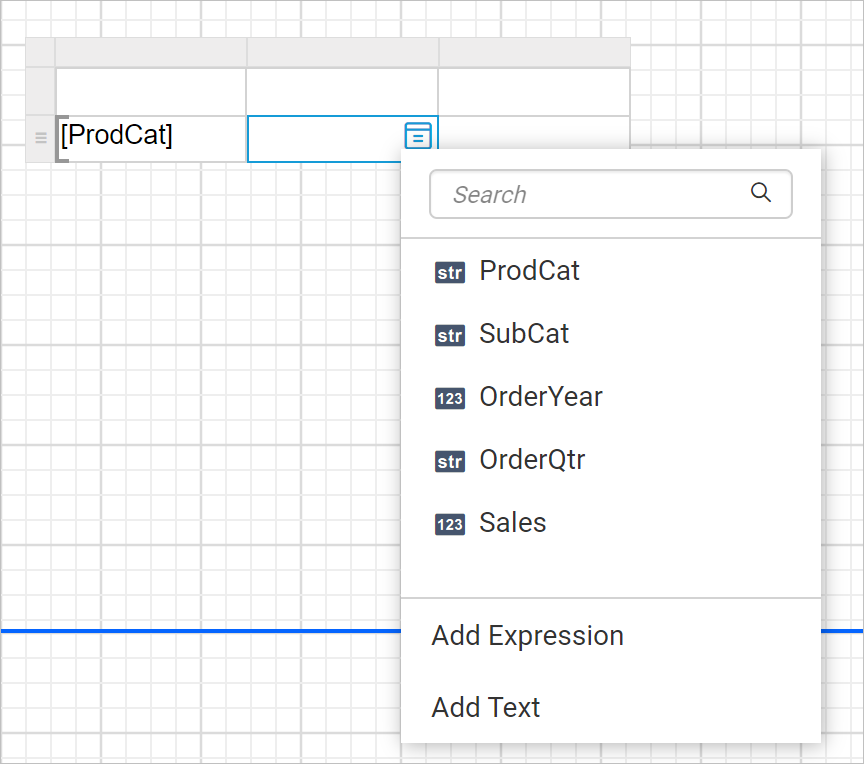
The fields of the dataset which is assigned to
Datasetproperty of tablix will be listed in the menu. -
Now, the respective field will be assigned to the respective cell like below.

Textbox properties
- Select a cell in the tablix, now the respective textbox properties will be listed in the properties panel.
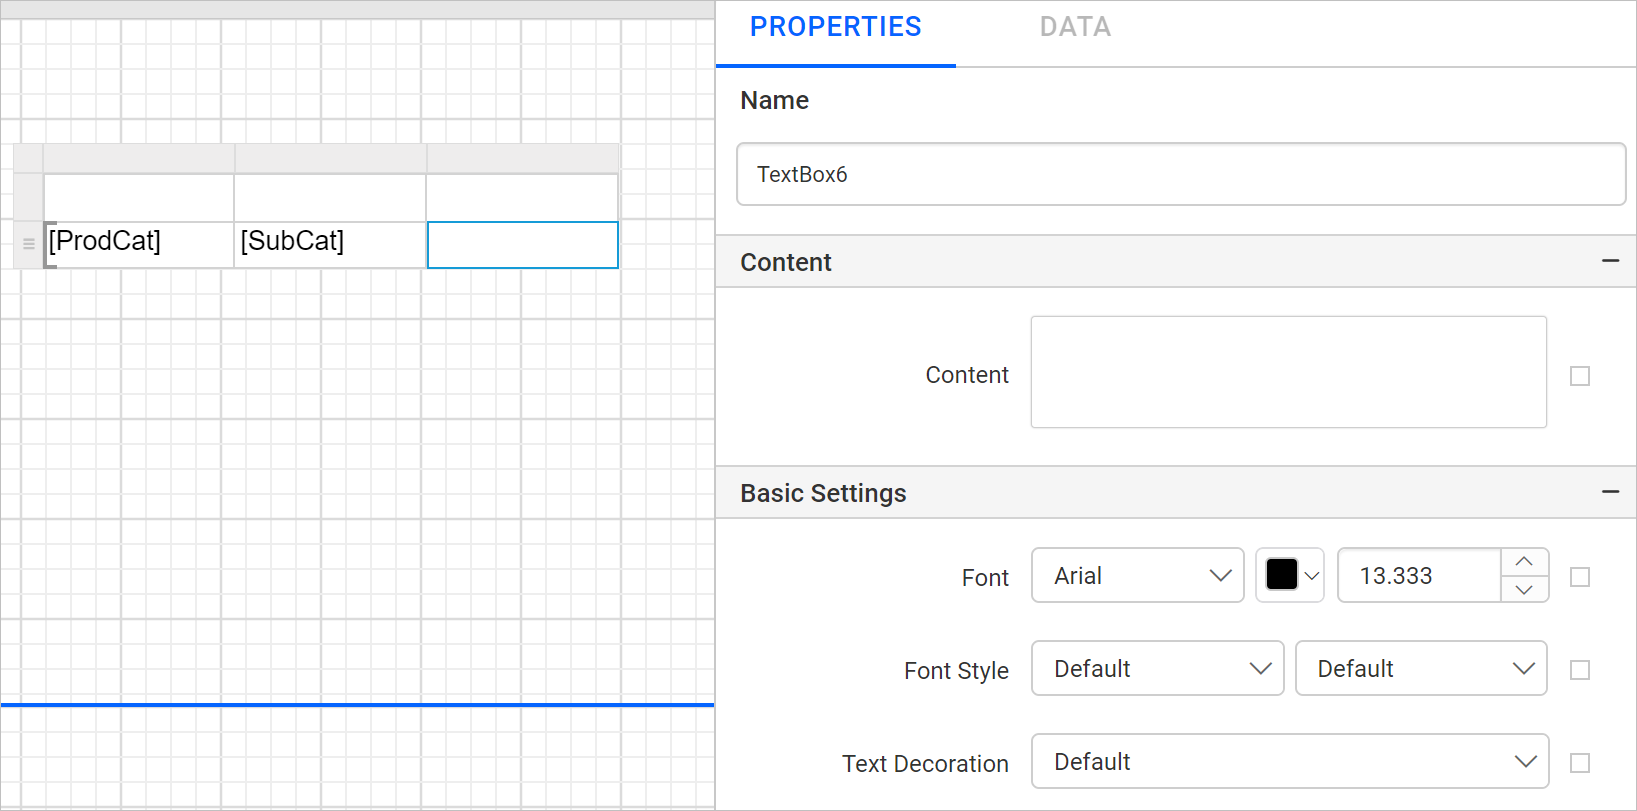
- In the
Contentproperty, type the value or set the data field using the expression editor.Refer Set expression section to open expression menu and to set expression.
- Here, the
=Fields!Sales.Valueexpression is entered in the content property field to assignSalesdata field into the respective cell.
- Now, the
Salesfield will be denoted in the respective cell like below.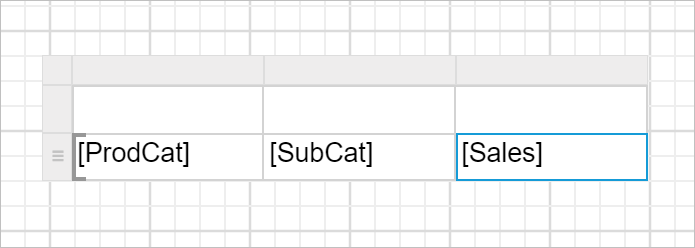
Assign or edit expression into table cell
There are two ways to assign or edit the expression into a tablix cell:
- Set expression using the
Add Expressionand edit expression using theEdit Expressionoption in data assign menu - Set or edit expression in
Contentproperty of a cell in properties panel
Set expression using data assign menu
-
Select a table cell and click on the
Data assignmenu icon to open data assign menu.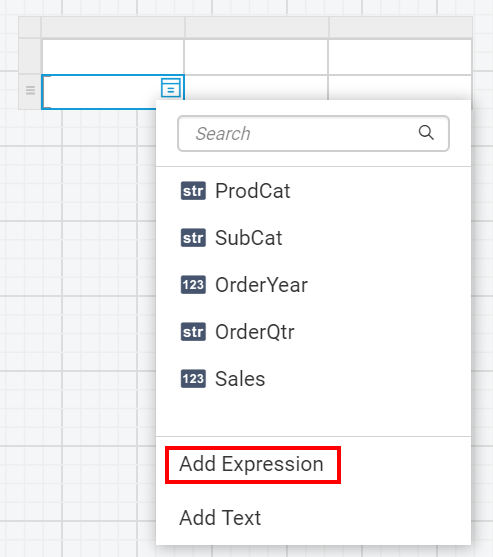
-
Click the
Add Expressionoption in the data assign menu. Now, theExpressionbuilder will be launched like below.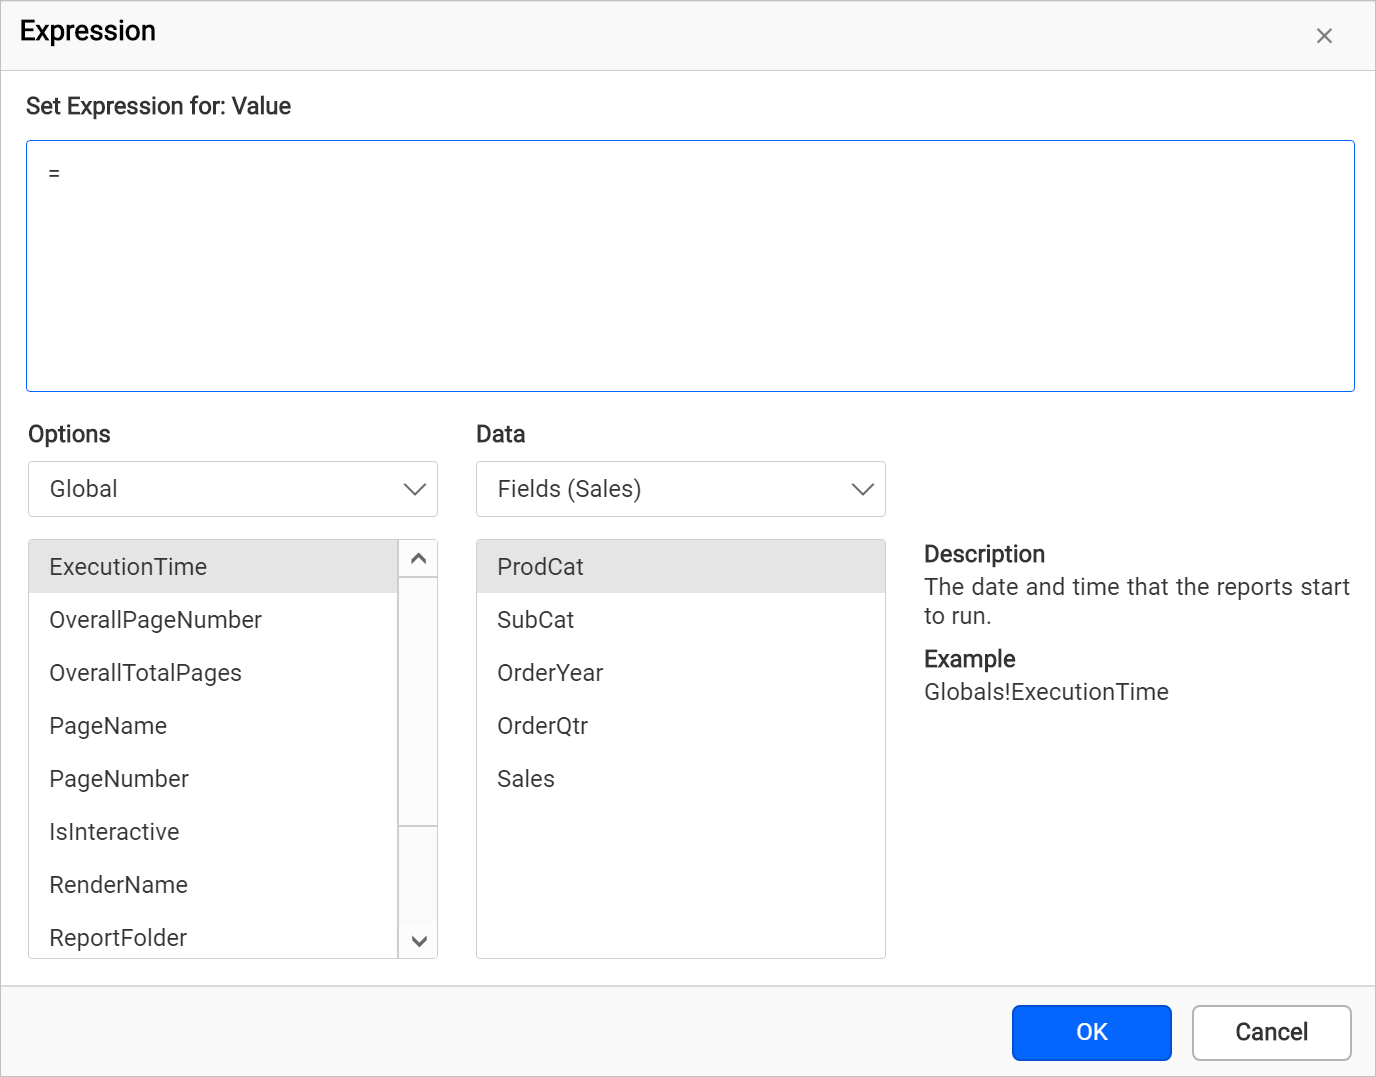
To learn more about handling expressions in report designer refer Expressions section.
-
You can specify dataset fields, parameters or any other built-in functions and click on the
OKbutton. -
The label denoted in the table cell varies based on the assigned values in table cell. The following snap depicts the label text variations.

Set expression in properties panel
- Select a cell in the tablix, now the respective textbox properties will be listed in the properties panel.
- Click on the square icon in the right corner of the
Contentproperty.
- Click on the
Expressionoption in the menu. Now, theExpressionbuilder will be launched like below.
- You can specify dataset fields, parameters or any other built-in functions and click on the
OKbutton. - The label denoted in the table cell varies based on the assigned values in table cell. The following snap depicts the label text variation.

Edit expression using data assign menu
- Select a table cell in which you need to edit the expression and click on the
Data assignmenu icon to open data assign menu.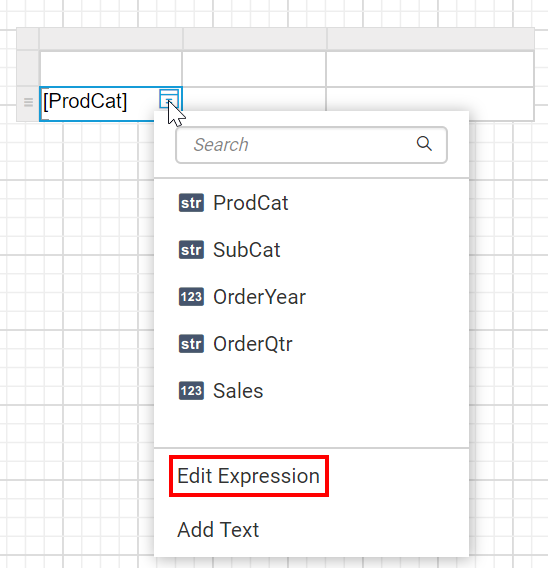
- Click the
Edit Expressionoption in the data assign menu. Now, theExpressionbuilder will be launched like below.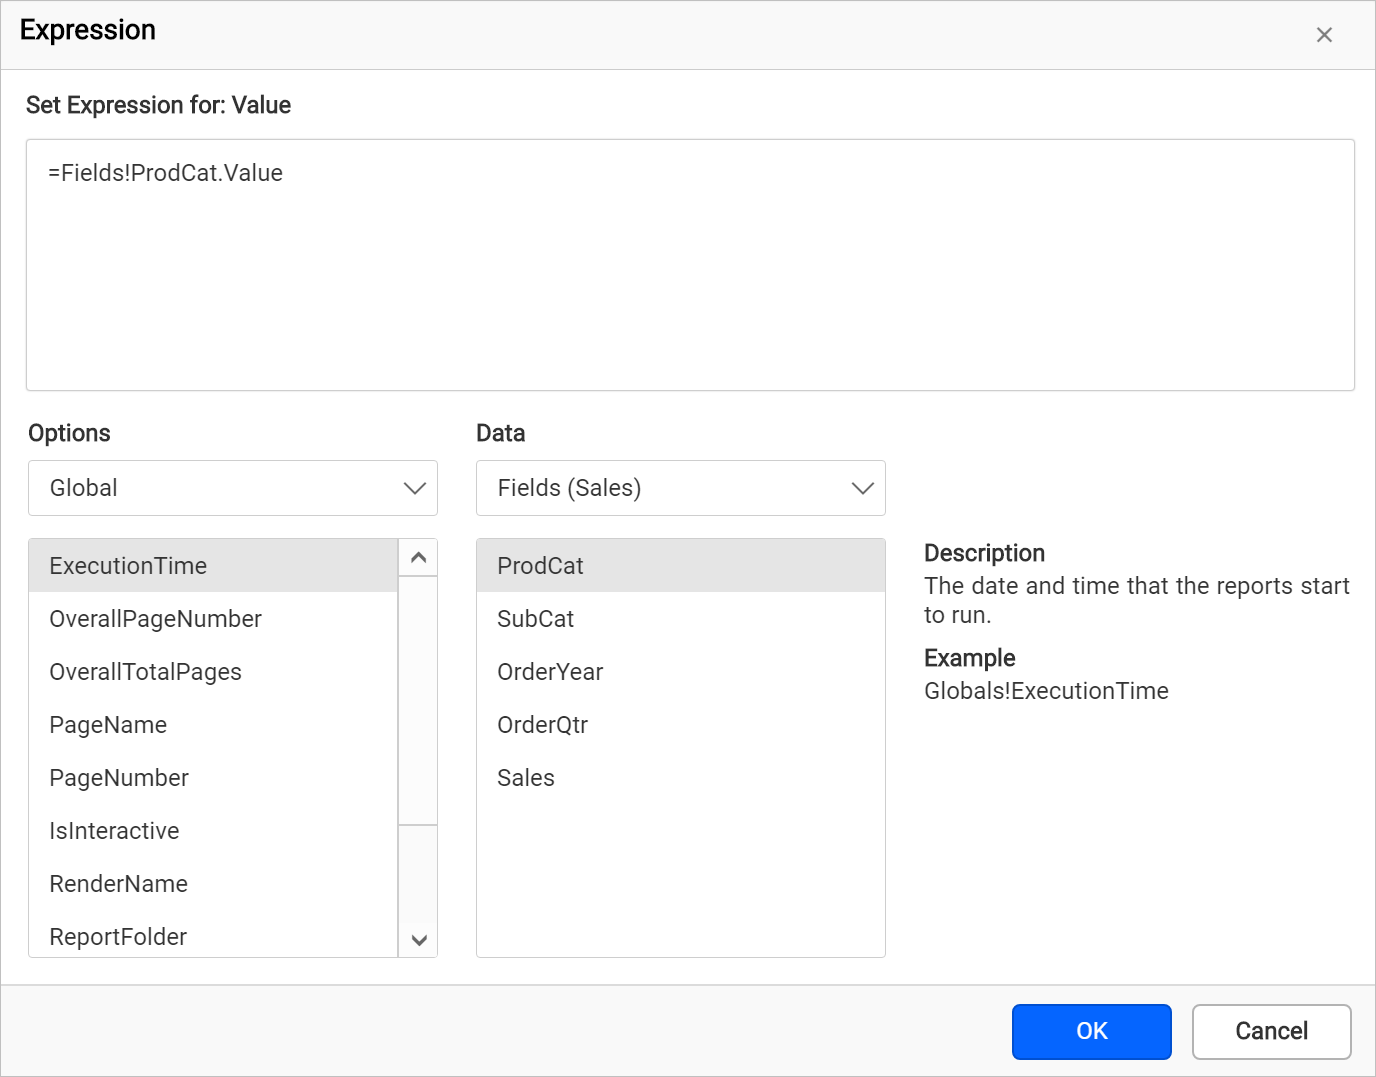
- Modify the expression as required and click on the
OKbutton.
Edit expression in properties panel
- Select a table cell, now the respective textbox properties will be listed in the properties panel.
- Click on the square icon in the right corner of the
Contentproperty.
- Click on the
Expressionoption in the menu. Now, theExpressionbuilder will be launched like below.
- Modify the expression as required and click on the
OKbutton. Now, the expression will be updated for respective cell.
- Assign dataset
- Assign data from data assign menu
- Assign data from properties panel
- Assign fields to tablix cell
- Drag and drop data fields
- Assign fields using data assign menu
- Textbox properties
- Assign or edit expression into table cell
- Set expression using data assign menu
- Set expression in properties panel
- Edit expression using data assign menu
- Edit expression in properties panel