Schedule report settings
This section explains how to use the schedule report settings to manage schedule control, compress the exported reports into a zip file by using the Enable File Compression option, and configure various export paths.
Additionally, you can set up FTP/SFTP and S3 bucket exports for scheduled reports. These settings allow you to specify where the reports will be saved, how they will be transferred to external storage locations, and control the scheduling of report exports.
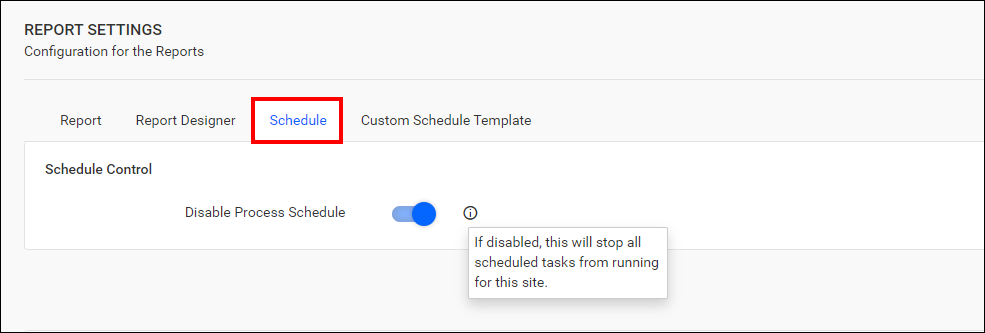
Schedule Control
-
Click on the
Settingsoption in the Report Server left-side panel and navigate to theReportstab.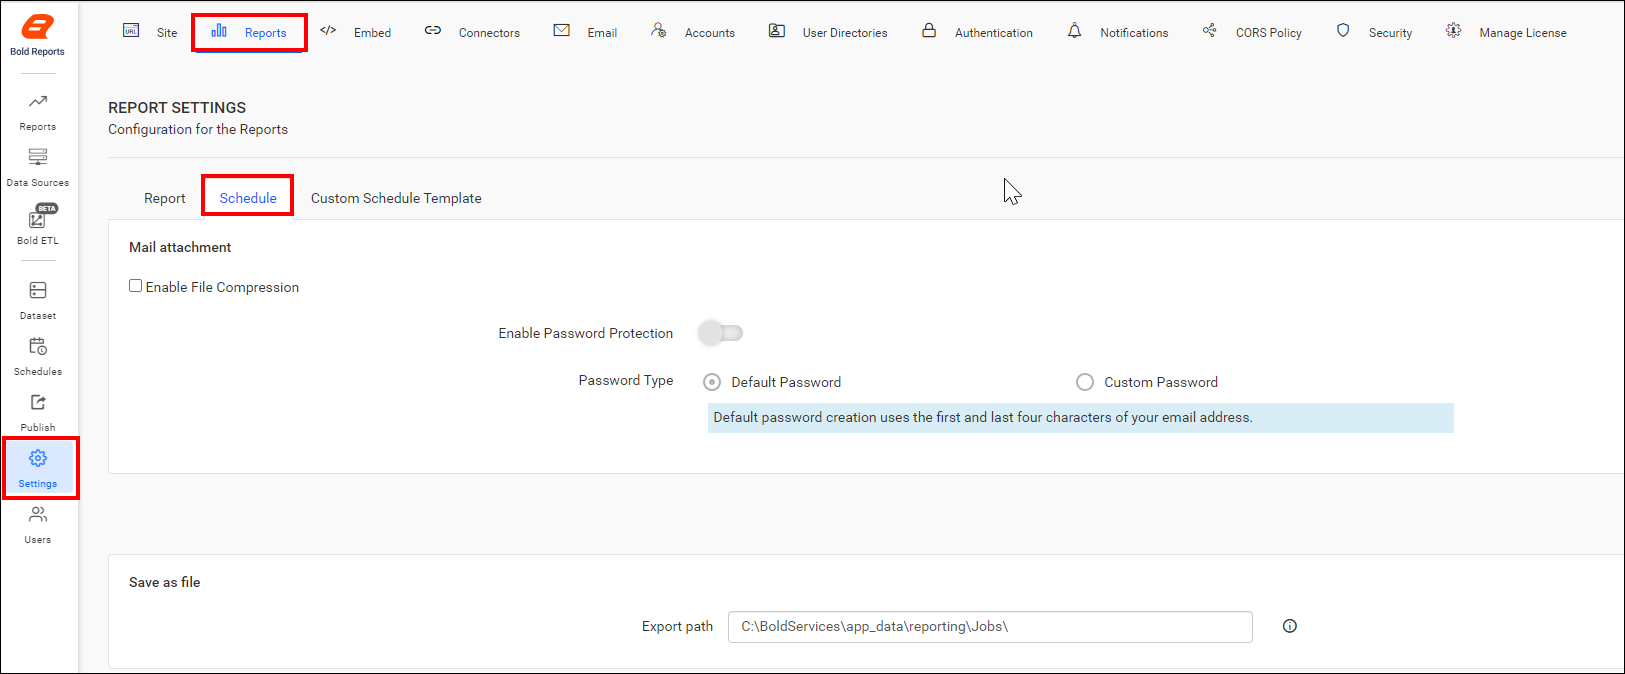
-
By enabling the Disable Process Schedule option, all scheduled tasks for this site will be stopped.
-
After configuring the schedule control settings, click the
Savebutton to apply the changes.
Enable file compression
-
Click on the
Settingsoption in the Report Server left-side panel and navigate to theReportstab. -
Switch to the
Scheduletab as shown in the following image: -
Check the
Enable File Compressionoption and click theSavebutton to save the settings. -
Exported reports can be made more secure with password protection by enabling the
Enable Password Protectionoption. TheDefault Passwordoption is selected by default.For the default password setting, the system will generate a password by combining the first four and the last four characters of the user’s email.
-
You can customize the password protection rules for exporting reports by choosing the
Custom Passwordoption. However, the username or first name is mandatory in the password condition.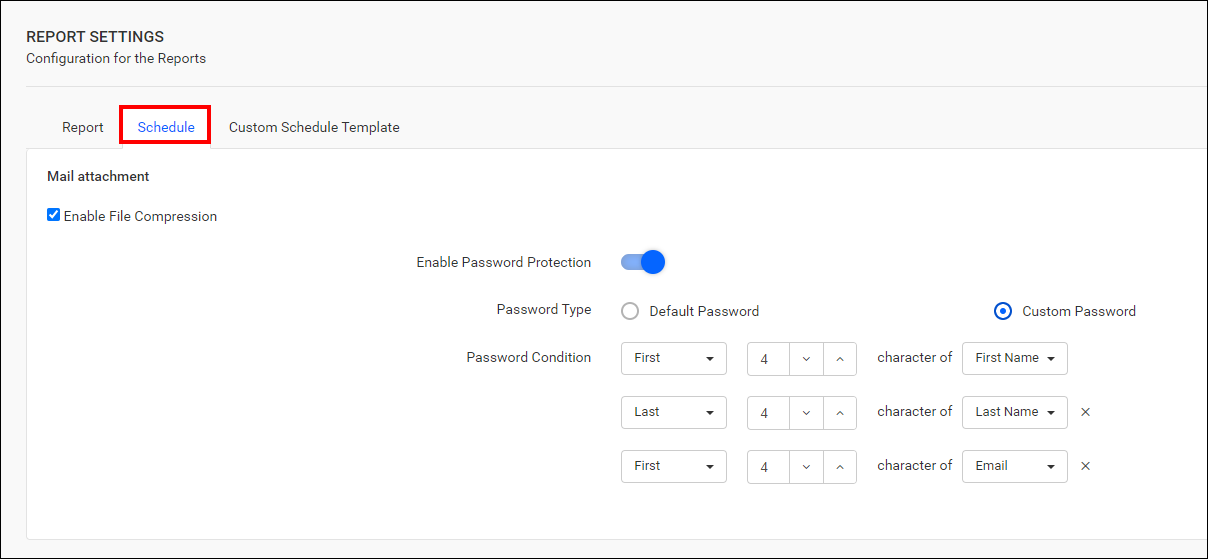
-
For instance, let’s consider a sample user with the following details:
First Name : John
Last Name : Michael
Email: [email protected] -
With this sample user as an example, we will explain the possible password combinations and their corresponding unlock passwords in the section below:
Password Rule Unlock Password The First four characters of the Email
+
The Last four characters of the First NamejohnJohn First four characters of First Name
+
First four characters of Last NameJohnMich First four characters of Email
+
Last four characters of Last Name
+
johnhael
Save as file
-
Click the
Settingsoption in the Report Server left-side panel and navigate to theReportstab. -
Switch to the
Scheduletab as shown in the following image: -
We need to save the export path value for exporting reports to the specified location. By default, the directory root path will be C:\BoldServices\app_data\reporting\Jobs.

-
You can edit the default directory root path value provided in the “Export path” option, and then click on the
Savebutton to save the changes.
FTP or SFTP Settings
You can export reports to an FTP location by configuring the respective server credentials. To do this, enable the FTP / SFTP Location Export checkbox. After you have entered the credentials, make sure to save the changes to apply them.

S3 Bucket Settings
You can export the reports to an Amazon S3 bucket by configuring the respective bucket details. To do this, enable the S3 Bucket Export checkbox.
-
Access Key: Provide the access key for your Amazon S3 bucket.
-
Secret Key: Provide the secret key for your Amazon S3 bucket.
-
Bucket Name: Enter the name of the S3 bucket.
-
Region: Specify the region where your S3 bucket is located.

After entering the required details, click the Save button to save the settings.