Connect Snowflake with Bold Data Hub
The Bold Data Hub Snowflake connector loads data from a Snowflake data warehouse into Bold Reports®. Snowflake is a cloud-based data warehouse that uses SQL to manage and analyze large amounts of data. Snowflake is popular for its speed, easy scaling, and ability to handle big data. Teams often use Snowflake in business reporting, data analytics, and machine learning.
Connection Properties
The Snowflake connector in Bold Data Hub reads the following properties from the config section of a YAML file:
Connectorname: Snowflake
user: <>
password: <>
database: <>
account: <>
Example Configuration
The following Bold Data Hub YAML template shows a complete Snowflake extractor configuration:
version: 1.0.1
encrypt_credentials: true
union_all_tables: true
add_dbname_column: false
plugins:
  extractors:
    - name: Snowflake
      connectorname: Snowflake
      schemaname:
      config:
        user: <>
        password: <>
        account: <>
        database: <>
      properties:
      metadata:
      select:
      - tablename
How do I connect Snowflake in Bold Data Hub?
You connect Snowflake by creating a pipeline in Bold Data Hub and adding the Snowflake template to it.
-
Click the
Data Hubicon on the Navigation Pane.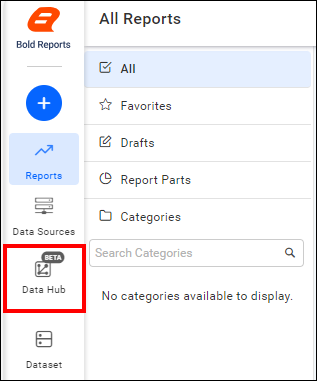
-
Click
Add Pipelineand enter a name for the new pipeline.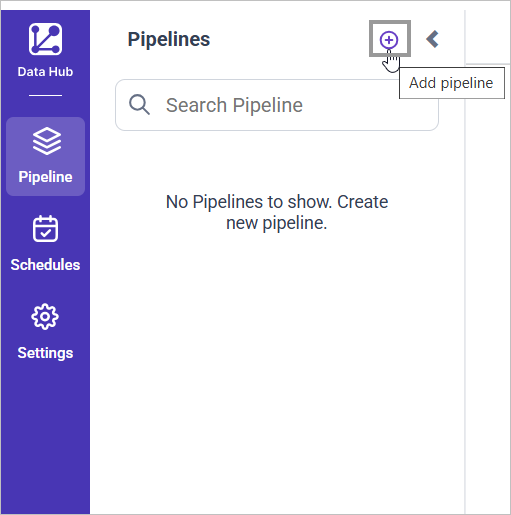
-
Select the newly created pipeline and add the
Snowflaketemplate.
-
Update the required details in the template, using the configuration parameters below.
-
Click Save and choose the destination to save the pipeline.

Creating a pipeline in Bold Data Hub automatically creates a data source in Bold Reports®. The Bold Reports® data source is a live data source to the destination database used in Bold Data Hub.
Configuration Parameters
The Snowflake template in Bold Data Hub uses these parameters:
| Parameters | Description |
|---|---|
| Username: | Provide the username to authenticate with the Snowflake server. |
| Password: | Provide the password to authenticate with the Snowflake server. |
| Account: | Specify the Snowflake account identifier (e.g., xy12345-kc60294). |
| Database: | Specify the name of the Snowflake database from which data will be extracted. |
| Schema: | Define the schema within the database where the tables reside. |
| Select: | Tablename(s): Specify the table name list to load tables from the Snowflake server. |
How do I schedule the Snowflake pipeline?
You schedule the Snowflake pipeline in Bold Data Hub from the schedules tab, or you run it on demand.
-
To configure interval-based scheduling, click the schedules tab, select the created pipeline, click the schedule icon, and configure the schedule.


-
For an on-demand refresh, click the
Run Nowbutton.
-
Check the schedule history with the history option and the logs.
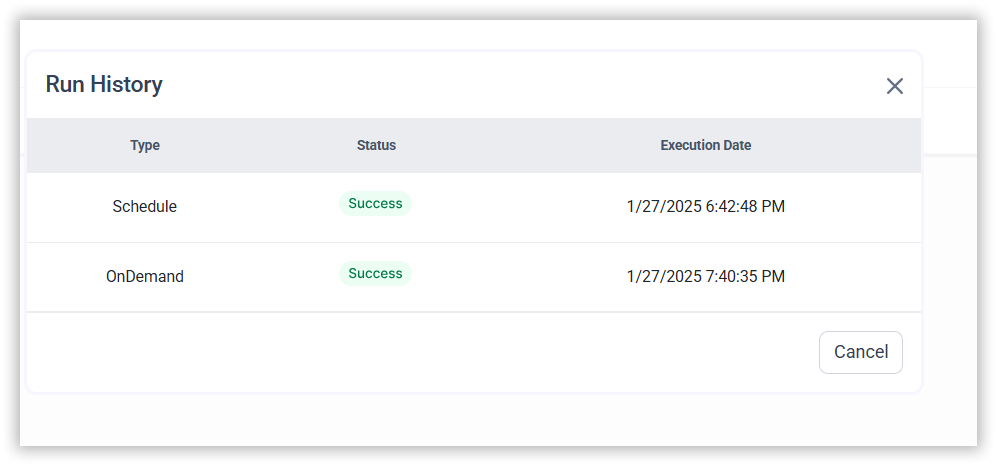
-
Click Logs to see whether the run is completed and the data source is created in Bold Reports®.

-
Click the
Edit DataSourceoption to view the created tables.
Frequently asked questions
Which values does Bold Data Hub need to connect Snowflake?
The Bold Data Hub Snowflake connector needs a username, password, account identifier, and database. You can also define the schema and the tables to load.
What does a Snowflake account identifier look like?
A Snowflake account identifier looks like xy12345-kc60294.