Data sources management in Report Server
You can create and store a data source on the Report Server when you have a data source that you use often. When you create a data source on the Report Server, it is considered a shared data source that can be used by multiple reports.
It is recommended to use shared data sources as much as possible. They are easier to manage and help keep reports and access to data sources more secure. shared data sources are always placed on the Data Sources page and are accessible to users depending on their permissions.
This section covers data source management in the Report Server, allowing you to add, update, share and delete shared data sources. The following image shows the list of options available for managing data sources.

Add or create data sources
A data source can be added to the Report Server only if the user has Create All Data Sources permission.
Steps to add a data source
-
Click on the
Create Data Sourcebutton from the Data Sources listing page.
While adding a data source, we can also add a new dataset to the Report Server either by using
Create New Data sourceoption or theUse existing Data sourceoption.
Create New Datasource
-
Click on the
Create New Datasourceoption; it will show the enabled connectors, as shown in the image below.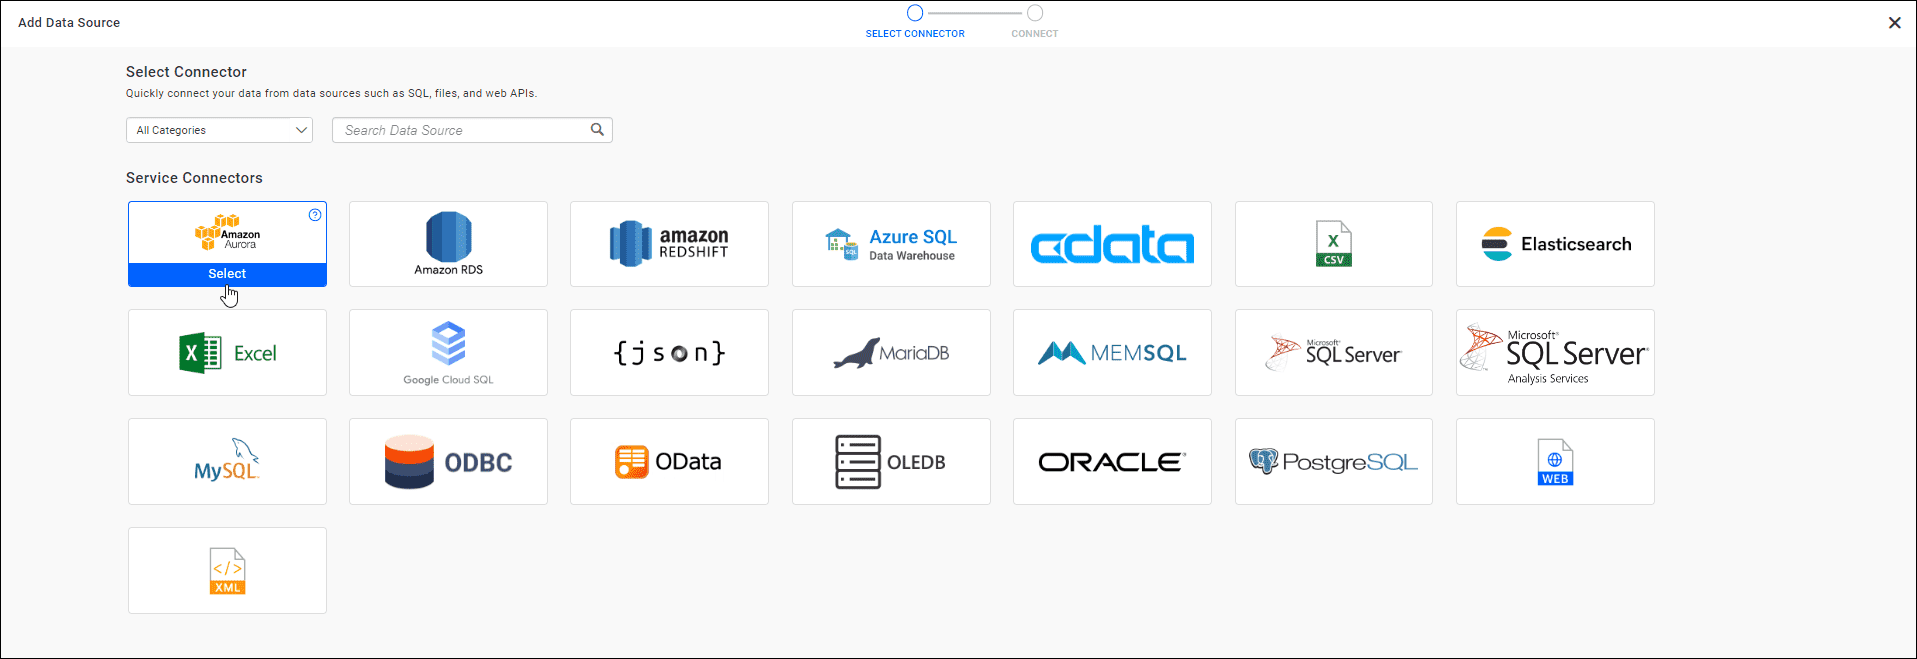
-
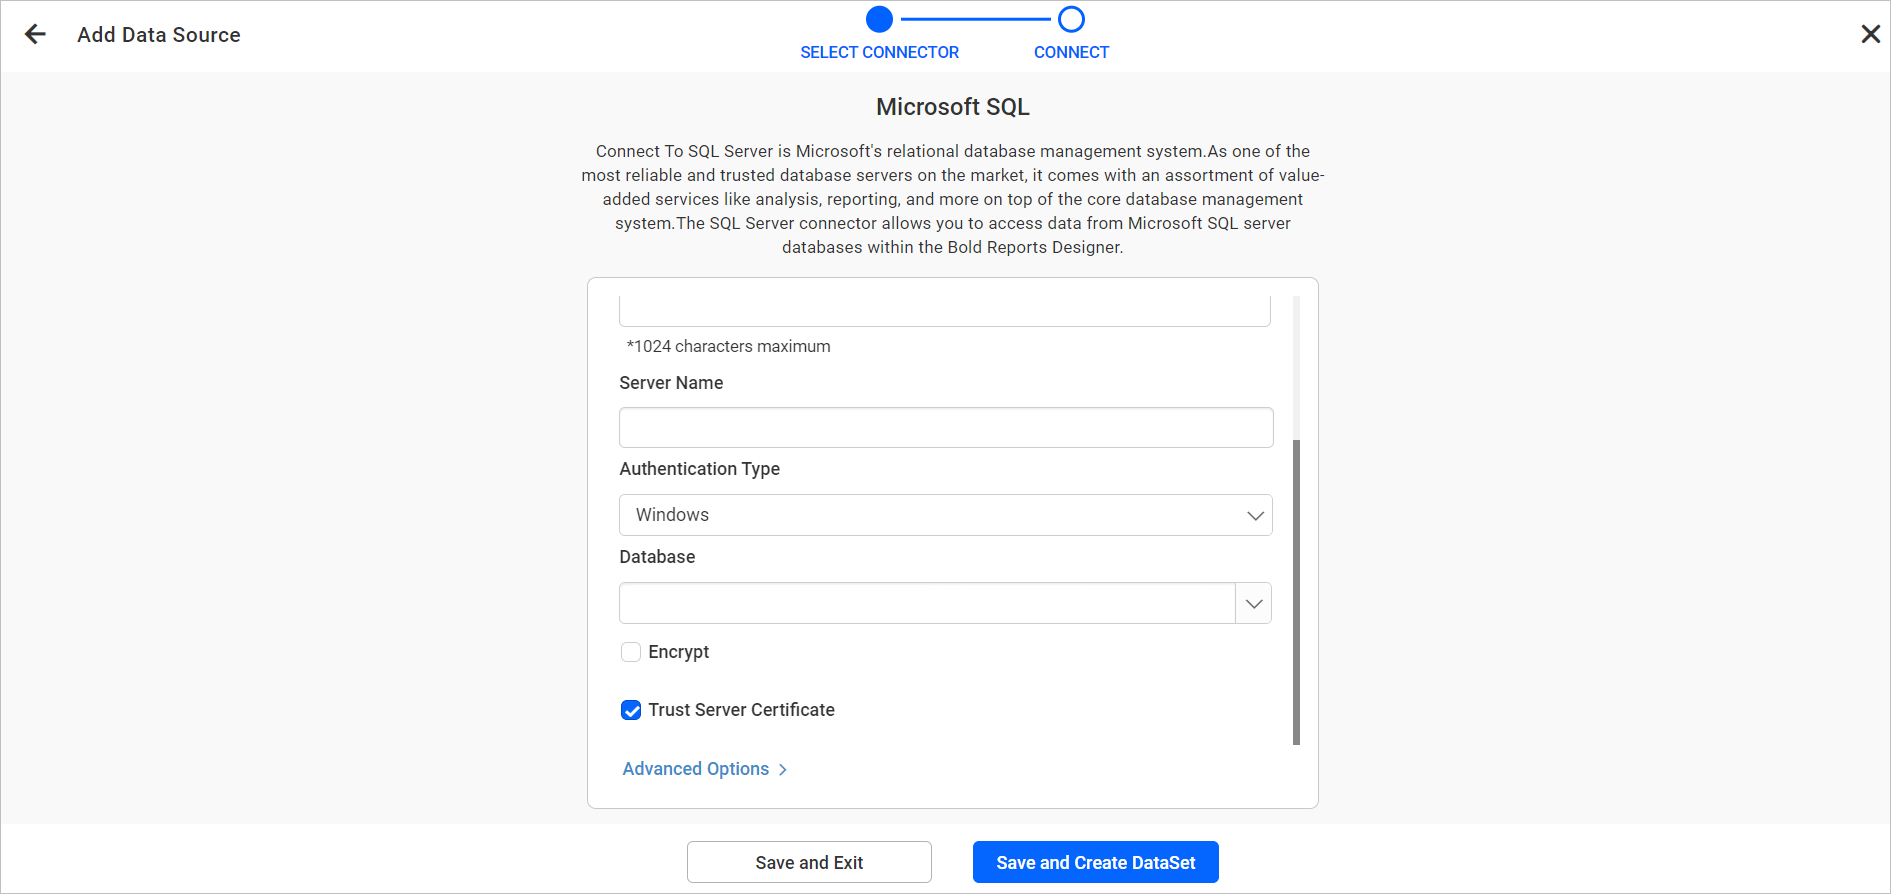
Choose the data source, enter the name, description, and other required details of the data source, and then click on the Save and Create DataSet option.
-
Enter the name and description of the dataset and click on the
Proceed to Query Designeroption.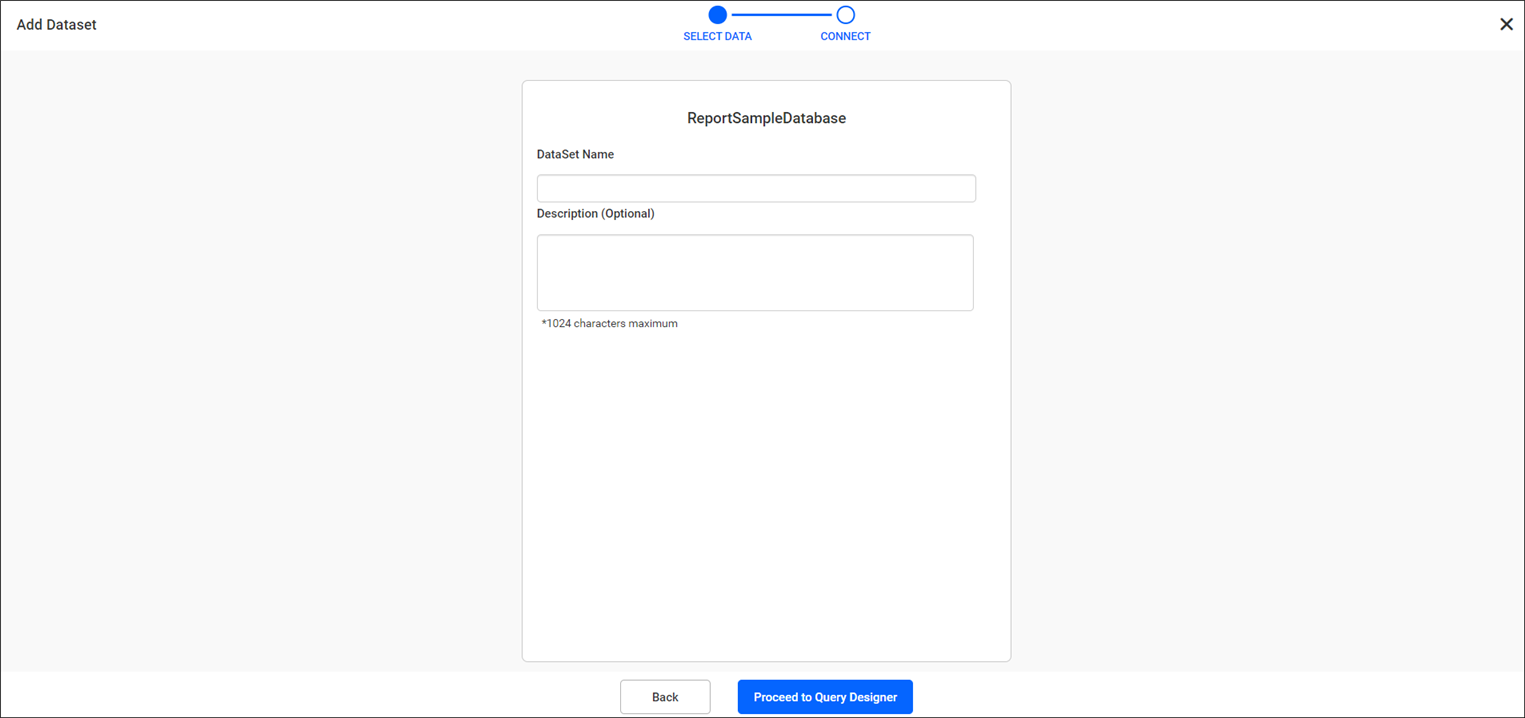 .
. -
After designing the dataset, click on the
saveoption.Read, Write, Deletepermission for theSpecific Data Sourcewill be added for the user who created the data source.Note: Security Content
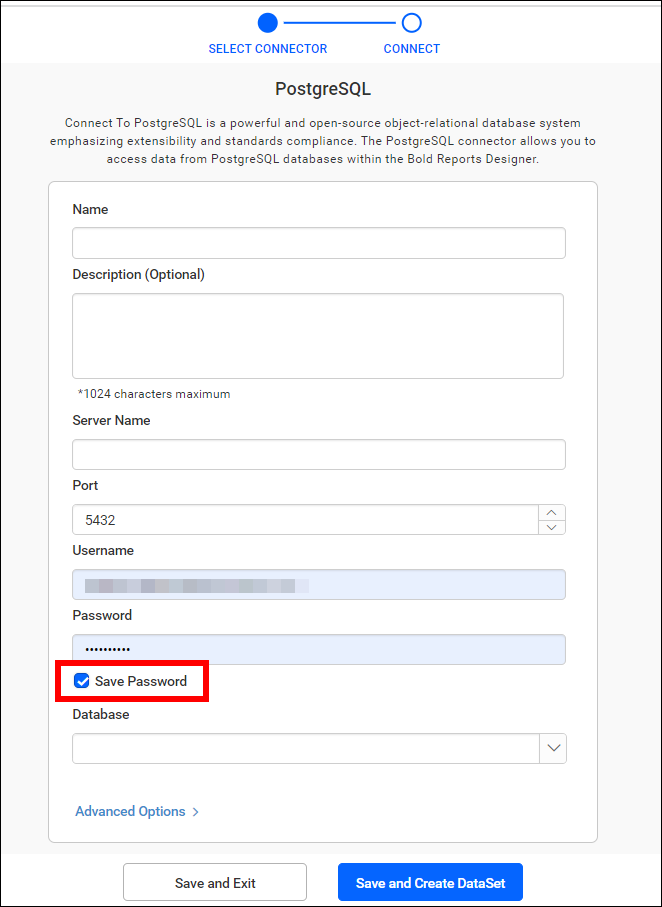
- A password will be encrypted and saved in the database.
- When the
save passwordoption is not enabled, the credentials will not be stored in the database, and the system will prompt for the username and password on every occasion. - When the
Save Passwordoption is enabled, the password is encrypted, and the credentials are stored in the database, preventing the system from prompting for the username and password on every occasion.
Use existing Datasource
-
Click on the
Use existing Datasourceoption when creating a dataset; it will show all existing data sources.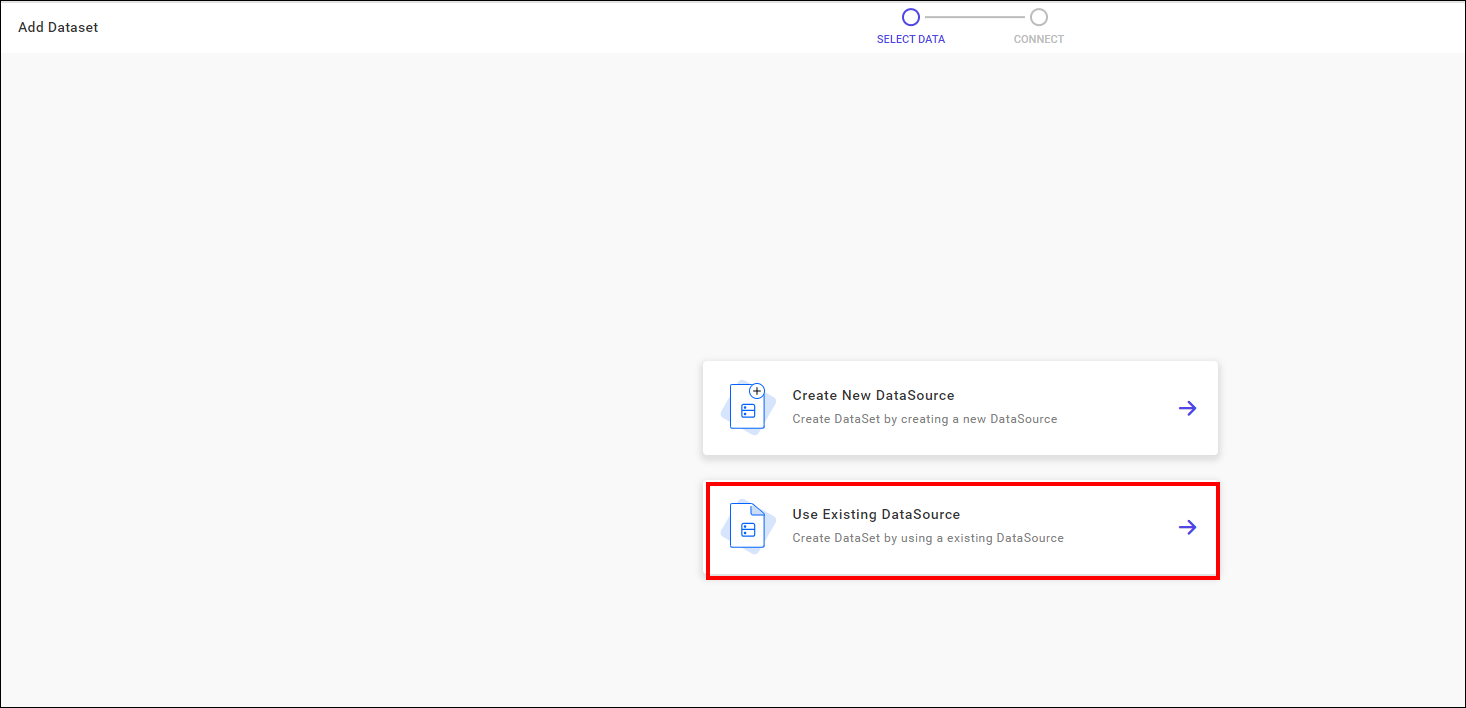
-
Select the existing data source and click on
Connectbutton to create a new dataset.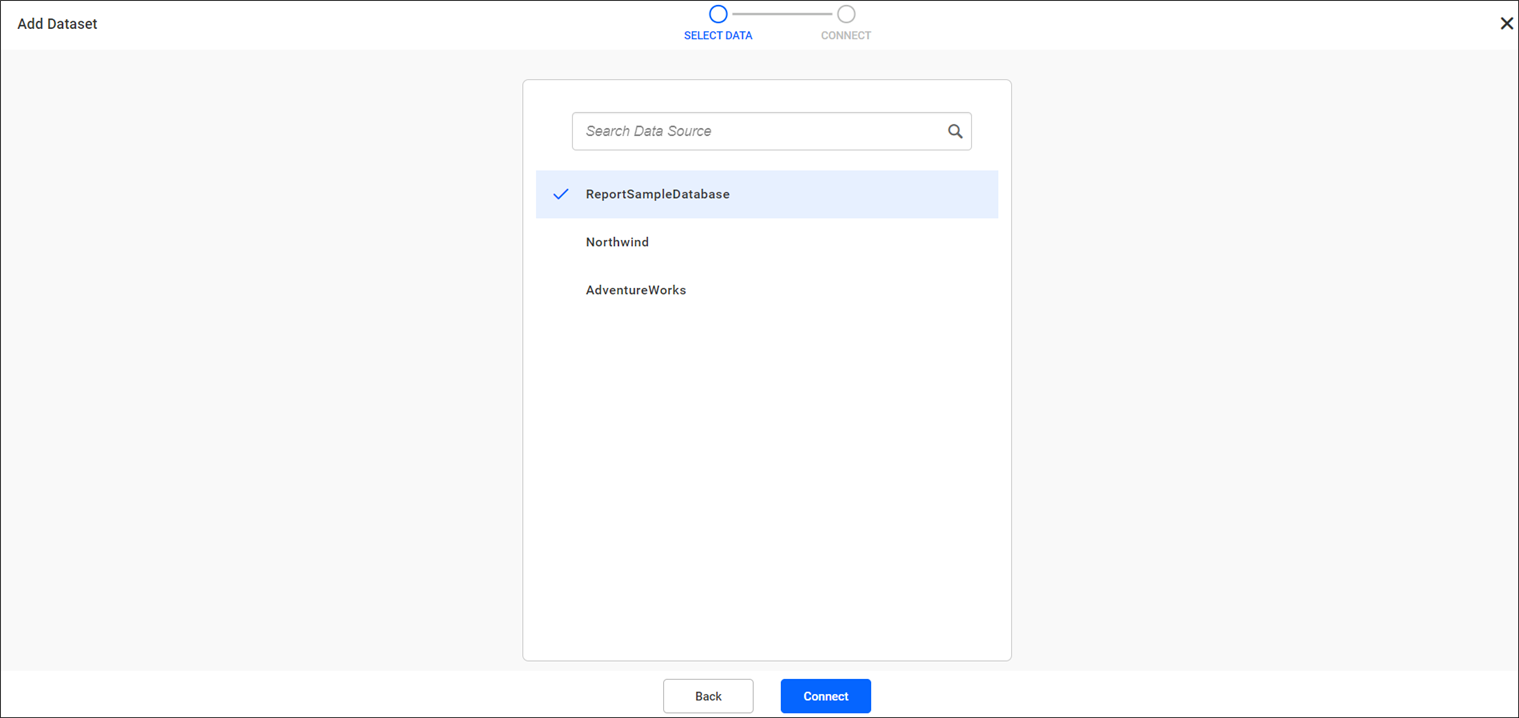
-
Enter the name and description of the dataset and click on the
Proceed to Query Designeroption. .
. -
After designing the dataset, click on the
Saveoption.Read, Write, Deletepermissions for theSpecific Data Sourcewill be granted to the user who created the data source.
Share data sources
This section explains on how to share data sources with the other users in the Report Server.
Steps to share a data source
-
Click the
Actionsmenu button in the Data source grid context menu and selectSharing Permissionsoption.
-
Click the
Manage Accessbutton.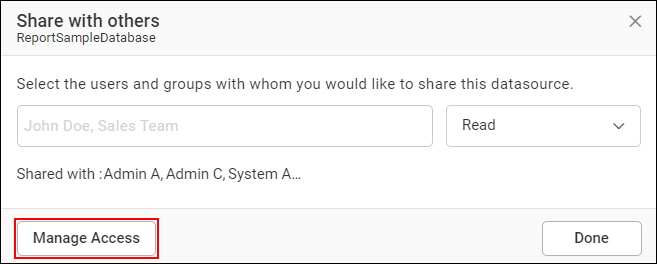
-
Select the permissions to access and the users or groups to share the data source.
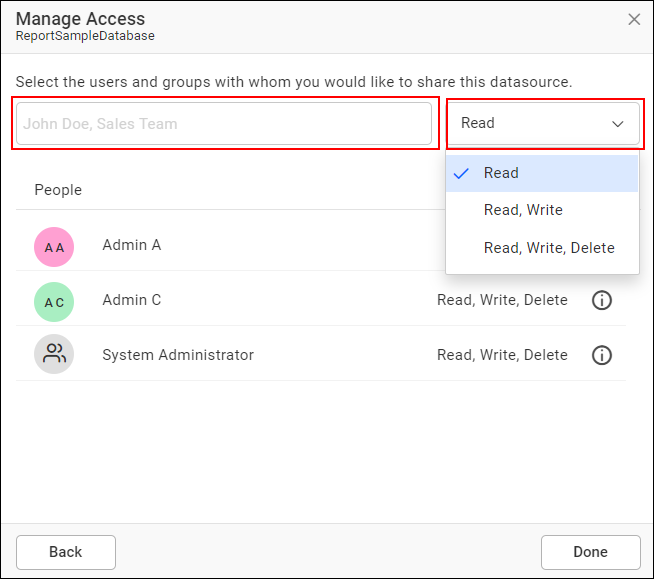
-
After selecting the access and users or groups, click the
Addbutton.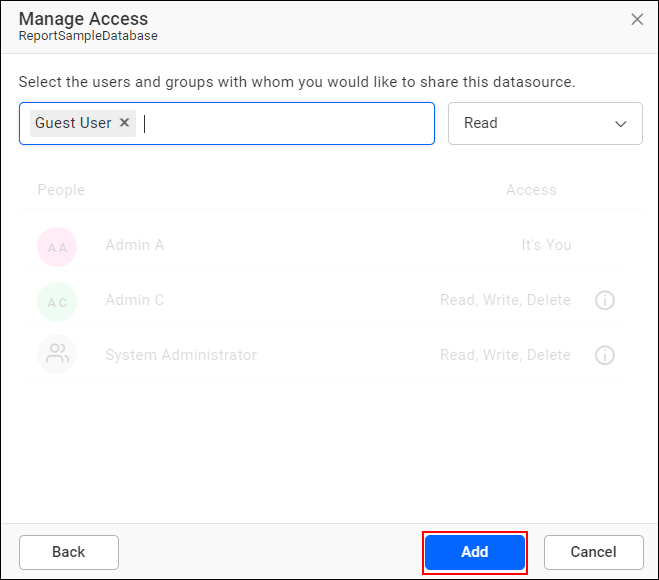
Note: Only users who have share permission can share the data source with other Report Server users.
Remove data source Permission
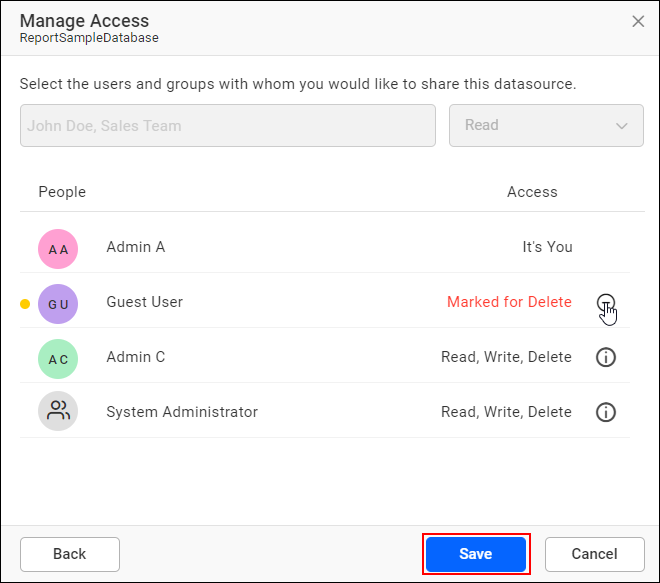
The user with specific permissions can remove the shared report permissions using the Remove icon in the Access column.
Info
-
Click the Actions menu button in the Data source grid context menu and select
Info.
-
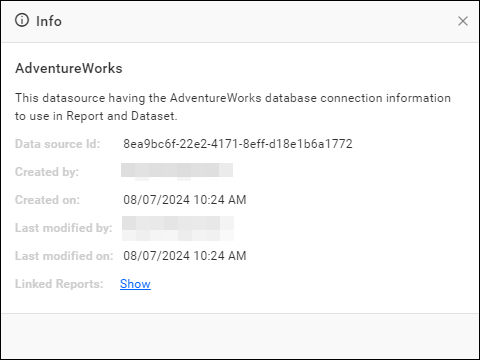
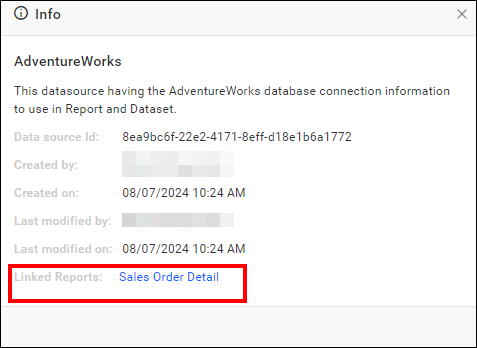
The Data Source info action provides information about the Data source Id, Created by, Created on, Last modified by, Last modified on, and Linked Reports.
-
Click
Showto view the linked reports.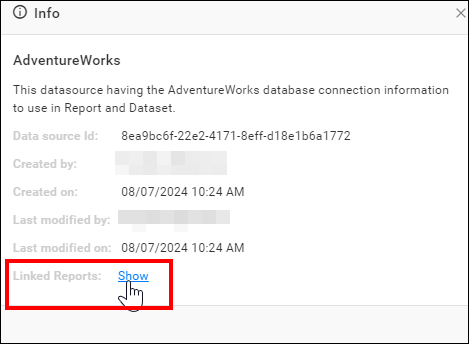
Edit Datasource as XML
This XML editor provides a user-friendly interface for making necessary modifications to the data source in the Report Server. This means you can make changes to the data source without downloading it or using a separate text editor.
-
Click the
Actionsmenu button in the data source grid context menu and selectEdit As XMLto edit a data source.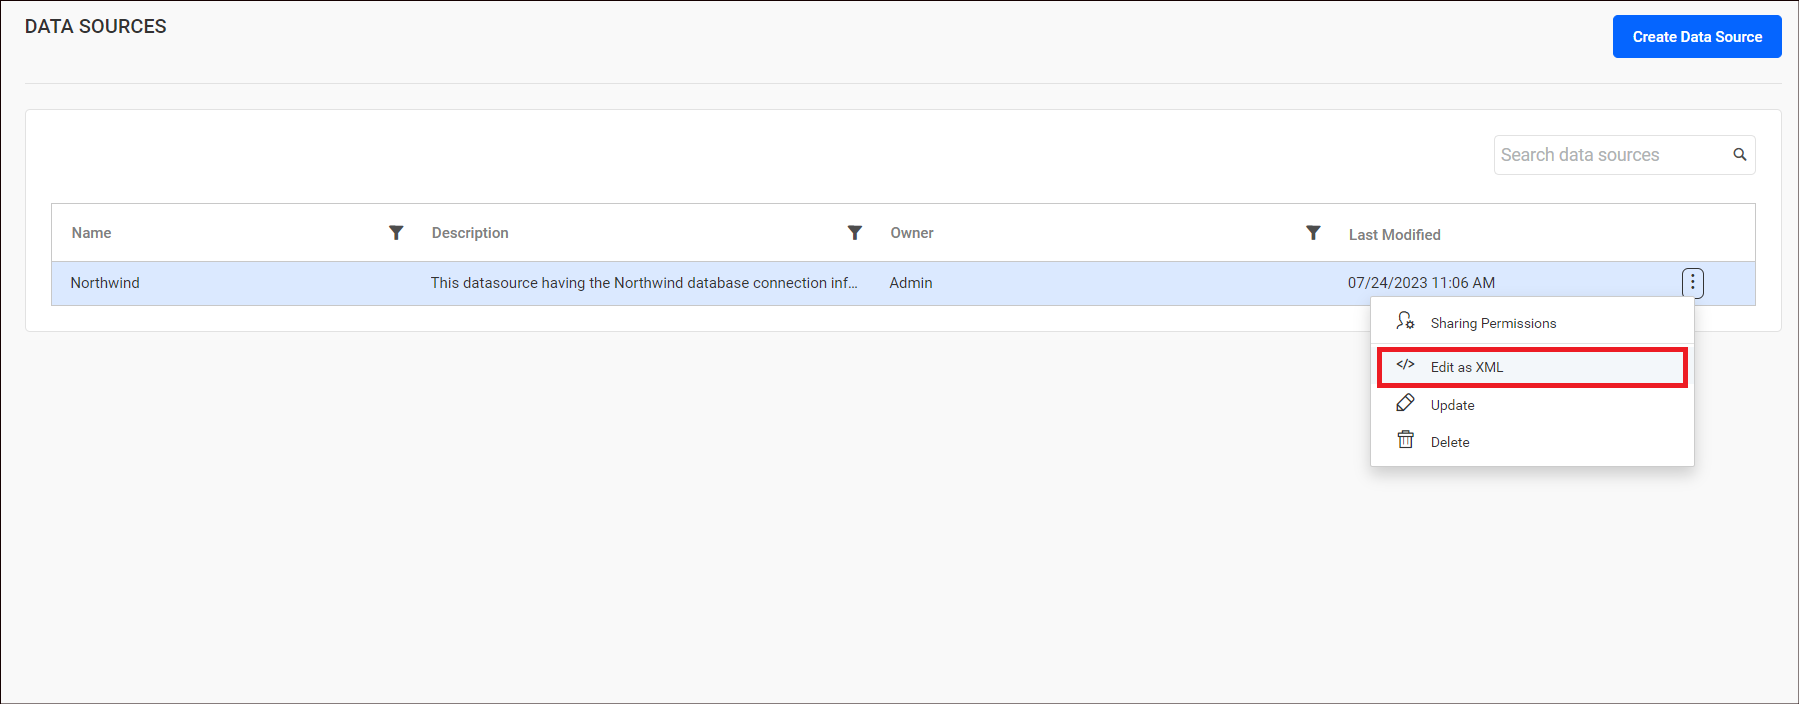
-
The respective data source will be opened in a new tab as XML, allowing you to make modifications, and you can save the edited data source by publishing it from the XML editor.

Update data sources
This section explains how to update the data sources in Bold Reports®.
Steps to update the data source
-
Click the
Actionsmenu button in the data sources grid context menu and select theUpdateoption.
-
The name, description and other required details can be changed by selecting the
Updateoption in the update data source dialog box.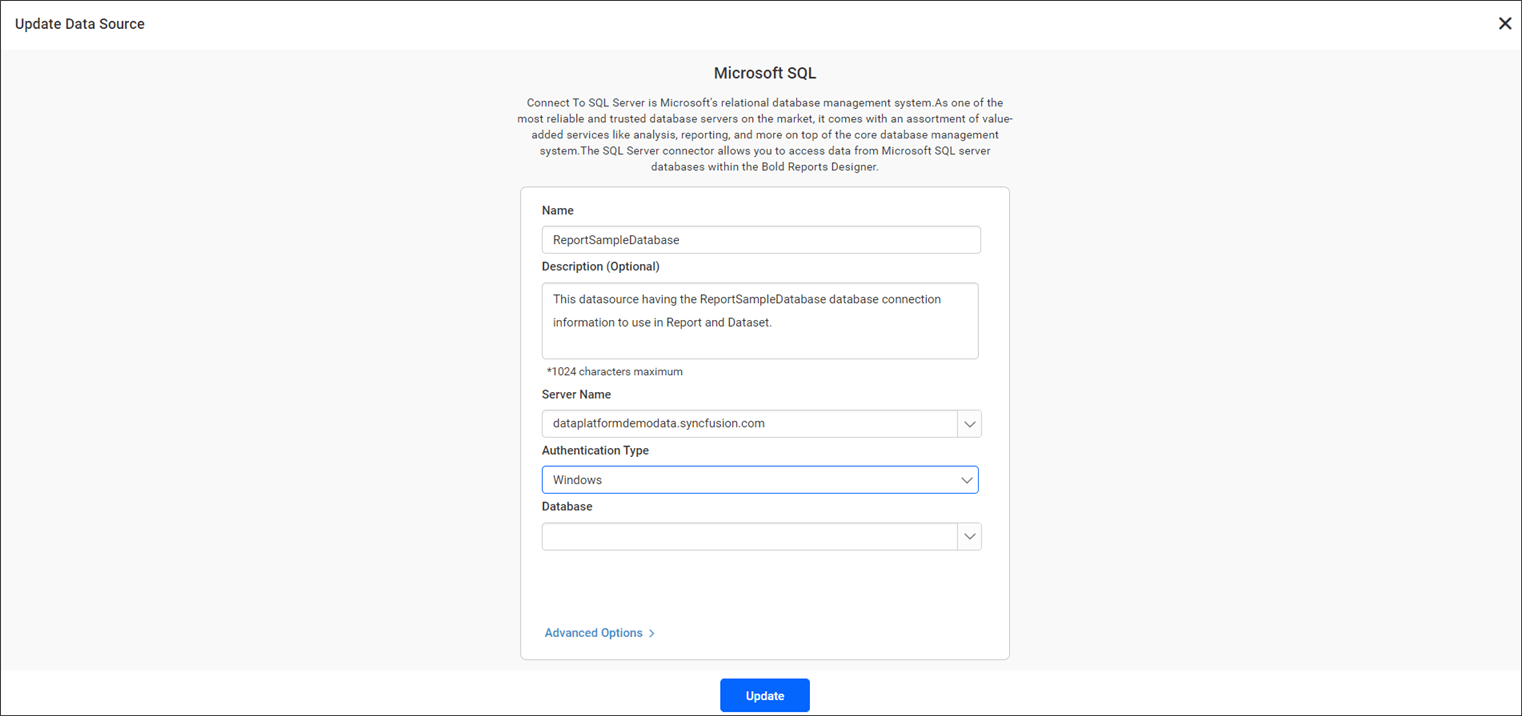
Note: This option is available in Bold Reports® On-Premise Edition from version
2.2.28onwards.
Delete data source
Data sources can also be deleted from the Report Server when they are no longer required.
Click the Actions menu button in the data sources grid context menu and select Delete to delete the data source.

Data Sources cannot be deleted if a report or dataset uses them.
REST API Reference
The following table illustrates the list of available APIs related to data sources in Bold Reports® On-Premise.
| Action | HTTP Method | Endpoint | Description |
|---|---|---|---|
| AddDataSource | POST | /api/site/{tenant-name}/v1.0/reports/data-sources | Adds a new data source to the server. Datasource details must be passed as input. |
| UpdateDataSource | PUT | /api/site/{tenant-name}/v1.0/reports/data-sources | Updates the data source on the server. Updated data source details must be passed as input. |
| GetDataSources | GET | /api/site/{tenant-name}/v1.0/items | Returns the list of data sources for the current user. ItemType should be Datasource. |
| GetDataSourceLocation | GET | /api/site/{tenant-name}/v1.0/items/{itemId}/location | Returns the item location of the specified data source. A specific data Source ID should be passed as a path parameter. |
| IsDataSourceNameExists | POST | /api/site/{tenant-name}/v1.0/items/is-name-exists | Returns an item's existence, whether the given data source name already exists or not on the server. The data source name and ItemType as data Source should be passed in request body. |
| GetDataSourceDetail | GET | /api/site/{tenant-name}/v1.0/items/{id} | Returns the specified datasource details from the server. DataSource item ID should be passed as a path parameter. |
| DeleteDataSource | DELETE | /api/site/{tenant-name}/v1.0/items/{id} | Deletes the specified data source from the server. DataSource item ID should be passed as a path parameter. |