Manage Users in UMS
This section explains how to add, update, activate and delete users.
Users can only be added,edited, or deleted by those with UMS admin access.
Add new users
New users can be added to UMS individually or in bulk by using CSV import.
Add individual users
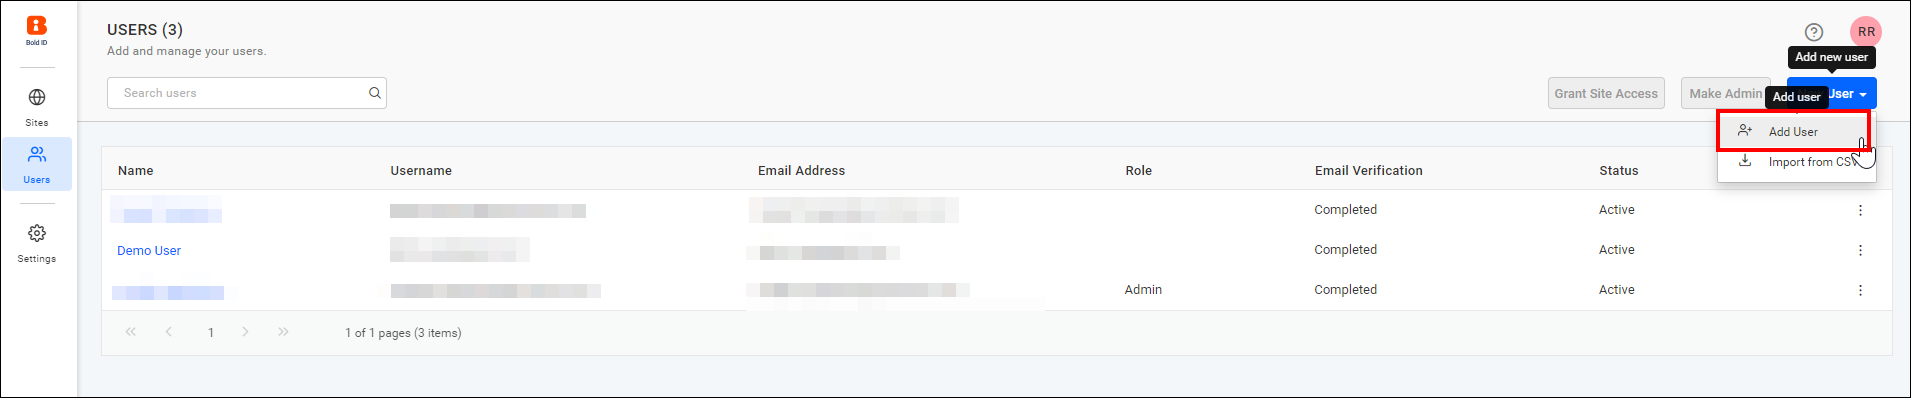
To add a new user in UMS, click New User and then Add User from the User Management page.
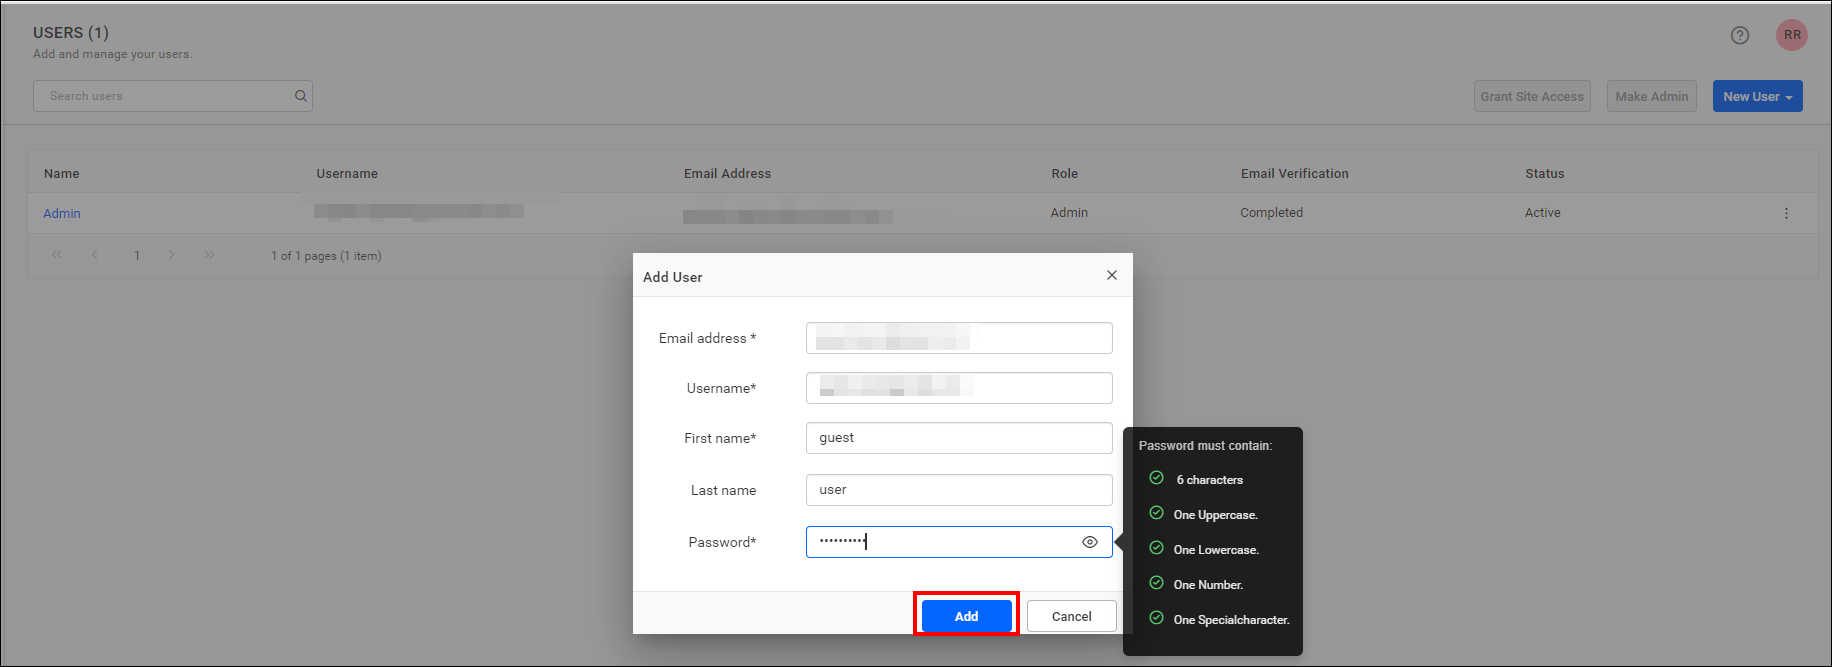
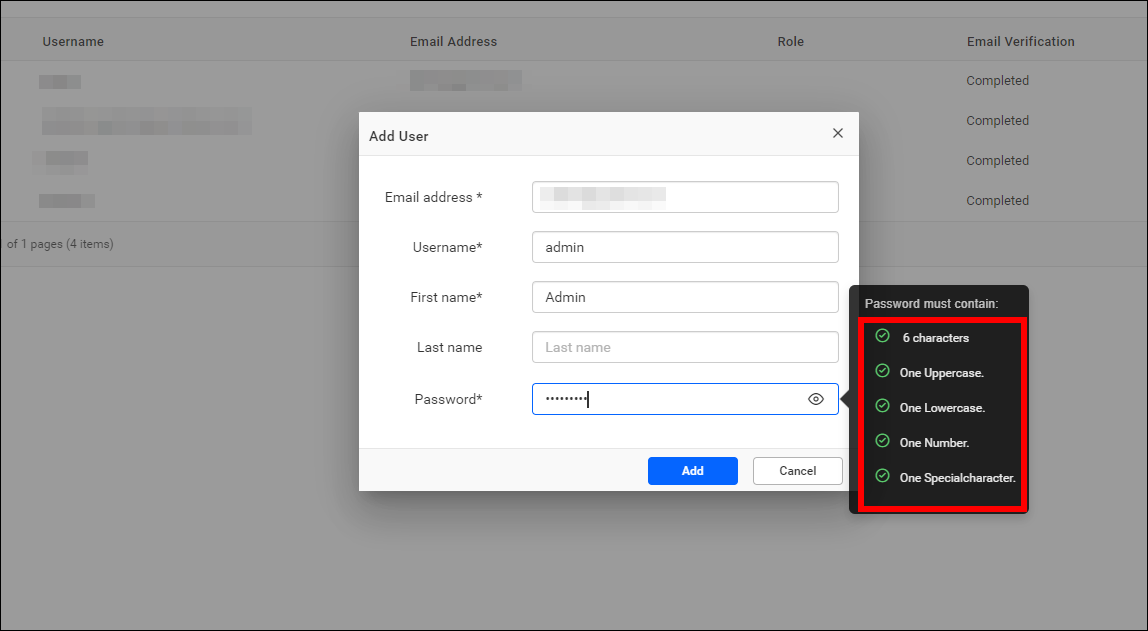
The Add User dialog will be shown as in the image below.

NOTE:
- If the account activation mode is set to Automatic, new users will be activated automatically.
- If the activation type is set to Email, users will receive an email to activate their account. Activation will occur after verifying the email. By default, the Account Activation Mode is set to Automatic.
- Please refer to the Account settings page for more details.
| Automatic activation | Email activation |
|---|---|
Fill out the form with a Username, Email address, First name, Last name and Password, then click Add. |
Fill out the form with a Username, Email address, First name and Last name and then click on Add. |
| Please refer to this section for password requirements. | To activate the user, please check the Activate Users section for more details. |
Import users from CSV
The section will explain how to import the users from a CSV file, which can be downloaded from the designated location in UMS.
To automate the process of adding a large number of users to UMS, you can download the CSV template file, add the users to it, and then import the file.
Add users from CSV file
In UMS, click Import from csvto begin importing the CSV file.

CSV file Requirements
The first row in the CSV template should contain the column headings. UMS will assume that the data from the second line in the file represents the user information, and the following columns are mandatory in the downloaded CSV file.
| Automatic Activation | Email Activation |
|---|---|
| Username | Full Name |
| Full Name | |
| Password | - |
Follow the steps below to add users using the CSV template:
-
Download the CSV template.

-
Add users to the CSV file, Save the file, and then upload it.

-
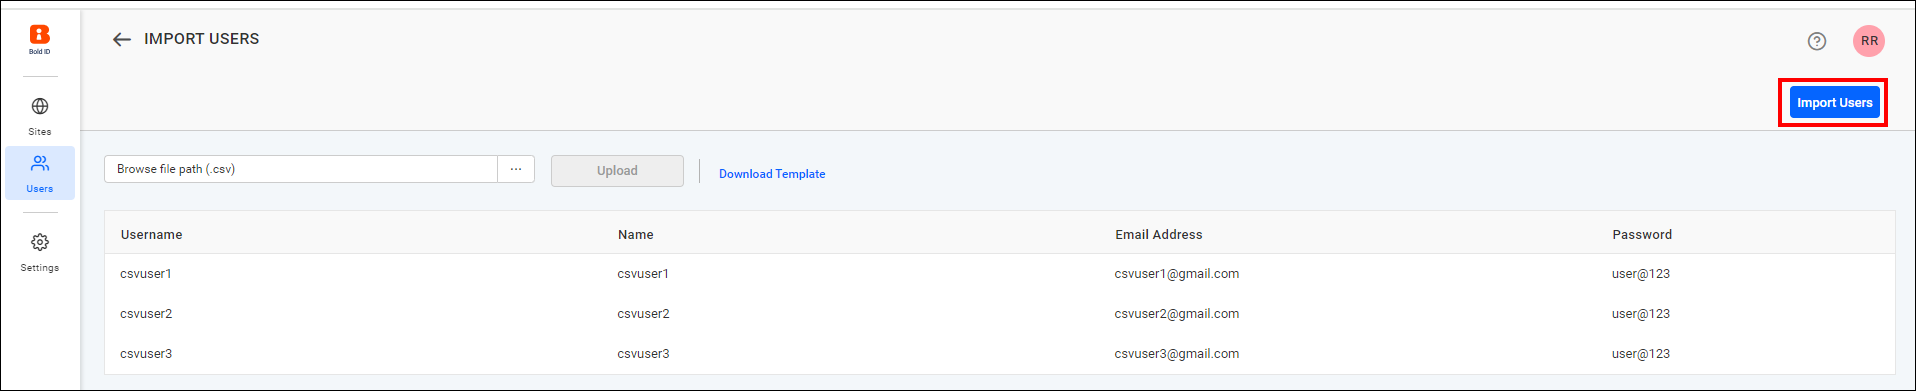
After uploading the file, the user details will be displayed in the grid, as shown in the image below. Click Import Users to add the users.

-
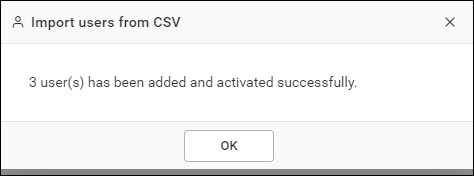
After uploading the users in UMS, the results are displayed as below.
Password Requirement
The password must meet the following requirements:
It must contain:
- At least 6 characters,
- 1 uppercase letter,
- 1 lowercase letter,
- 1 numeric digit,
- 1 special character.
Activate users
After the user is added, a new account will be created, and an account activation email will be sent to the email address provided, containing an activation link to activate the Bold Reports® account.
The activation link sent to the user will be valid only for 2 days. If the user does not activate within this period, a new activation link can be sent to the user from the user edit page.
The account will remain inactive until the user activates it from the activation email.
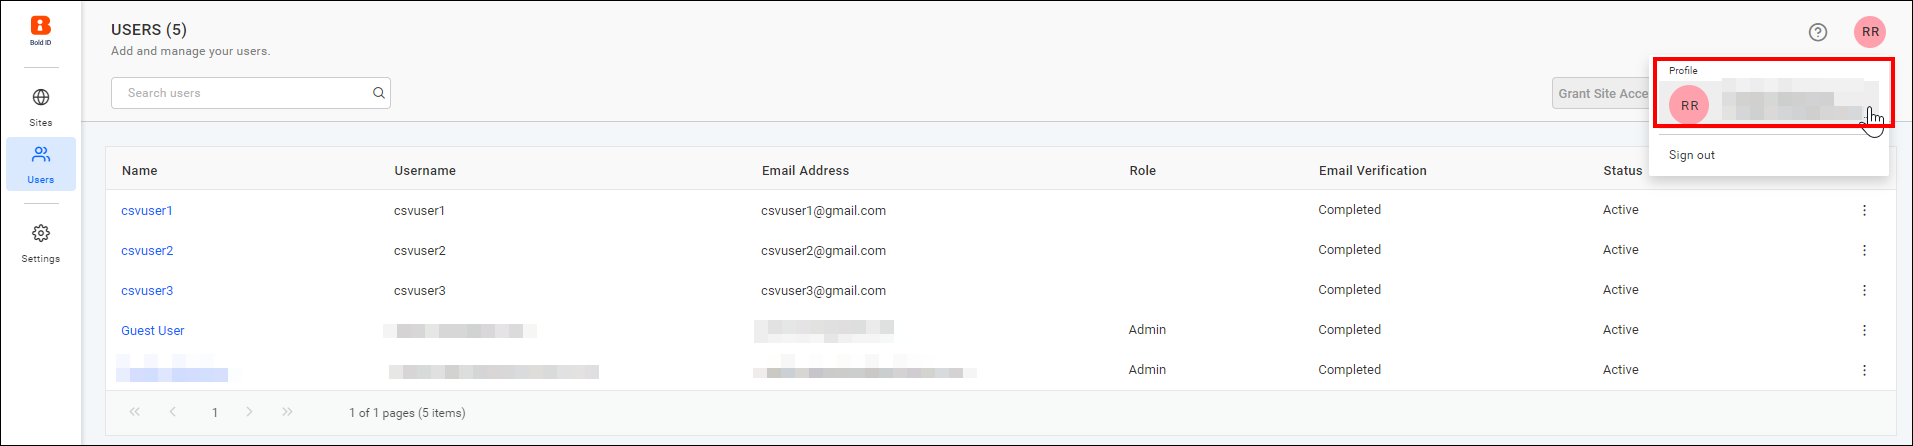
Edit users
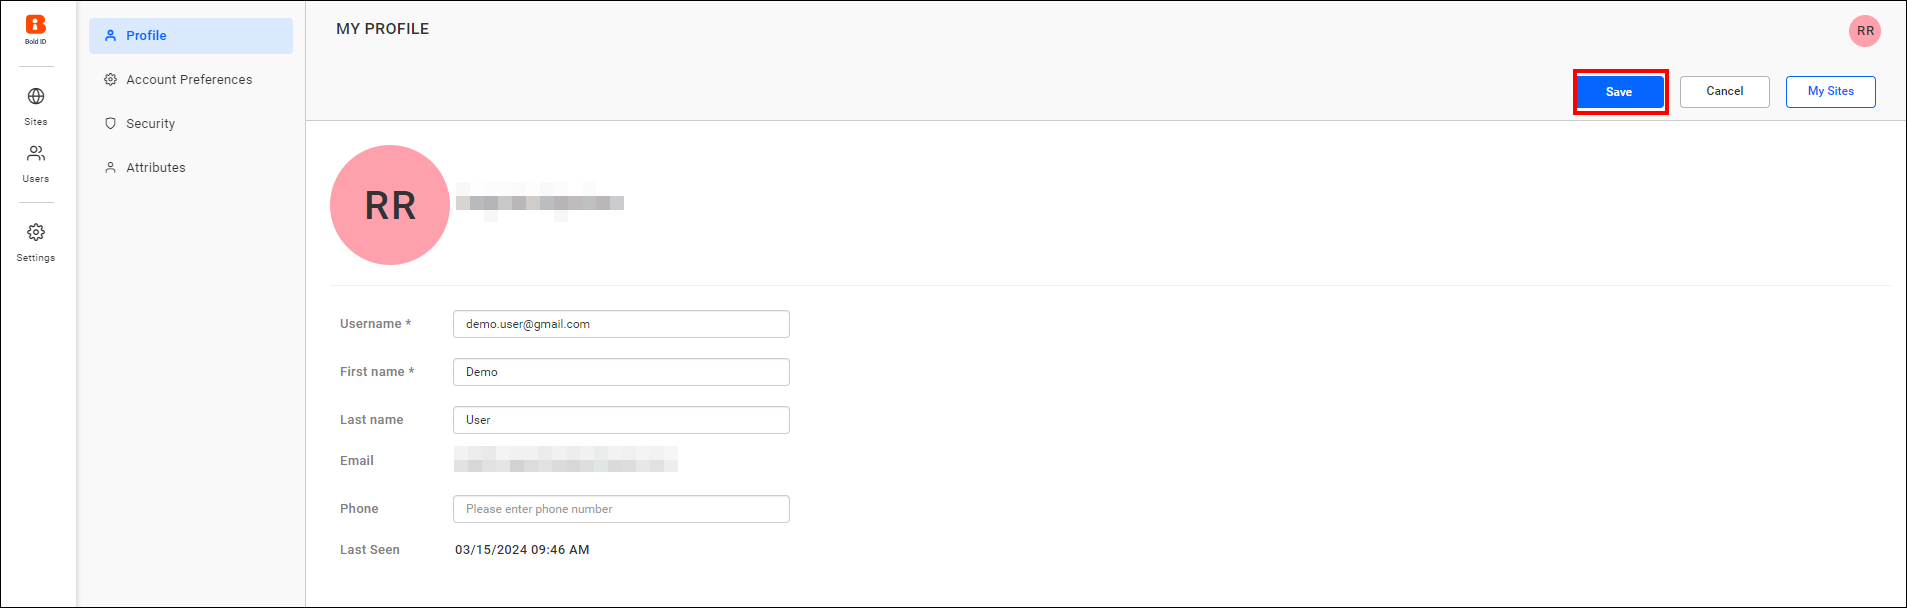
User profile details can be edited by the users edit page as shown in the below image.
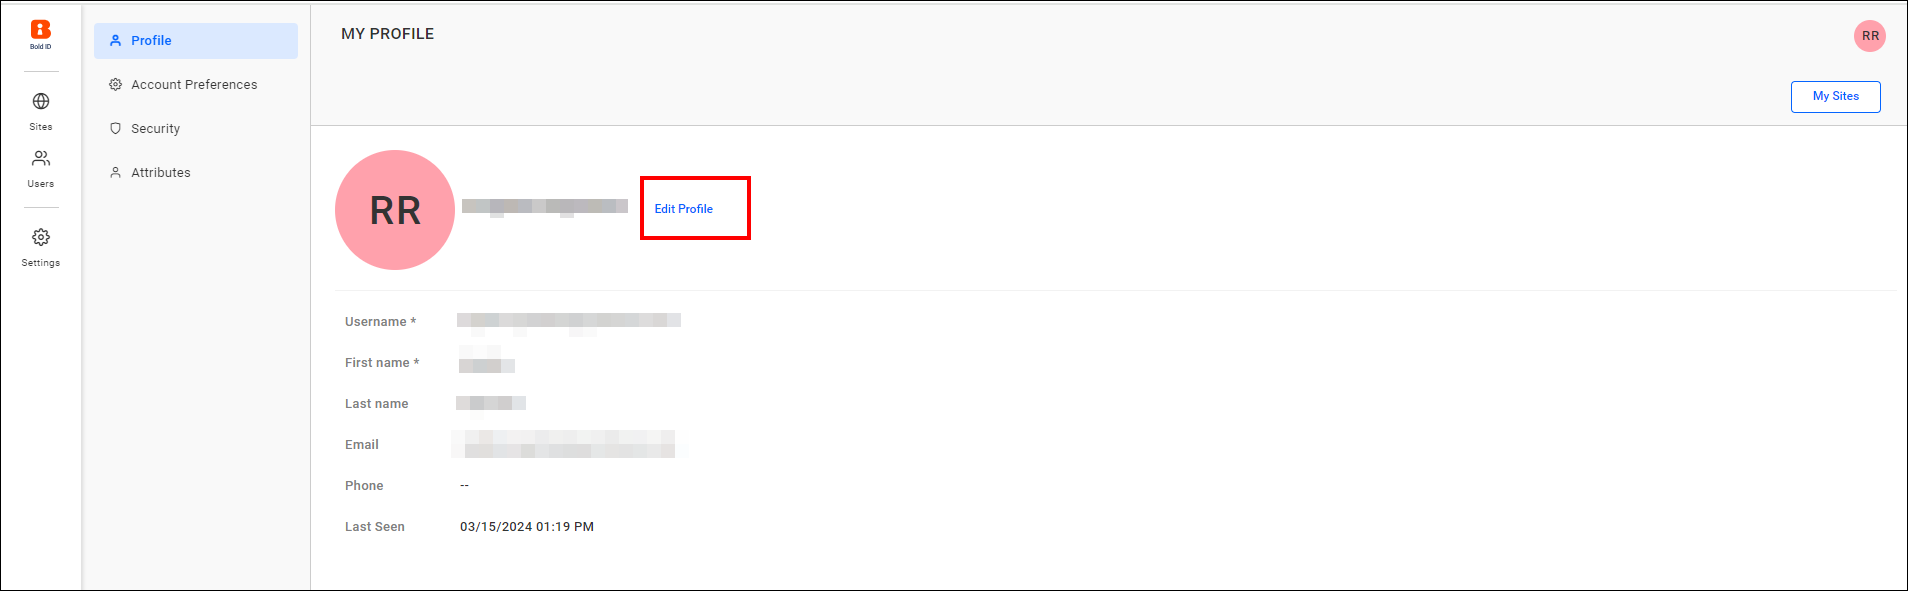
The Username, First name, Last name, Phone number, and Profile picture of the user can be edited.
Change Password
If users forget their password or want to create a new one, administrators can reset or create a password for them using this option. Please refer to this section for password requirement.
The password change functionality is available for the following types of users:
- Local Users: Users created and managed within Bold Reports®.
- Windows Active Directory (AD) Users: Users imported from a configured Windows AD domain.
Change Password for Local Users
Local users can change their password directly from the User Profile section in the application.
Change Password for Windows AD Users
Starting from version 12.1.5, Bold Reports® also supports changing the password for Windows AD users within the application.
- AD users can now set or update their password using the same interface used by local users.
- Once a new password is created or updated, it can be used to log in to the Bold Reports® application directly.
Note: The newly created password for a Windows AD user is used only within the Bold Reports® application and does not update the password in the actual Active Directory domain.

Two Factor Authentication
Users can enable 2FA for their accounts. If a user loses their recovery code or authenticator application, the admin can disable 2FA or generate a new set of codes for them. This can be done using the Two-Factor Authentication tab in the security section.
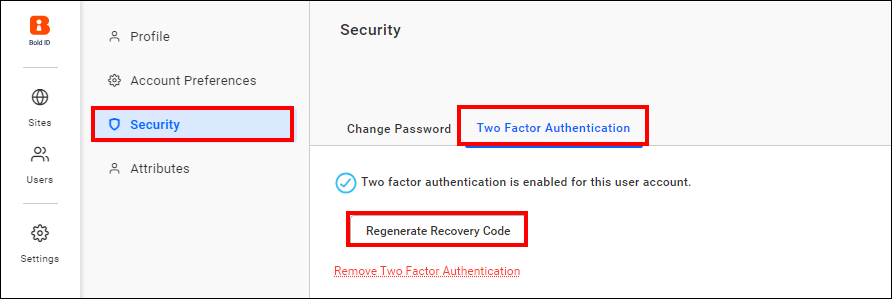
Regenerate Recovery code for user
To regenerate the recovery code for the user, go to the Two Factor Authentication tab in the user details and click Regenerate Recovery Code.
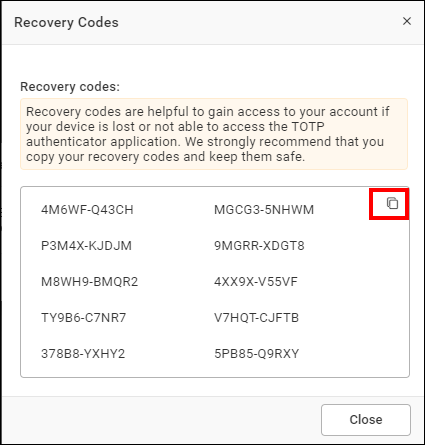
After clicking Yes, a recovery code will be generated. Copy the newly generated code and share it with the user.
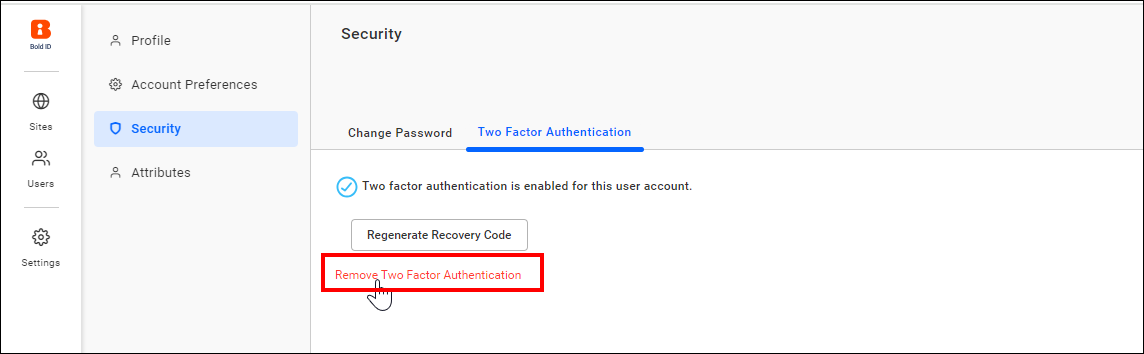
Disable Two Factor Authentication for user
To disable Two-Factor Authentication for the user, click on the Remove Two-Factor Authentication option, then confirm by selecting Yes.
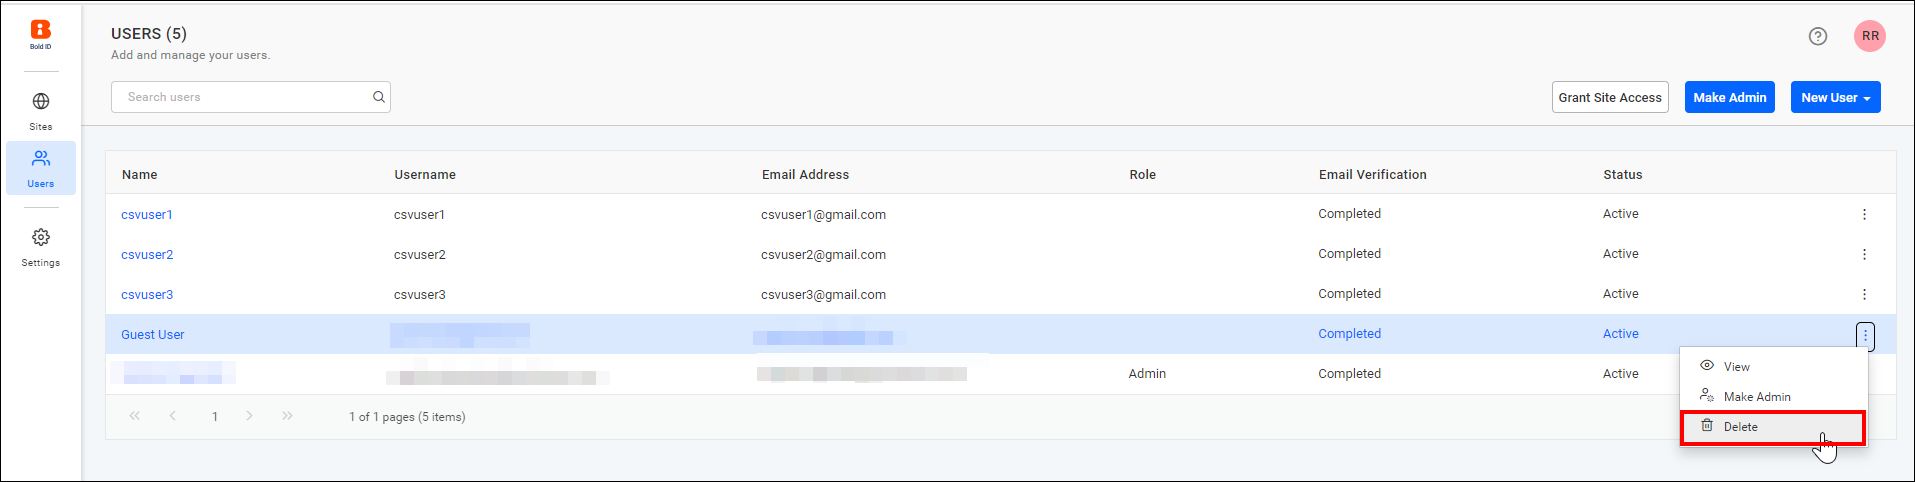
Delete users
Users can be deleted from the UMS when they no longer requires access. The System Administrator can delete users from the user management page.
Note: Once a user is deleted by the System Administrator, their access will be revoked from the sites they belong to.
Grant user access to multiple sites
You can select single or multiple users in user management to provide access to multiple sites.
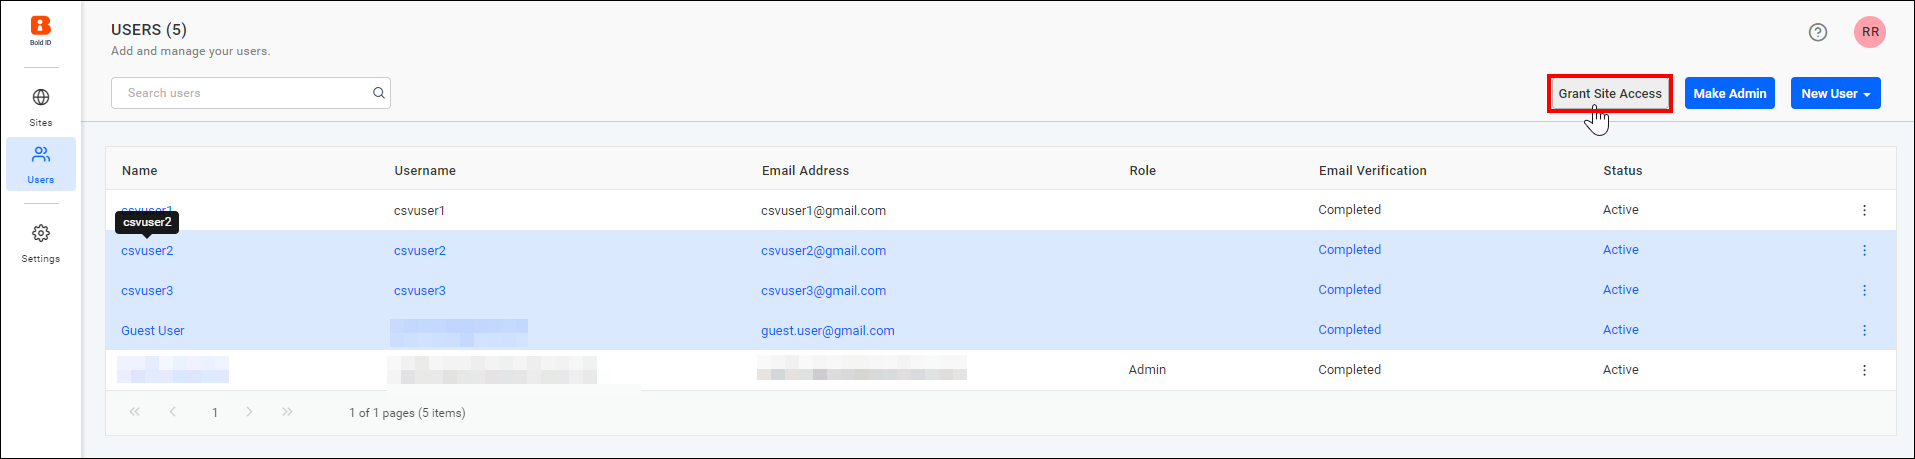
Select the sites to which you need to provide access to the selected users, and then click the Grant Access button to proceed.
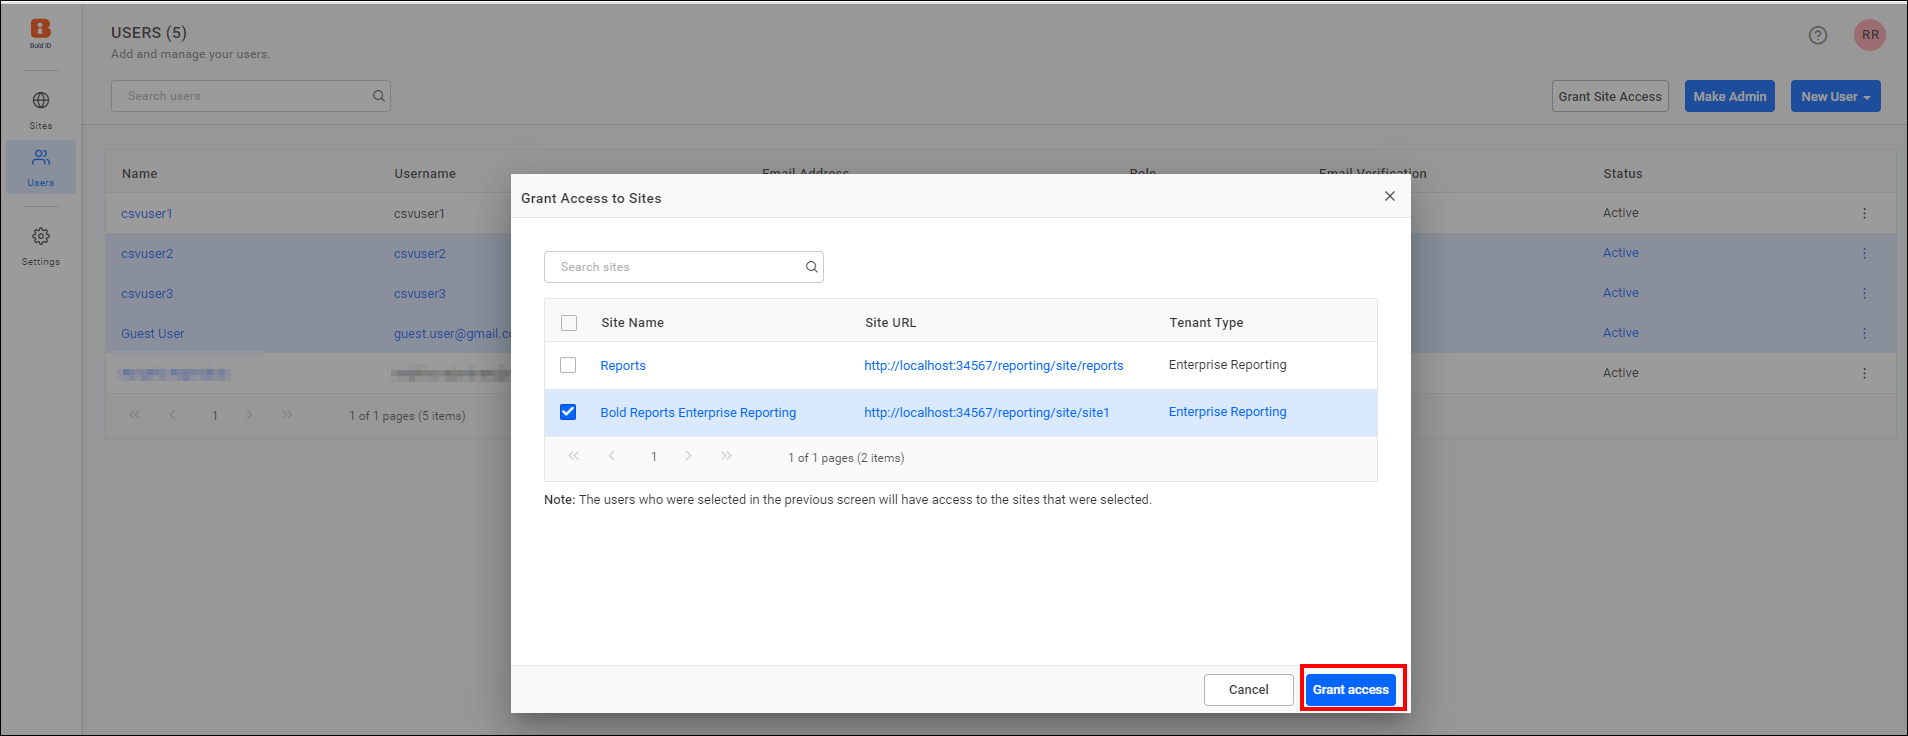
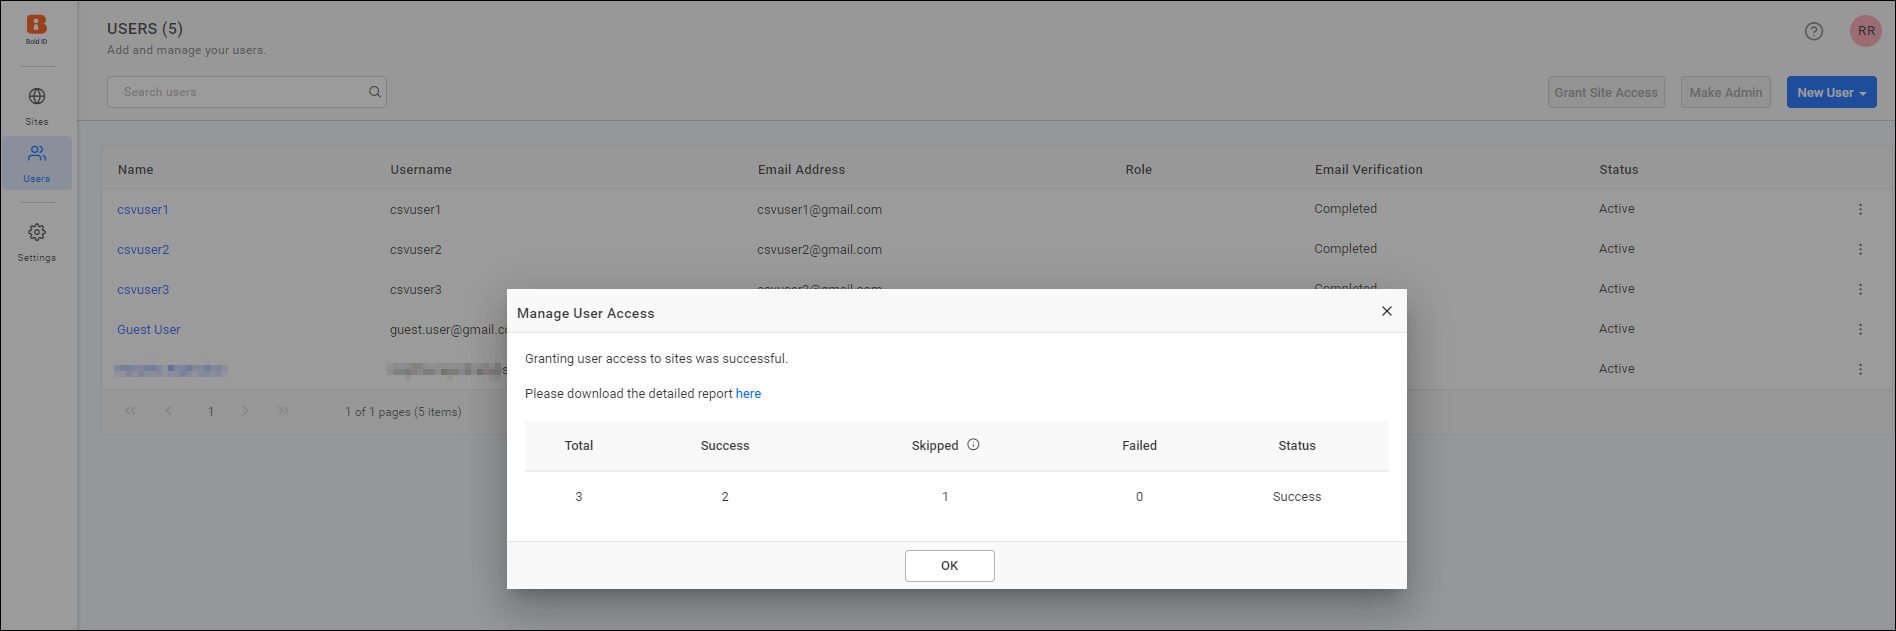
NOTE: If the selected user already has access to that site, the process will be skipped.
After the process is completed, you can view a detailed report on it and download the report in CSV format.
You can revoke access to the site by referring to the instructions provided here.
- Add new users
- Add individual users
- Import users from CSV
- Add users from CSV file
- CSV file Requirements
- Password Requirement
- Activate users
- Edit users
- Change Password
- Change Password for Local Users
- Change Password for Windows AD Users
- Two Factor Authentication
- Regenerate Recovery code for user
- Disable Two Factor Authentication for user
- Delete users
- Grant user access to multiple sites