Upgrade Bold Reports® Enterprise Reporting latest version:
- To upgrade the Bold Reports® Azure App Service to the latest version, you must have access rights to edit the Bold Reports® Server App Service.
- Follow these steps below to upgrade the Bold Reports® Azure App Service.
-
Stop the created App Service in the overview section.

-
Select
Deployment Centerin the left panel of the Bold Reports® App Service.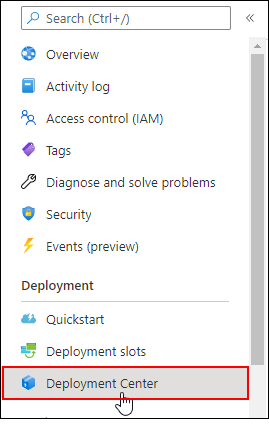
-
Once the deployment center is clicked, click
Disconnect. Now the deployment panel will open.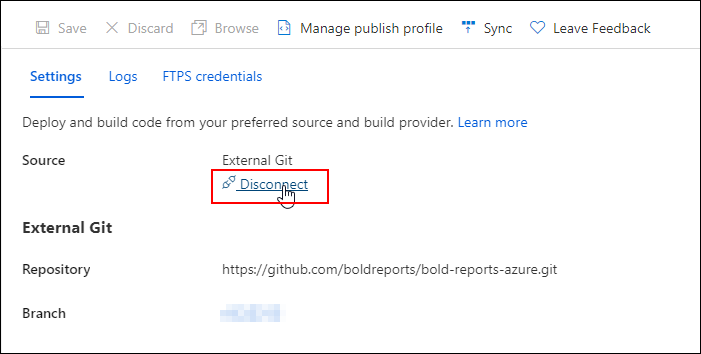
-
Choose the
External Git.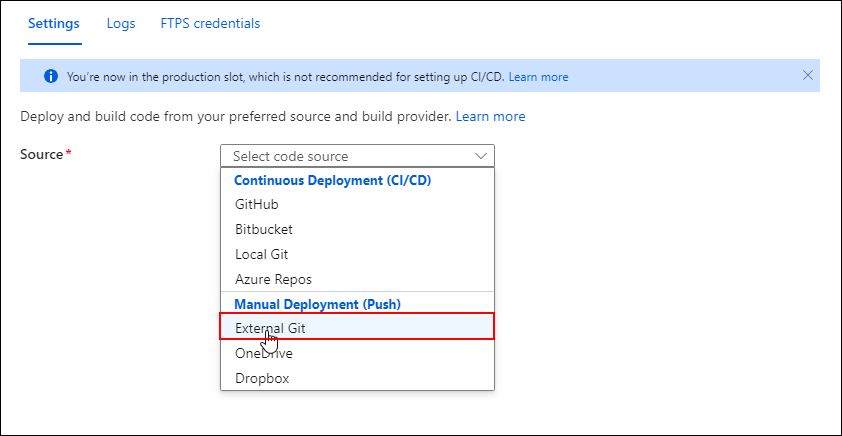
-
Now, fill in the below details in the
Settingstab and click theSave.- Repository:
https://github.com/boldreports/bold-reports-azure.git - Branch:
v{release-version} - Repository Type:
Public
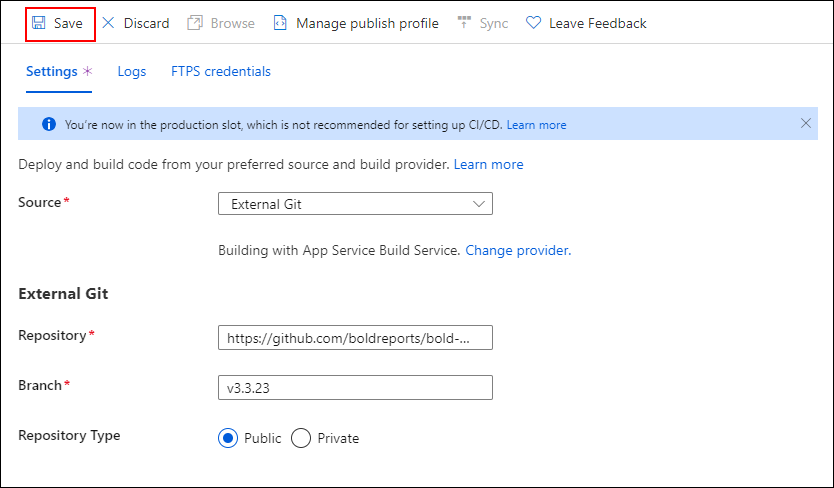
- Repository:
-
The
Successfully set up deploymentnotification will be displayed.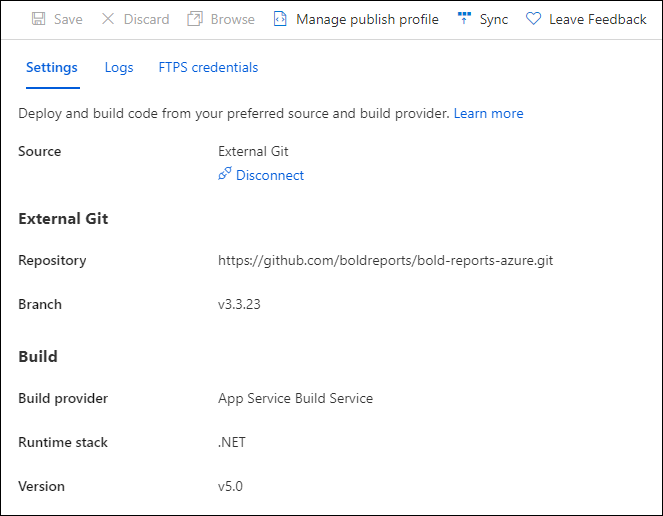

-
Select the
Syncbutton on the deployment center page.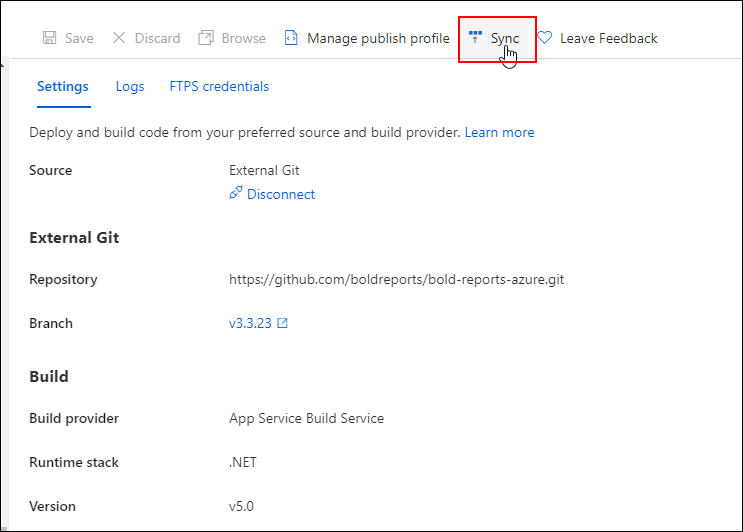
-
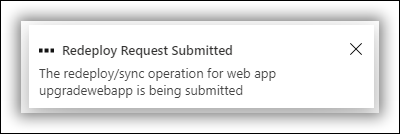
The synchronization request submitted will be shown in the notification, and synchronization progress will be shown in the deployment center page.
-
Please wait until synchronization is completed.
-
Breaking Changes: This step is applicable only for upgrading Azure App Service from version 3.x to latest. Otherwise, skip this step.
-
In the
Configurationsection, change the below value inGeneral Settings.Settings Value .NET version .NET 8 (LTS) 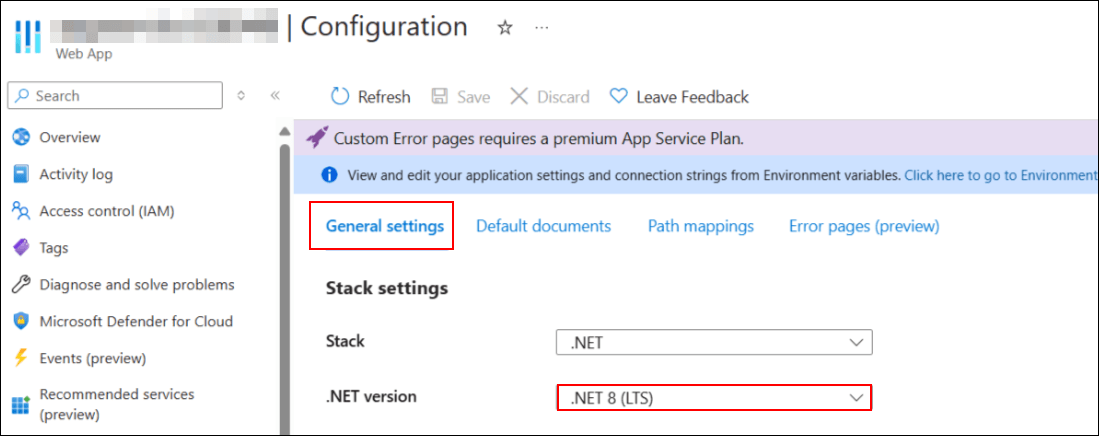
-
Add the below Physical Path in
Path MappingsandSavethe settings.Virtual Path Physical Path /reporting/viewer site\wwwroot\reporting\viewer 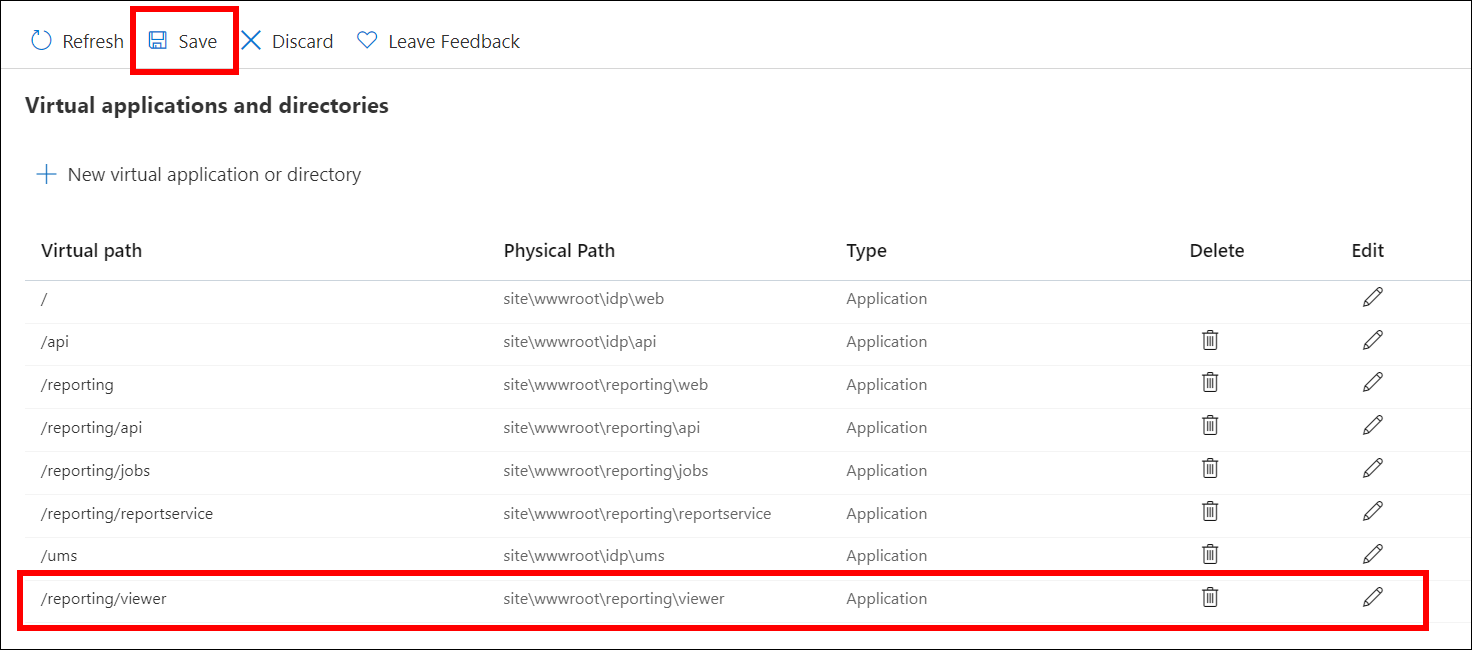
-
Below are the breaking changes introduced in v6.1 - Starting from version 6.1, the Bold Reports® application supports 64-bit architecture. To host it on Azure App Service as a 64-bit application, the following changes need to be made in the Azure App Service configuration.
- Go to the Configuration of the app service and select
General settings.
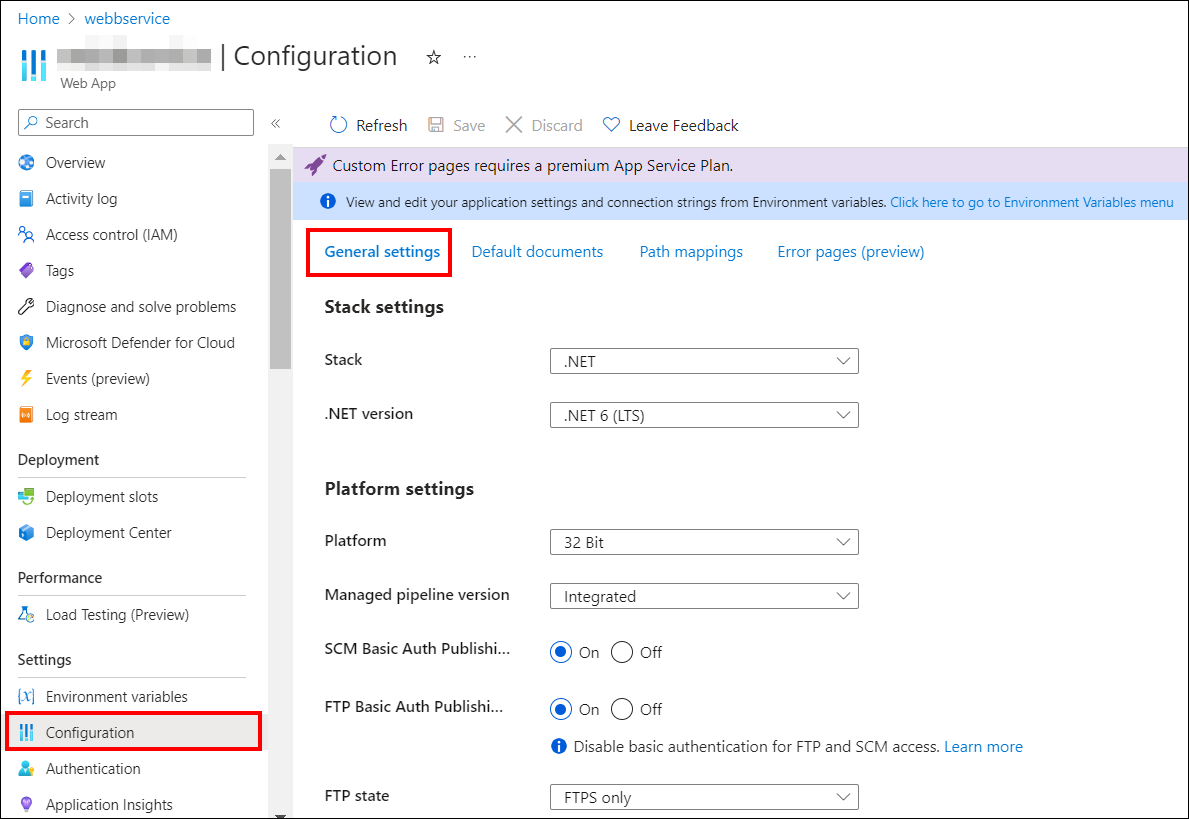
- In the General settings, change the platform to 64-bit and save the changes.
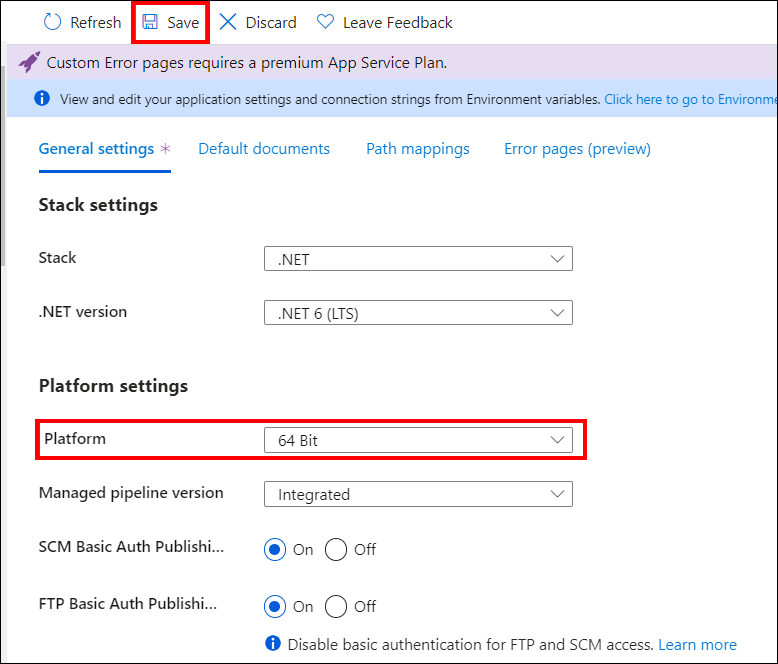
- After starting the app service, you’ll be able to access the application as a 64-bit app.

-
Starting from v7.1, DataHub (ETL) has been added to Bold Report Server in Azure App Service. If you are upgrading Azure App Service from version 3.x to 7.1 and require ETL, refer to the KB article for guidance. You can skip this step if DataHub is not needed.
-
Now, we have completed the Bold Reports® upgrade process. Launch Bold Reports® by clicking the
browseoption or type in the Bold Reports® URL in the browser.
