How to Set up Azure Active Directory to perform authentication using Single Sign-On for Bold Reports® On-Premise
This section explains on how to perform Single Sign-On for users in Azure Active Directory on Bold Reports® On-Premise.
Steps to set up Azure Active Directory for Bold Reports® On-Premise
Prerequisites
- An Azure account with Active Directory support.
- Install Bold Reports® On-Premise and Login with Administrator account.
Setup Azure Active Directory application
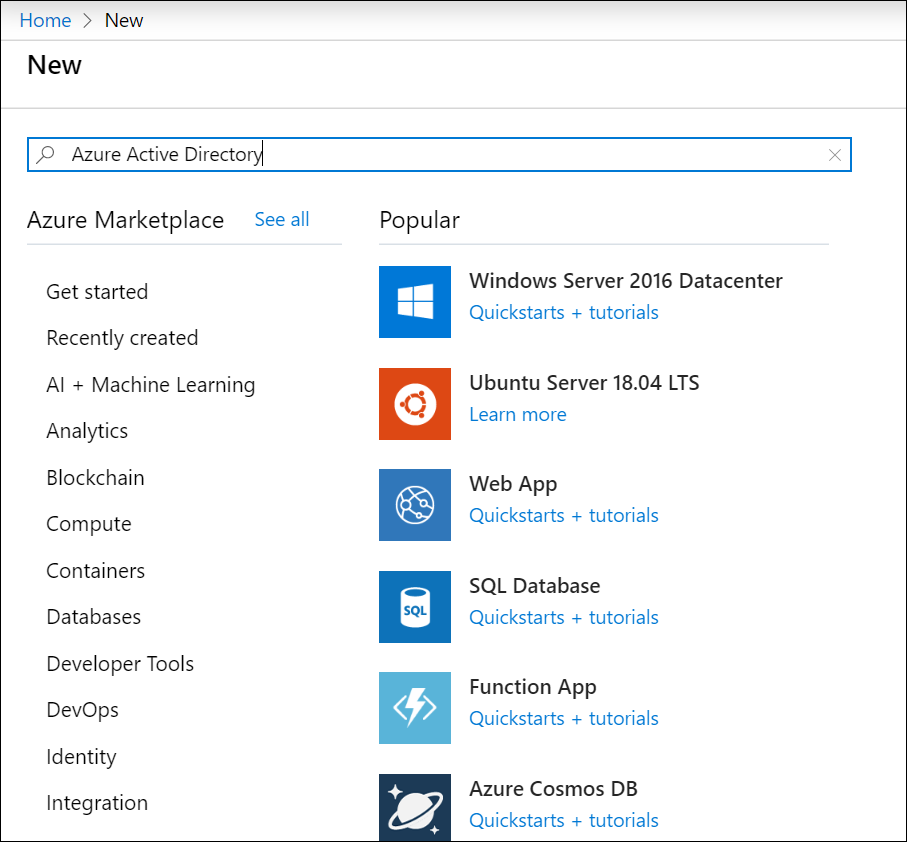
Log on to the Azure portal to create an Azure Active Directory.
-
Click
Create a resourceand searchAzure Active Directoryas follows.
-
Click
Createin the following screenshot.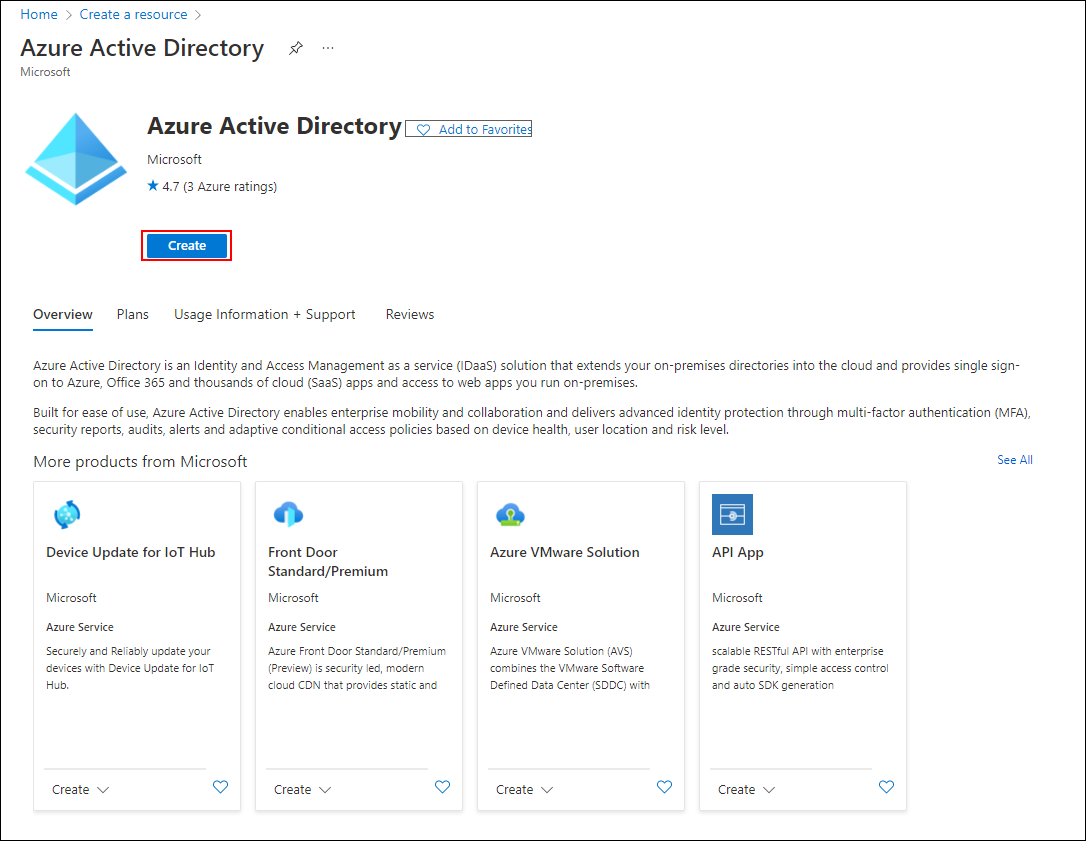
-
Choose
Azure Active Directoryand clickNext: Configuration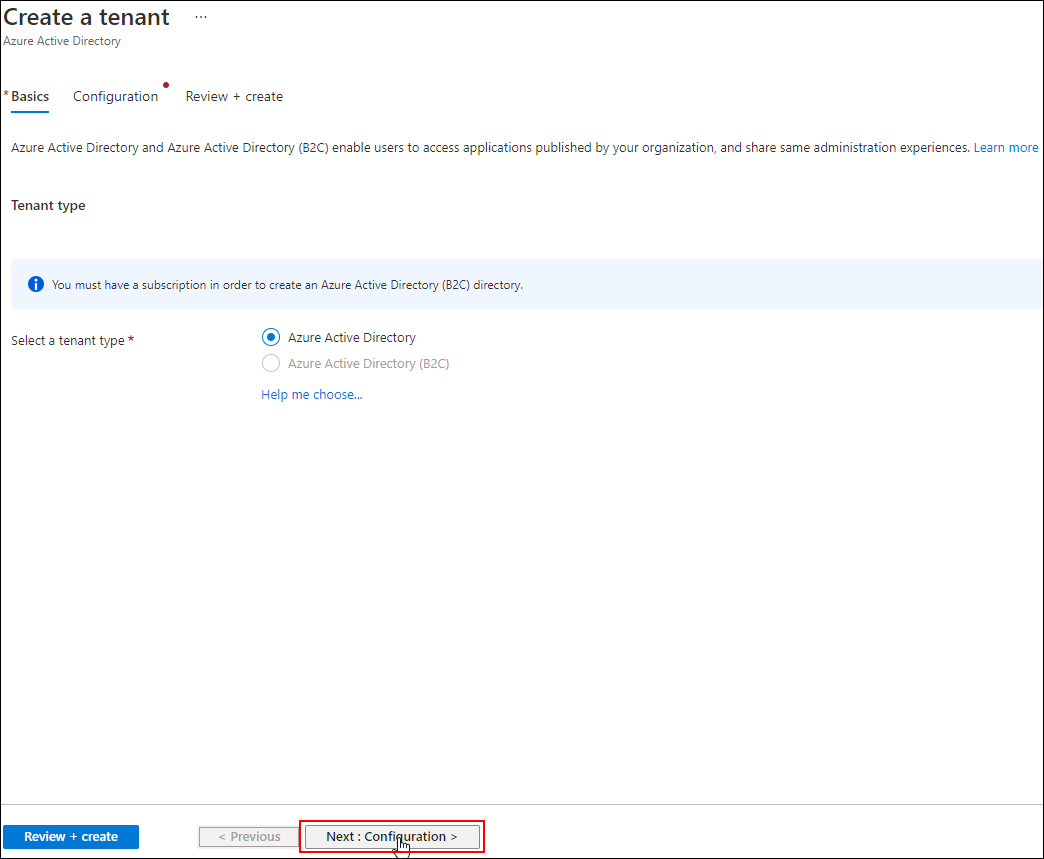
-
In the dialog box, enter the
Name,Domain Name, and choose theCountry or Region, and then clickNext: Review + Create.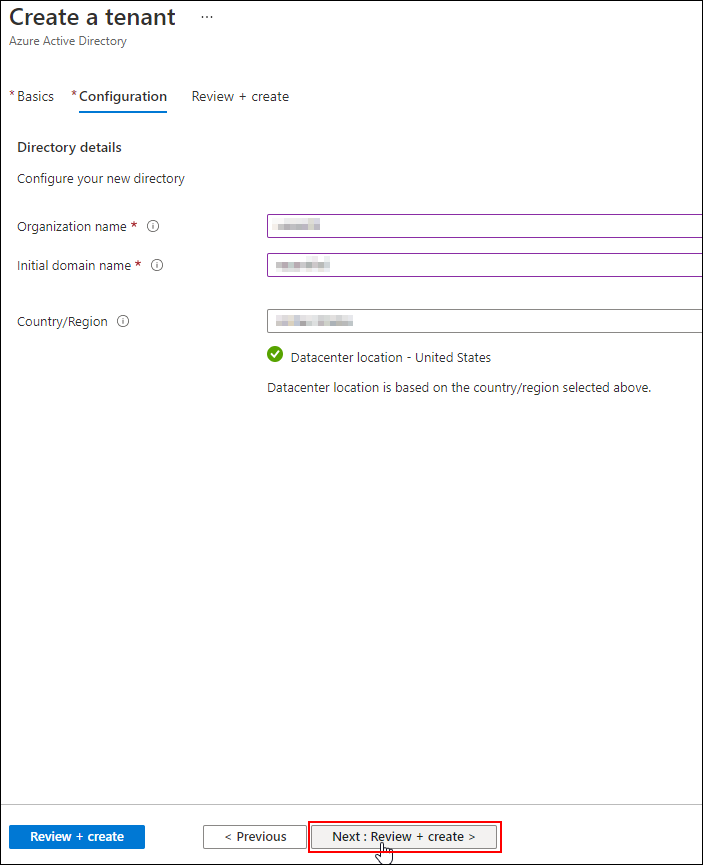
-
Crosscheck the details and click
Create.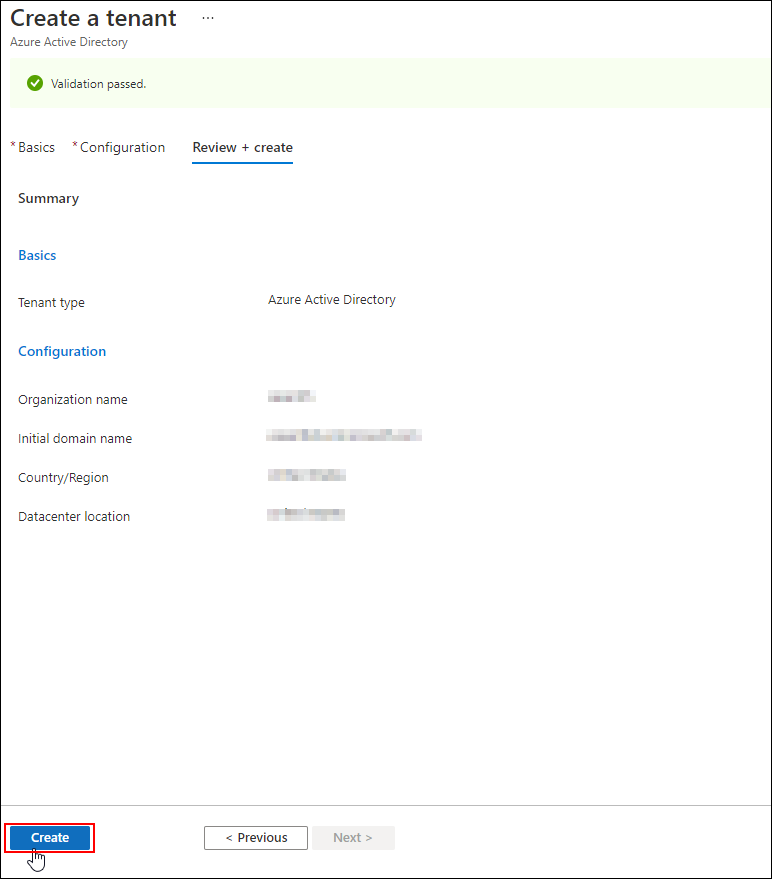
-
The application will be added to the directory and you can view the details of the application in the
App registrations.
Go to the Azure Active Directory. In the directory, you should add two applications, one of which acts as a Web API for authenticating Bold Reports® On-Premise and the other as a native client application for authenticating the Bold Reports® On-Premise mobile app.
Steps to register Bold Reports® On-Premise application in Azure Active Directory
-
Enter into the created directory and click
Azure Active Directoryand then selectApp registrations. -
Now, click
New application registrationto add a new application.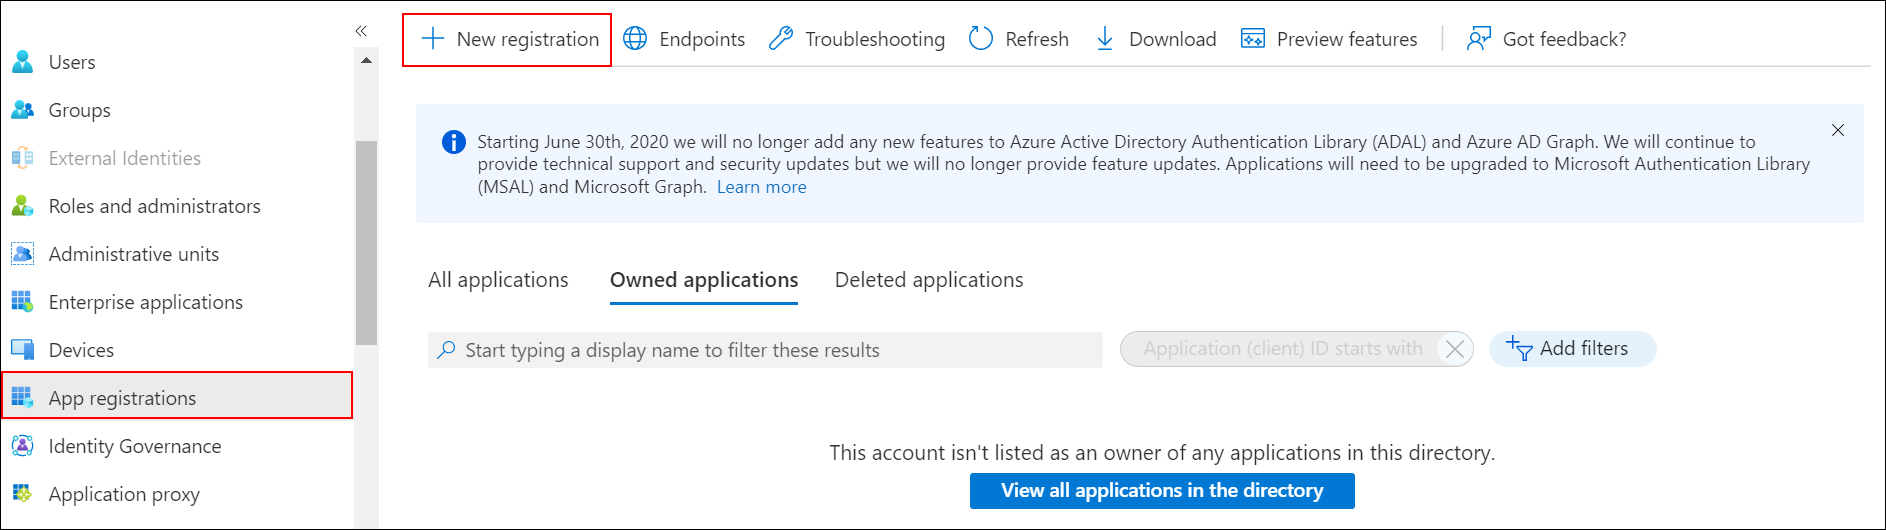
-
Enter the name of the application and choose the following options.
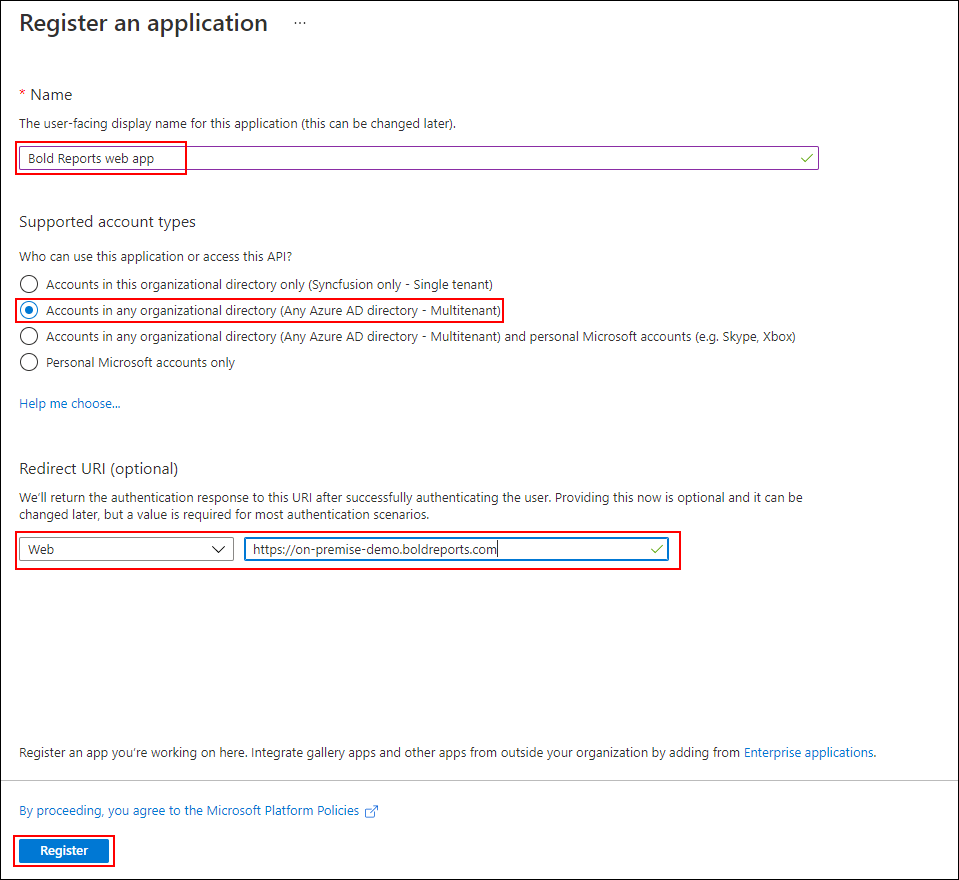
- Accounts in any organizational directory (Any Azure AD directory - Multitenant) as
Supported account types. - Web under the
Redirect URI(optional)section and enter the Redirect URI. And then clickRegister.
The application will be added to the directory and you can view the details of the application in the
App registrations. - Accounts in any organizational directory (Any Azure AD directory - Multitenant) as
-
Select
Brandingin the left side menu and enter theHome page URLand clickSave.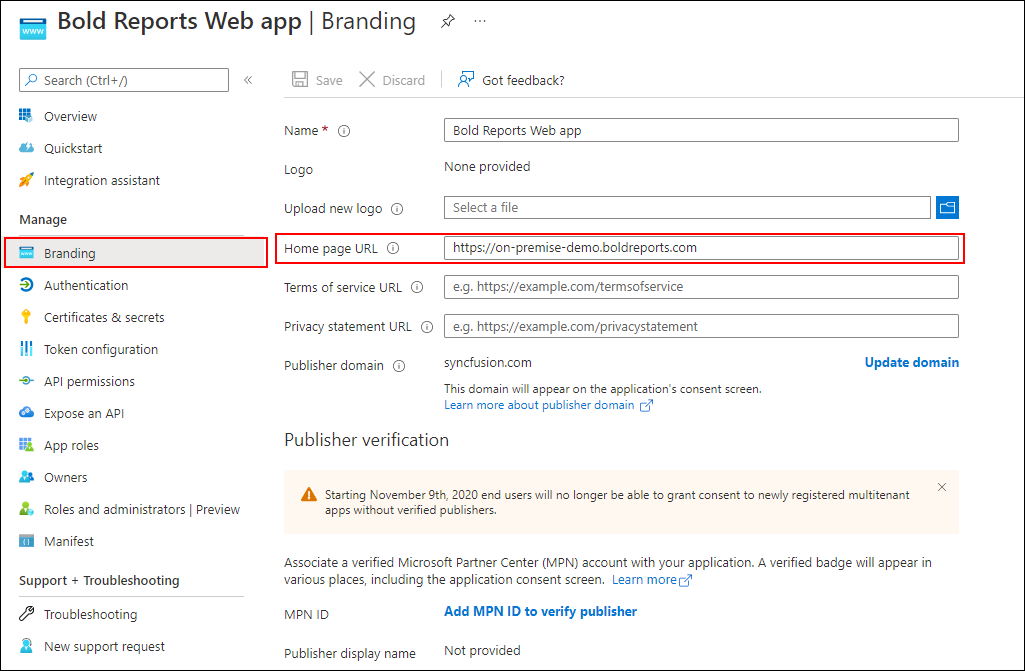
-
Select
Authenticationin the left side menu and save theLogout URL,Implicit grantandSupported account typesas highlighted in the following screenshot.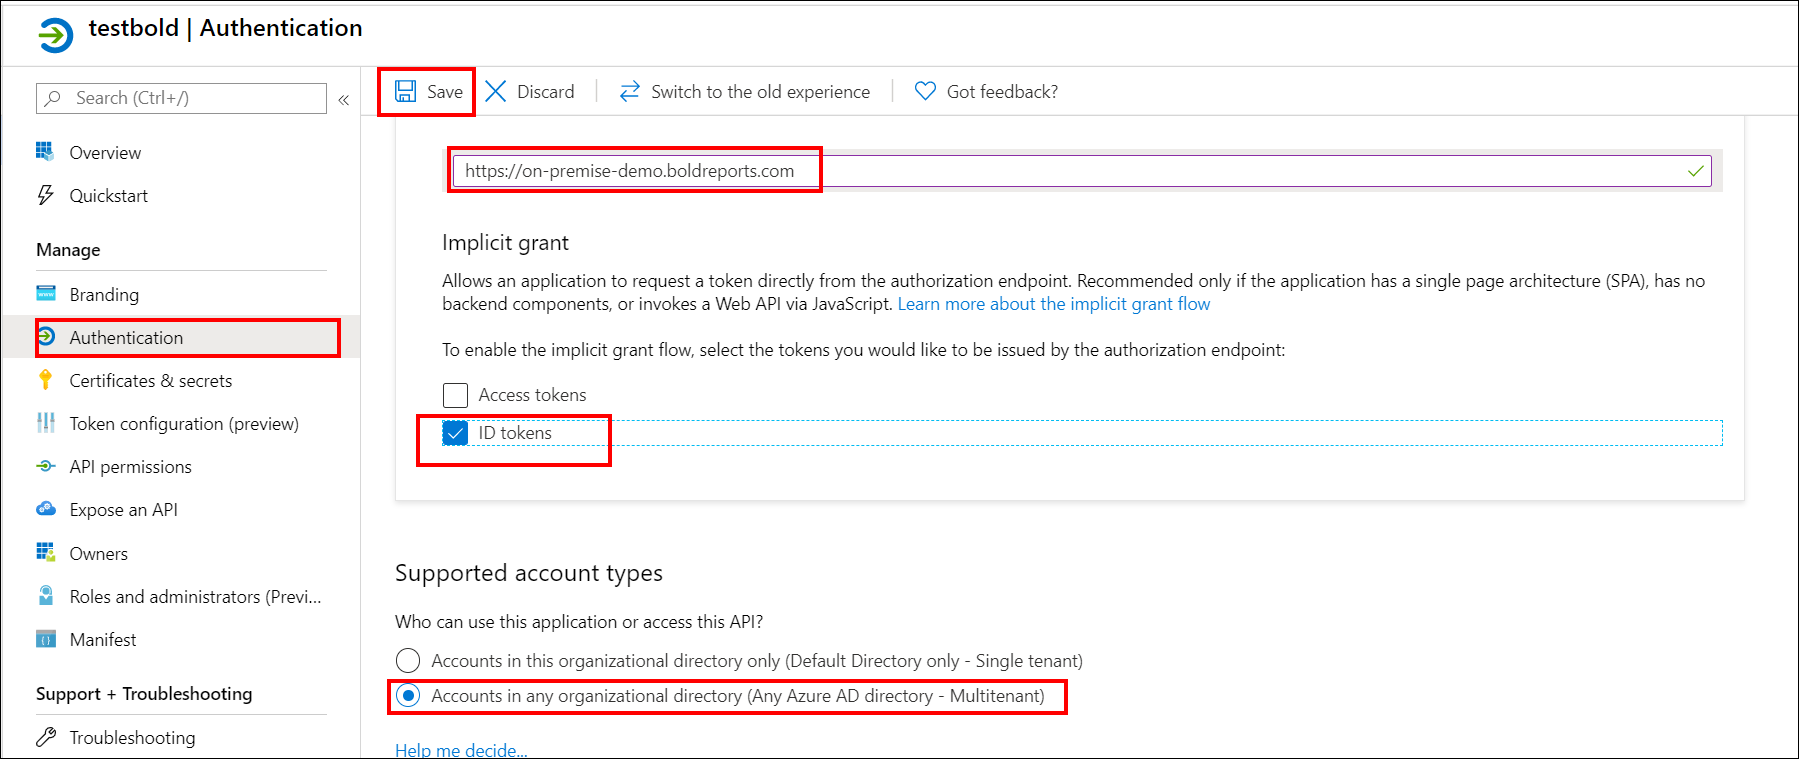
-
Select
Certificates & secretsto add client secret by clicking theNew client secretas in the following screenshot.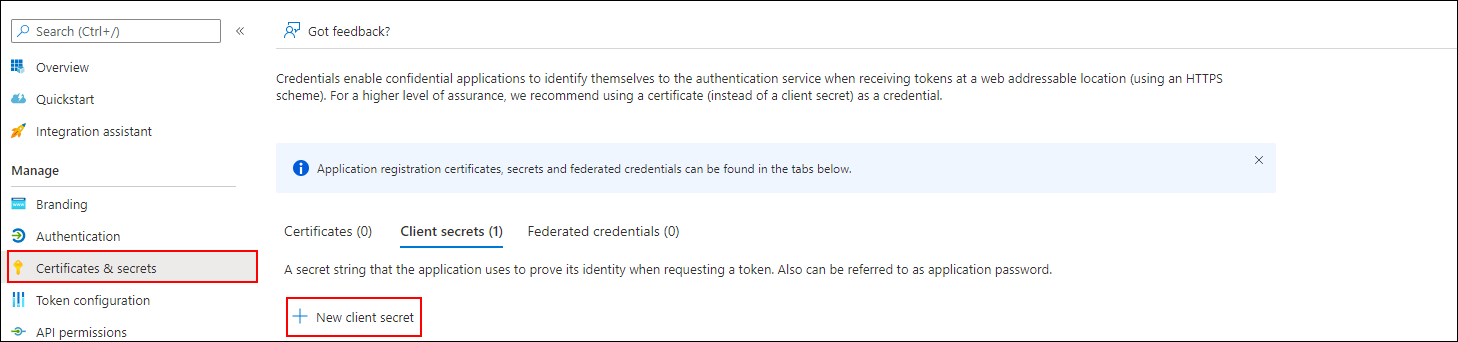
- Provide description and choose the expires option. Click on
Addbutton.
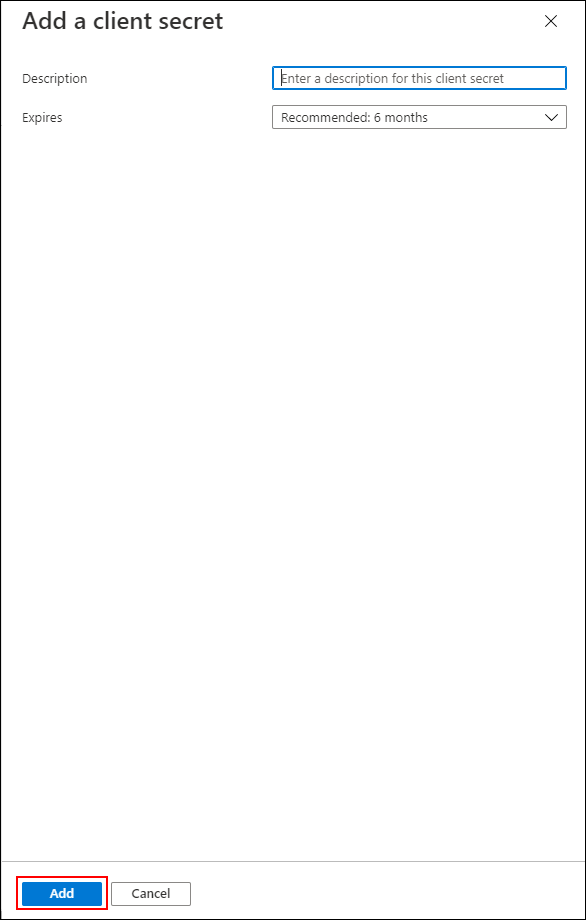
Save the client secret value generated.
- Provide description and choose the expires option. Click on
-
Go to
API permissions, clickAdd a permissionand then click onMicrosoft Graph.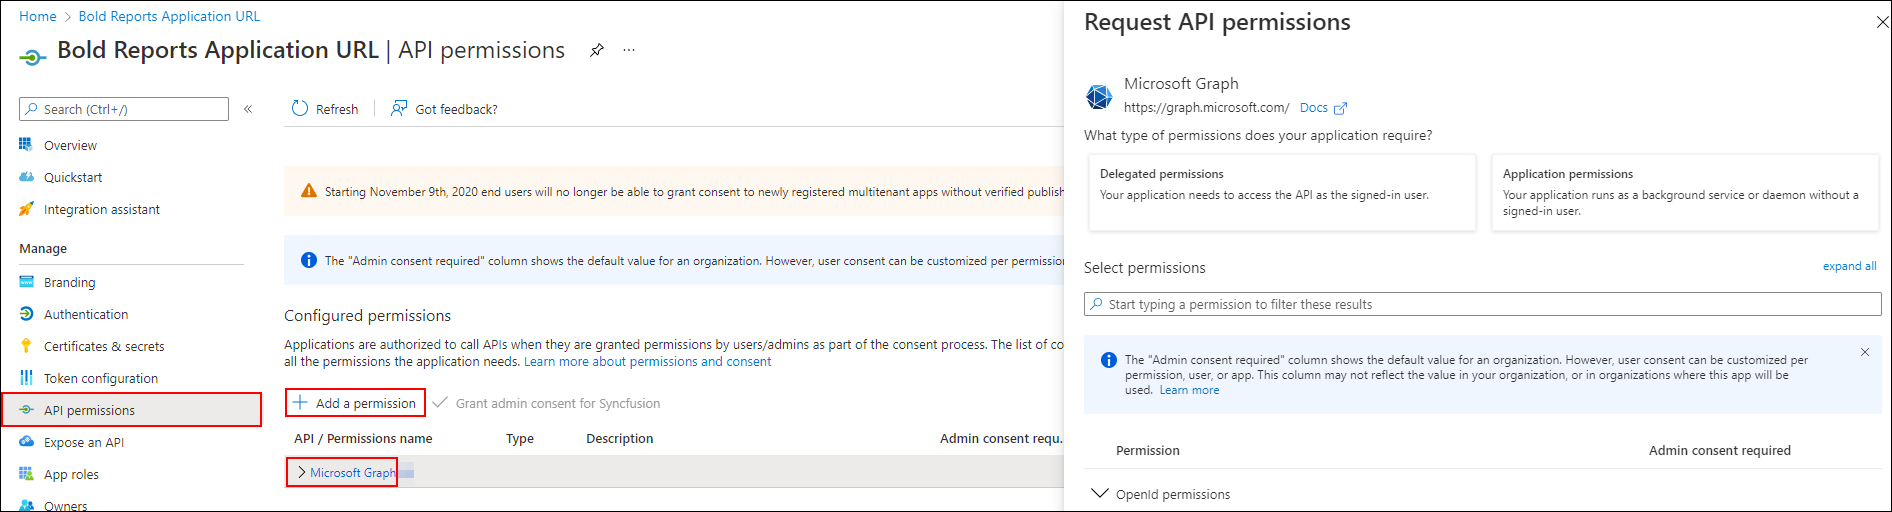
Application Permissions Directory Read directory data Delegated Permissions 1. Directory Read directory data, Access directory as the signed in user 2. Group Read all groups 3. User Read and write access to user profile 4. Profile View user's basic profile Select the above listed permissions and click on
Update permissionsbutton.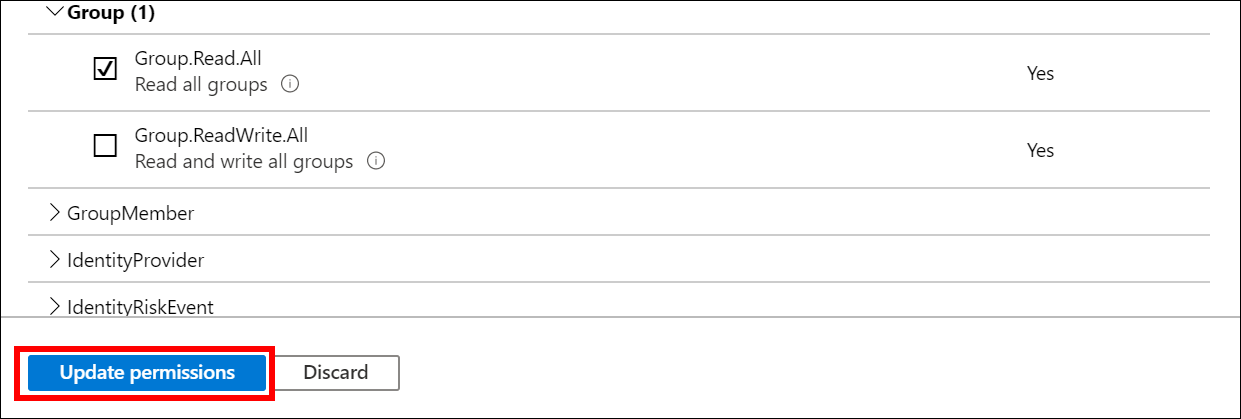
-
After adding the permissions, click
Grant admin consentto grant the admin consent for these permission.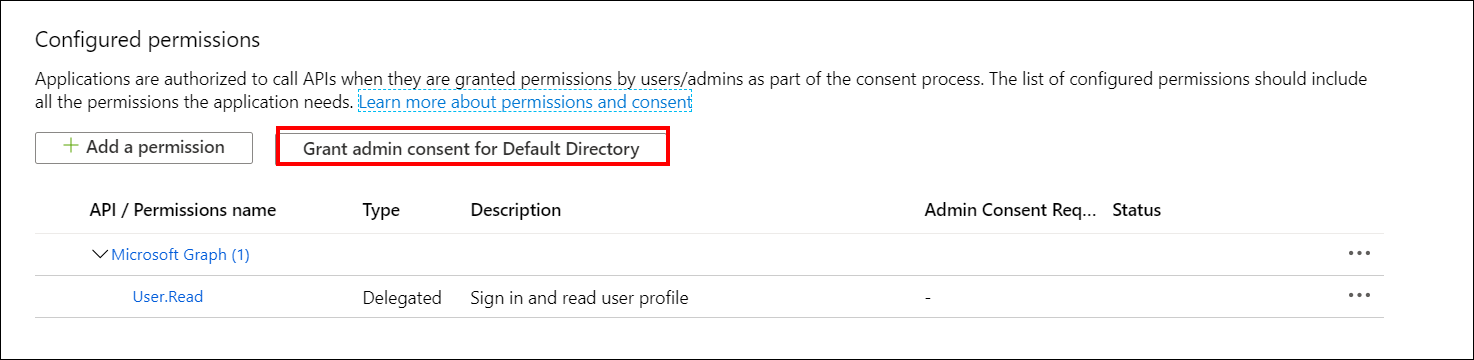
-
Select
Expose an APIin the left side menu and click onsetfrom Application ID URI.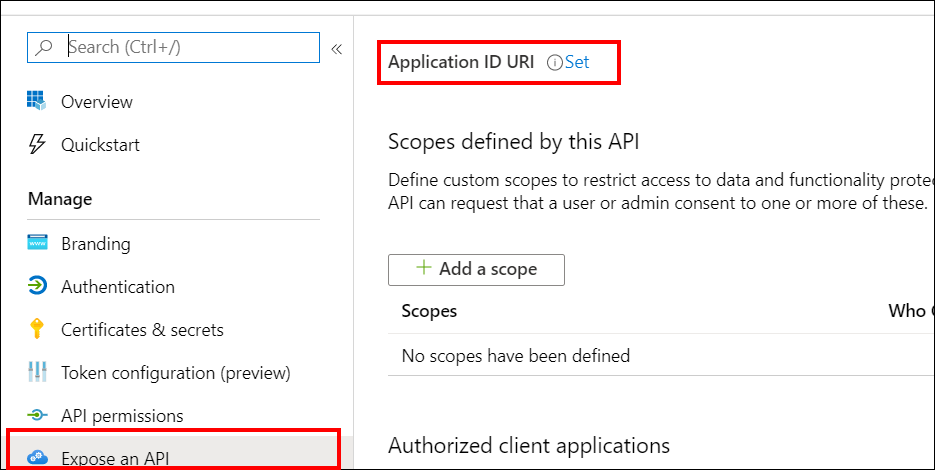
Enter
App ID URIand click onSavebutton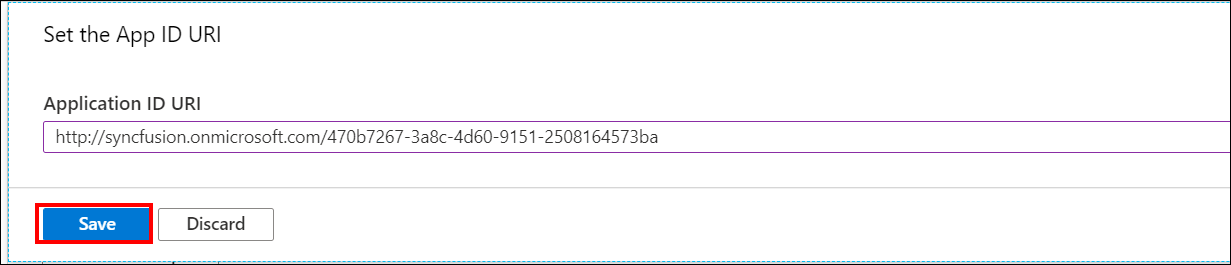
The
Application ID URImust be in the formathttp://{directory domain name}/{application id} -
Select
Expose an APIin the left side menu and click onAdd a scopebutton.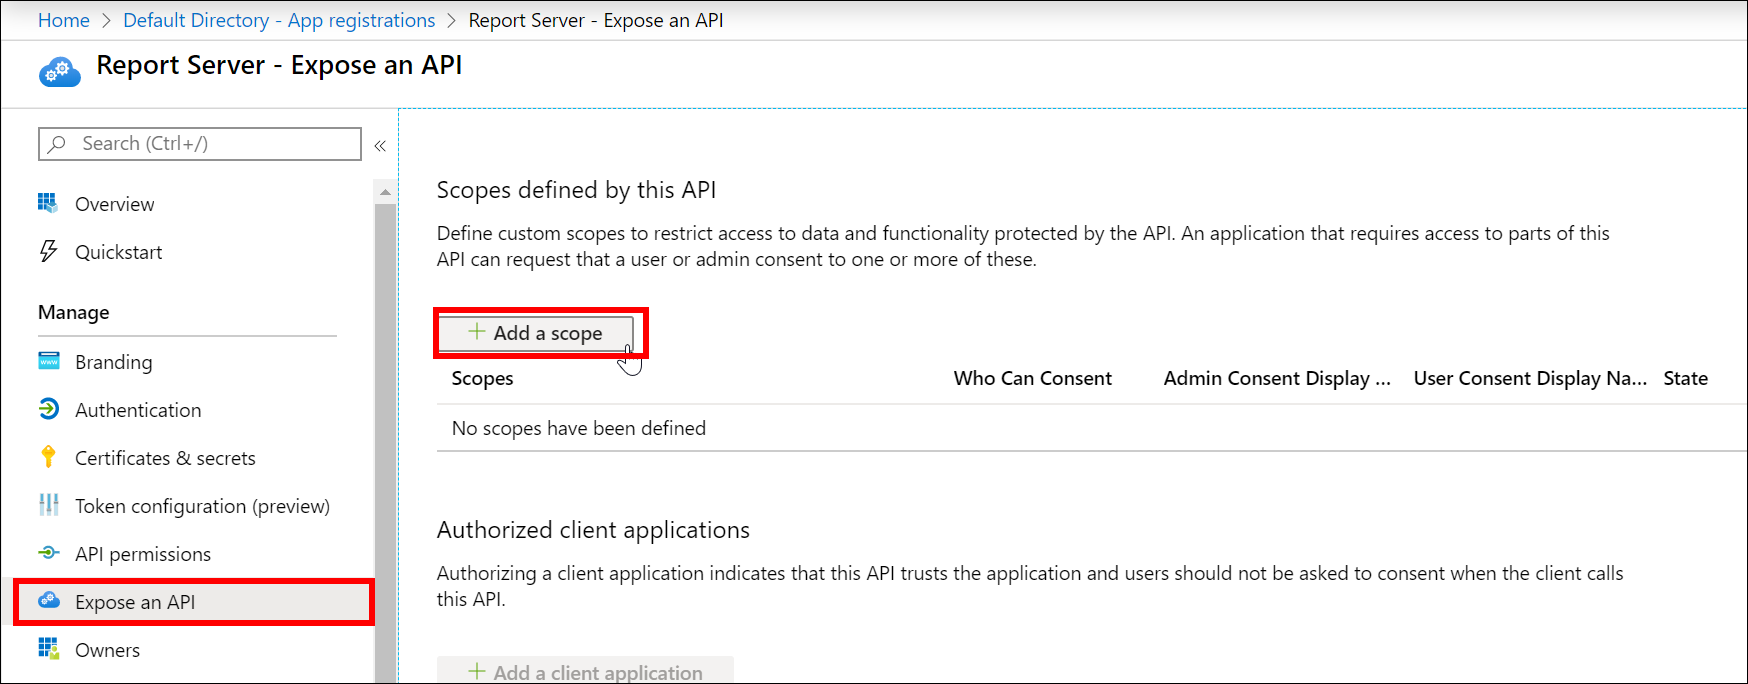
Enter
Scope name, chooseAdmins and userson consent and enterAdmin consent display name,Admin consent description,User consent display name,User consent description. Choose the state asEnabled. Click onAdd scopebutton.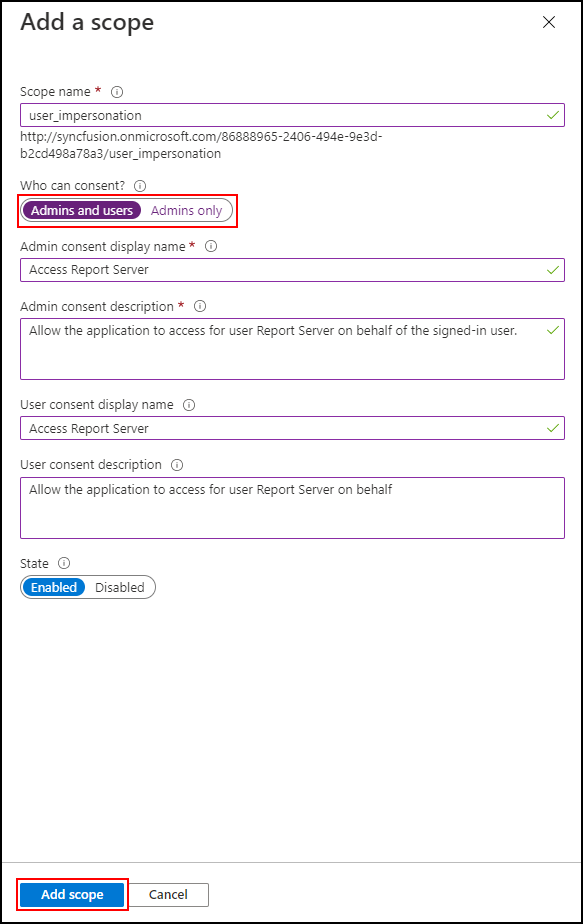
The
Redirect URIandHome page URLshould be the URL of the Bold Reports® On-Premise application.
Steps to register Bold Reports® On-Premise mobile application in Azure Active Directory
-
Enter into the respective directory. Click
App registrationsin the left side menu and then clickNew registrationto add a new application. -
Enter the name of the application and choose the following options,
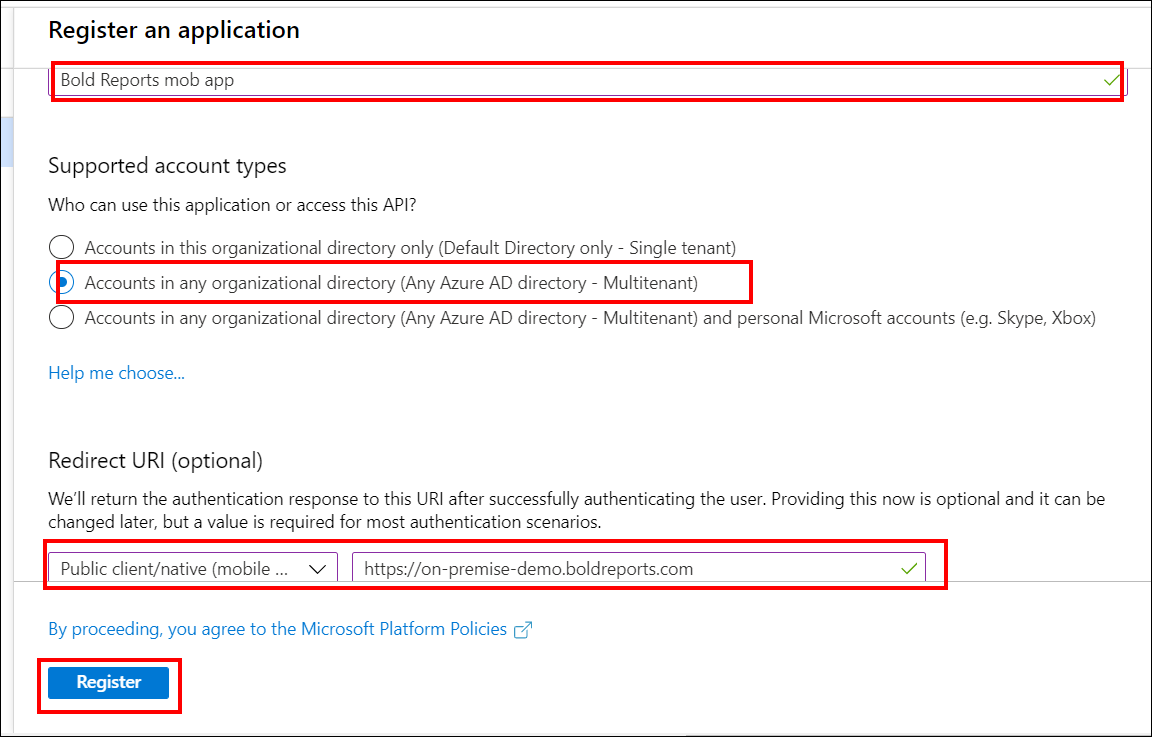
- Accounts in any organizational directory (Any Azure AD directory - Multitenant) as
Supported account types. - Public client/native(mobile & desktop) under the
Redirect URI(optional)section and enter the Redirect URI. And then clickRegister.
The application will be added to the directory and you can view the details of the application in the
App registrations. - Accounts in any organizational directory (Any Azure AD directory - Multitenant) as
-
Select
Brandingin the left side menu and enter theHome page URLand clickSave. -
Select
Expose an APIin the left side menu and click onsetfrom Application ID URI.
Enter `App ID URI` and click on `Save` button
>The `Application ID URI` must be in the format `http://{directory domain name}/{application id}`The
Home page URLshould be the URL of the Bold Reports® On-Premise application.
Configure the Azure Active directory details in Bold Reports® On-Premise to perform Single Sign-On
-
Configure the following fields in the Bold Reports® On-Premise to perform Single Sign-On in Bold Reports® On-Premise.
Application Id: Go to the registered application and click the
Overview, and then copy theApplication Idand paste it.
Application Id URI: Go to the registered application and click the
Overview, and then copy theApplication Id URIand paste it.
Tenant Name: It is the default domain name of your Active Directory. Go to the created
Azure Active Directoryand copy the domain name.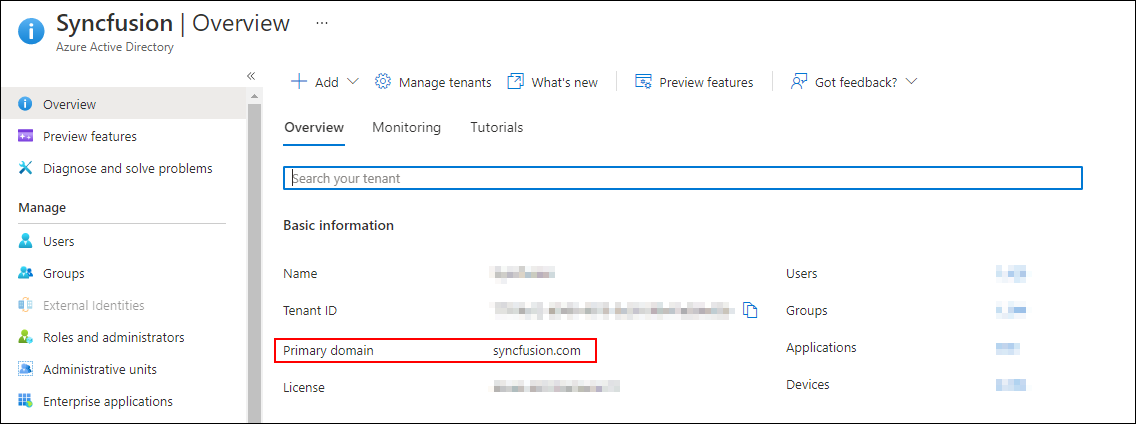
Mobile App Client ID: Go to the registered application for Bold Reports® On-Premise mobile application. Copy the
Application Idand paste it.
Configure the Azure Active directory details in Bold Reports® On-Premise to import users and groups
-
Configure the following fields in Bold Reports® On-Premise settings to import Azure AD users and groups.
Tenant Name: It is the default domain name of your Active Directory. Go to the created
Azure Active Directoryand copy the domain name.Client ID: It is the Client Id of the Bold Reports® On-Premise application in your Azure Active Directory. Go to the registered application and then copy the
Application Idin theOverviewand paste it here.Client secret code: It is the secure key of the Bold Reports® On-Premise application you created in your Azure Active Directory. Go to the
Certificates & secretsand search for the Keys you saved for the application and then choose theValue.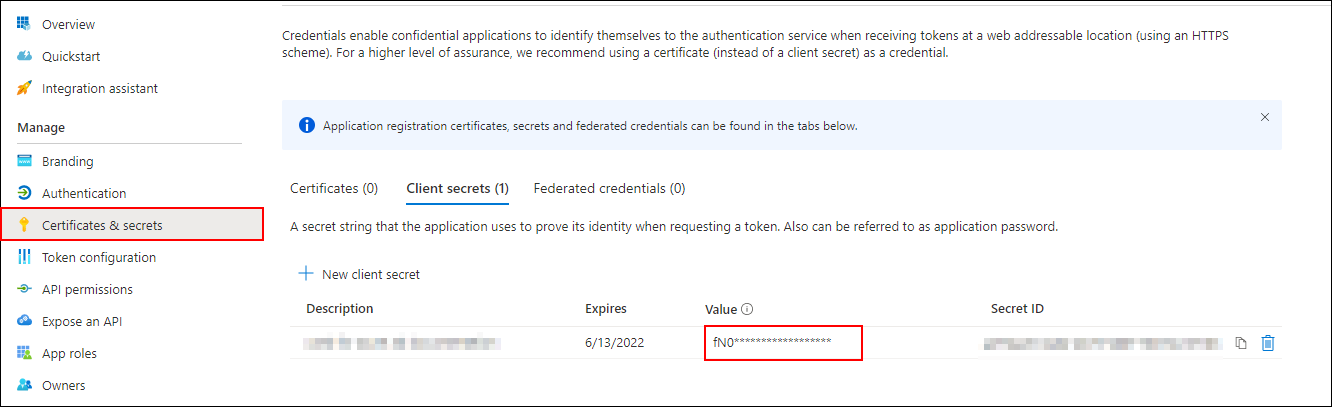
After the settings are configured in Bold Reports® On-Premise, the Azure user can be imported into the Bold Reports® On-Premise. Refer to the following link to Import Azure Active Directory Users and Import Azure Active Directory Groups.