How to migrate Bold Report Server with database in Azure App Service
We can migrate Bold Reports® Server data from one server to another server without any data loss. It involves a few manual steps, as below.
-
Before proceeding with the migration, Deploy the same version of Bold Reports® on your target app service.
-
We need to make some configuration changes in the files to migrate data from app service 1 to app service 2, So please stop Bold Report Server in azure app service.
Please follow the below steps to change the configurations on the target server,
Copy Database
You need to copy all the databases used in Bold Reports® Application from azure app service 1 to azure app service 2.
-
Go to Azure SQL Server of Azure App Service 1.
-
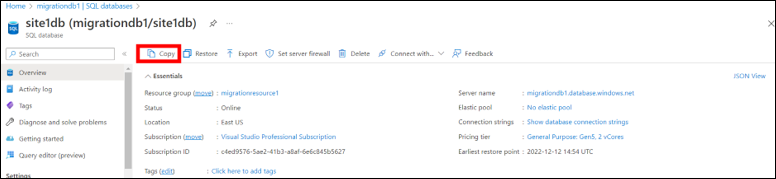
Select Azure SQL Database and locate the database for which you would like to create a clone.
-
Click Copy to copy the database.
-
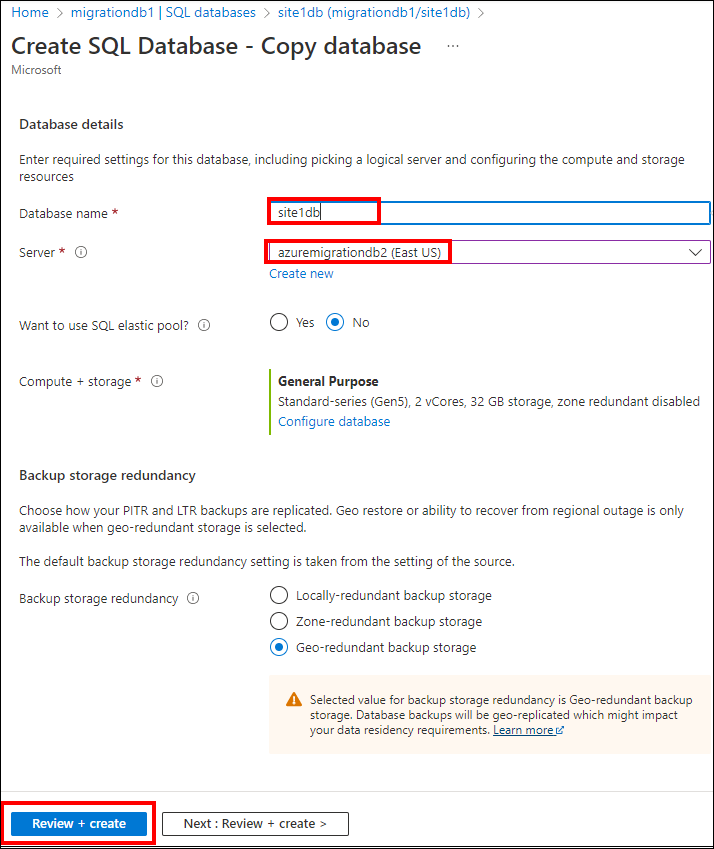
Now, Enter the azure app service 2 database details
- Type in the database name [Data base name must be same as azure app service 1 database name].
- Select the azure app service 2 SQL Server name.
- Choose “Yes” if you want to host it in the elastic database pool. If not, leave the default value “No”.
- Decide the Compute and Storage.
- Click Create.
-
Now the database is available in Azure app service 2 SQL server.
Note : Please follow the copy database steps for all the databases which is used in boldreport server application.
Update database connection string in Bold Reports®
Application data will always be stored in the app_data folder, So this will make the Bold Reports® a stateful application.
-
Go to storage account of azure app service 1, which is created at the deployment time of Bold Reports® in azure app service 1 and go to the container section.
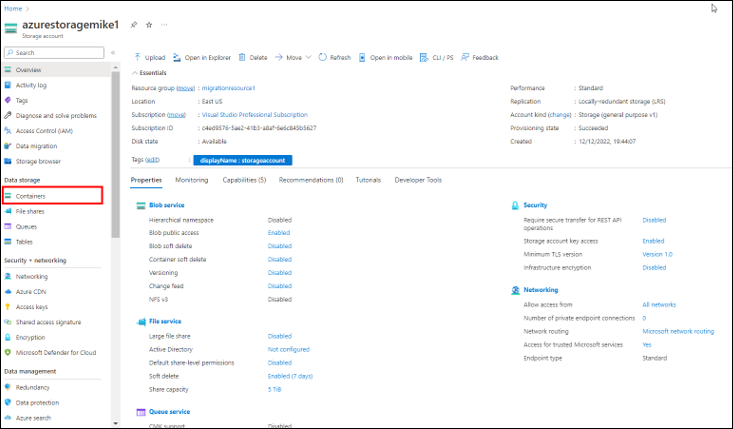
-
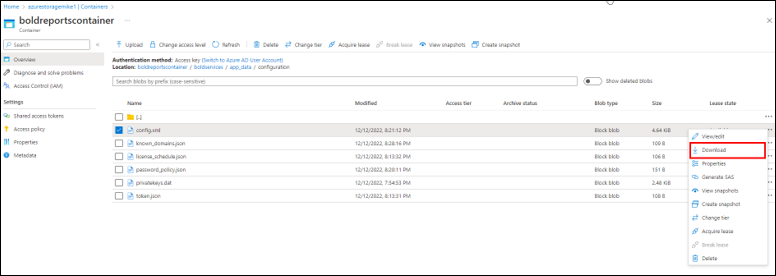
Navigate to the following location. boldreportscontainer/boldservices/app_data/configuration
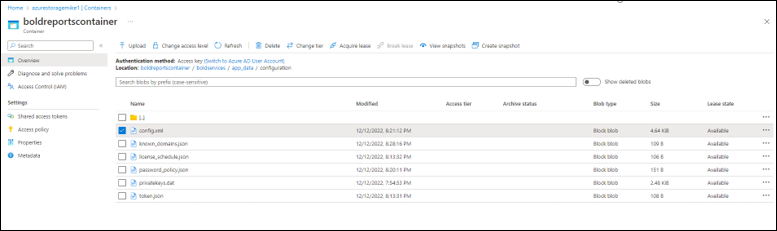
-
Download the config.xml and privatekey.dat file.
-
To change the database connection string, Download the utility from Utility
-
Extract the zip folder.
-
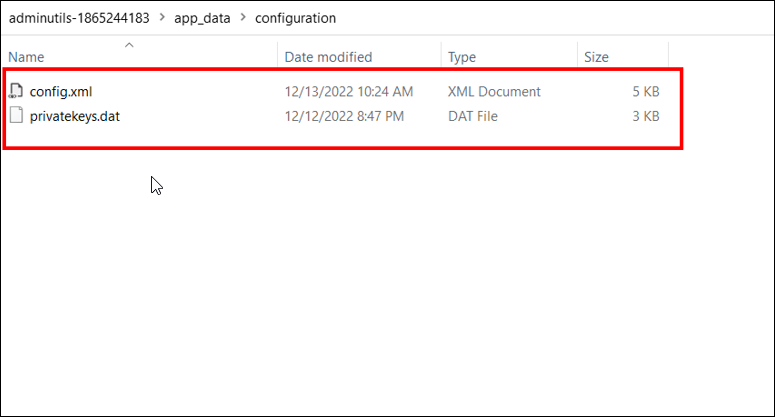
Create new folder app_data\configuration under the adminutils folder as like in below screenshot.
-
Copy the config.xml and privatekeys.dat files which is downloaded from step 2 and paste it under adminutils-1865244183\app_data\configuration
-
Navigate to the utility directory in the command prompt and run the following command.
Syncfusion.Server.Commands.Utility.exe dbconfig -servername “localhost” -databasename “BoldReportsMasterDatabase” -u “Admin” -p “Admin@12345” -iswindowsauthentication false -sslenabled false

Note: Provide SQL Server details of Azure app service 2
Command details
Servername – Server hostname/IP
Database name - database name (Master database name for boldreport application)
u – server username
p – server password
iswindowsauthentication – Is windows authentication required (this is optional)
sslenabled – Is encrypted connection required (this is optional)
-
Once the command executed successfully, Open the config.xml file which is located in adminutils-1865244183\app_data\configuration and update the target azure app service url under the InternalAppUrls.

-
Now, we need to update config.xml and privatekey.dat file to target storage account of azure app service.
-
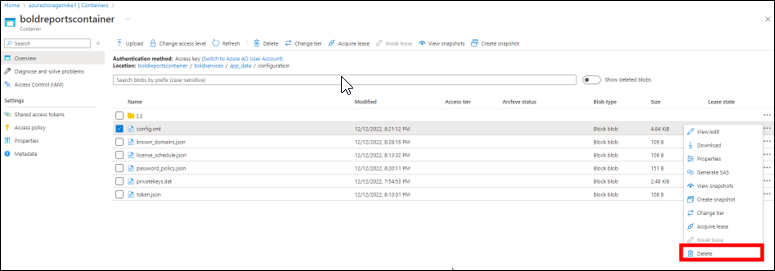
Go to your storage account of azure app service 2, which is created at the deployment time of Bold Reports® in azure app service 2 and in container section navigate to the following location. boldreportscontainer/boldservices/app_data/configuration
-
Delete the existing config.xml and privatekey.dat files from the above location.
-
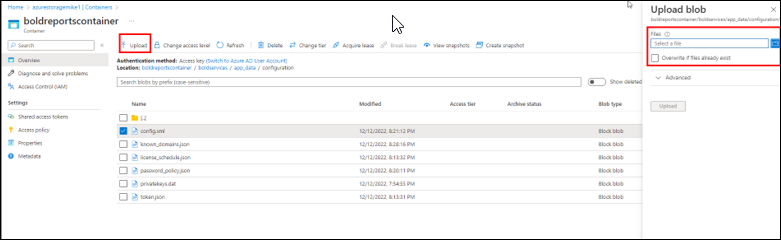
Click Upload and select the config.xml and privatekey.dat files from the below location adminutils-1865244183\app_data\configuration and update it.
Update storage account details and base url in sql server database of azure app service 2
We need update the values in each database in sql server of azure app service 2 which is copied from the source SQL server. Update the values in below tables
-
[dbo].[BOLDRS_SystemSettings]
-
[dbo].[BOLDTC_SystemSettings]
-
[dbo].[BOLDTC_Tenant]
Note: [dbo].[BOLDTC_SystemSettings] and [dbo].[BOLDTC_Tenant] tables are available only in master database.
Queries to update the storage account details and base url
Update the storage account details and base url of azure app service 2 by using the below queries.
Query for updating values in [dbo].[BOLDTC_Tenant] table:
USE [Database_name]
UPDATE [dbo].[BOLDTC_Tenant]
   SET DNS = '<azure_app_service_url>/reporting'
Query for updating values in [dbo].[BOLDTC_SystemSettings] table:
USE [Database_name]
UPDATE [dbo].[BOLDTC_SystemSettings]
SET SystemValue = CASE [SystemKey]
 when 'BaseUrl' then '<azure_app_service_url>'
 when 'AzureBlobStorageUri' then '<uri of target storage account>'
 when 'ConnectionString' then '<Connection string of storage account>'
 when 'BlobStorageAccountName' then '<Storage account name>'
 when 'BlobStorageAccessKey' then '<Access key of storage account>'
 End
WHERE [SystemKey] in ('BaseUrl','AzureBlobStorageUri','ConnectionString','BlobStorageAccountName', 'BlobStorageAccessKey');
Query for updating values in [dbo].[BOLDRS_SystemSettings] table:
USE [Database_name]
UPDATE [dbo].[BOLDRS_SystemSettings]
SET Value = CASE [Key]
 when 'BaseUrl' then '<azure_app_service_url/reporting/site/<site_identifier of the site>>'
 when 'AzureBlobStorageUri' then '<uri of target storage account'
 when 'ConnectionString' then '<connecting string of storage account>'
 End
WHERE [Key] in ('BaseUrl','AzureBlobStorageUri','ConnectionString');
Once the above queries executed successfully for all the database, Each and Every data is migrated to azure app service 2.
-
Now start the azure app service 2.
-
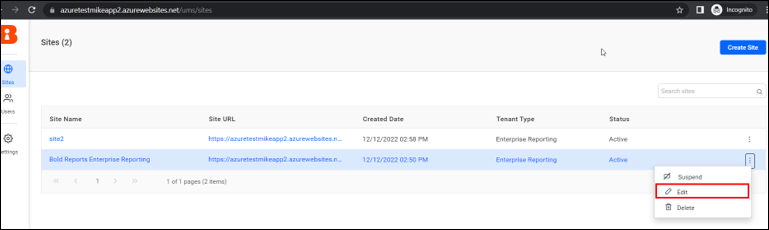
Go to the site listing page of UMS application.
-
Click the context menu and select the edit option.
-
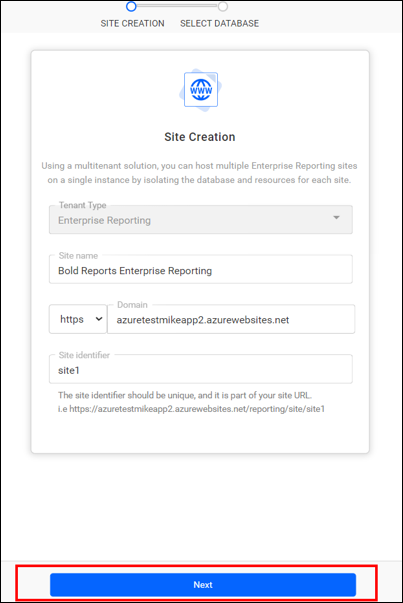
Proceed to the next page.
-
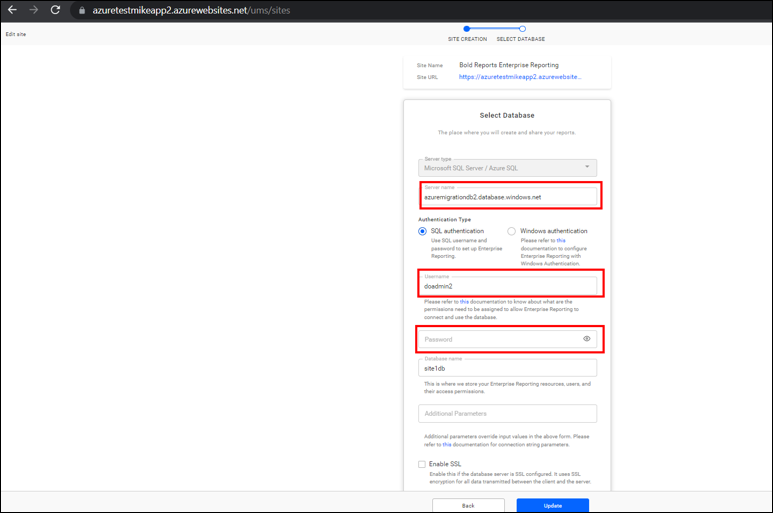
Here, you will find an option to change the site’s database connection. Modify the servername, username and password and update the details.
-
Do the same for all your tenants.
-
Now your reports sites will launch with your existing data.