Export SSRS RDL Report in Bold Reports® WPF Report Writer
The Report Writer is a class library that is used to export the RDL report with popular file formats like PDF, Microsoft Word, Microsoft CSV, and Microsoft Excel without previewing the report on the webpage. This section describes how to export the RDL report in WPF application using the Report Writer.
Create WPF application
- Start Visual Studio 2022 and click Create new project.
- Choose WPF App (.NET Framework), and then click Next.
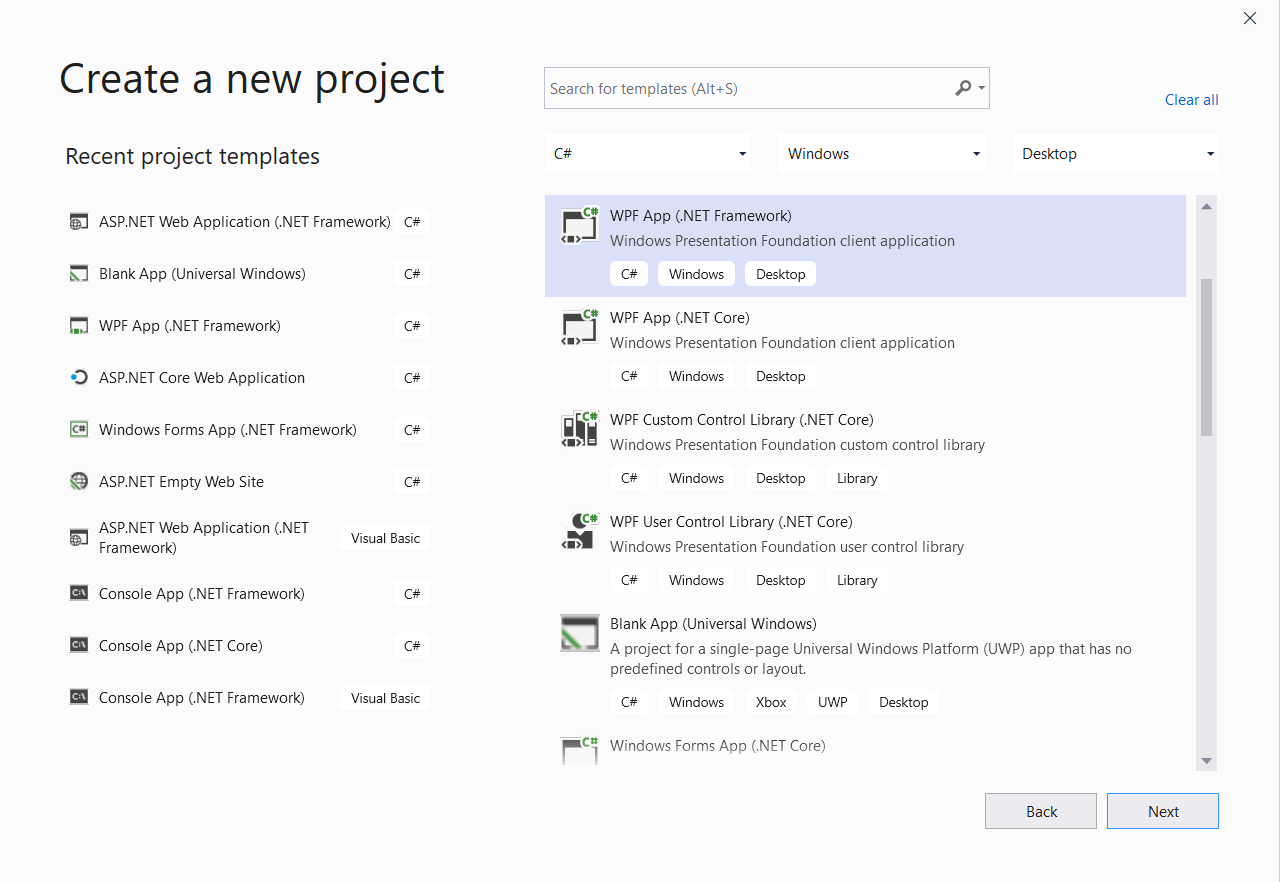 3. Change the project name, choose .NET Framework 4.6.2 or Higher in the framework field, and then click Create.
Starting with Bold Reports® version 8.1.1, support for .NET Framework versions lower than 4.6.2 (including .NET Framework 4.0, .NET Framework 4.5, and .NET Framework 4.6) has officially ended, with only limited support available for these versions. To continue receiving new features, improvements, and full support, upgrade to .NET Framework 4.6.2 or later. If you need to stay on an earlier .NET Framework version, use Bold Reports® version 7.1.10 or earlier.
List of dependency libraries
- In the Solution Explorer tab, right-click the project or solution, and choose Manage NuGet Packages. Alternatively, select the Tools > NuGet Package Manager > Manage NuGet Packages for Solution menu command.
- Search for
BoldReports.Wpfpackage and install this in your WPF application. The following table provides details about the packages and their usage.
Package | Purpose
--- | ---
BoldReports.Wpf | Contains WPF Reporting controls (Report Viewer and Report Writer) to preview and export the reports.
Add already created reports
In this tutorial, the
sales-order-detail.rdlreport is used, and it can be downloaded at this link. You can add the reports from the Syncfusion® installation location. For more information, refer to the samples and demos section.
1. Create a folder `Resources` in your application to store the RDL reports.
2. Add already created reports to the newly created folder.
Initialize Report Writer
-
Open the
MainWindow.xamlfile in your application. Add the following code example in the<Window>tag.<Window ..... ..... ..... Title="WPF Writer" WindowStyle="SingleBorderWindow" ResizeMode="NoResize" WindowStartupLocation="CenterScreen" Width="365" Height="235"> <Grid> </Grid> </Window> -
Initialize the Report writer export type inside the
<Grid>tag as shown below in theMainWindow.xamlfile,<Grid> <Grid.RowDefinitions> <RowDefinition Height="*"/> <RowDefinition Height="*"/> </Grid.RowDefinitions> <TextBlock Grid.Row="0" TextAlignment="Justify" FontFamily="Verdana" FontSize="11" TextWrapping="Wrap" Padding="5" > <TextBlock.Background> <LinearGradientBrush EndPoint="0.5,-0.04" StartPoint="0.5,1.04"> <GradientStop Color="#FFD9E9F7" Offset="0"/> <GradientStop Color="#FFEFF8FF" Offset="1"/> </LinearGradientBrush> </TextBlock.Background> <TextBlock.Text> Choose a file format to view the selected document generated from Report file by using Essential Report Writer. </TextBlock.Text> </TextBlock> <StackPanel Grid.Row="1" Orientation="Horizontal"> <RadioButton Content="PDF" Height="16" HorizontalAlignment="Left" Name="pdf" IsChecked="True" Margin="5"/> <RadioButton Content="Excel" Height="16" HorizontalAlignment="Left" Name="excel" Margin="5" /> <RadioButton Content="Word" Height="16" HorizontalAlignment="Left" Name="word" Margin="5"/> <RadioButton Content="HTML" Height="16" HorizontalAlignment="Left" Name="html" Margin="5"/> <Button Click="Button_Click" Margin="10,0" Width="100" Height="25" BorderBrush="LightBlue"> <Button.Background> <LinearGradientBrush EndPoint="0.5,-0.04" StartPoint="0.5,1.04"> <GradientStop Color="#FFD9E9F7" Offset="0"/> <GradientStop Color="#FFEFF8FF" Offset="1"/> </LinearGradientBrush> </Button.Background> <StackPanel Orientation= "Horizontal"> <Image Name="image2" Margin="2" /> <TextBlock Text="Generate" Margin="3" HorizontalAlignment="Right" /> </StackPanel> </Button> </StackPanel> </Grid>
Set report path
-
Open the
MainWindow.xaml.csfile and add the following using statement.using BoldReports.Writer; -
Initialize the ReportWriter by using the following code example in the
MainWindow.xaml.csfile export button click event.private void Button_Click(object sender, RoutedEventArgs e) { try { // Refer the RDL report file location string reportPath = @"<root folder>\Resources\sales-order-detail.rdl"); string fileName = null; WriterFormat format; //Step 1 : Instantiate the report writer with the parameter "ReportPath". ReportWriter reportWriter = new ReportWriter(reportPath); //Step 2 : Save the report as Pdf or Word or Excel if (pdf.IsChecked == true) { fileName = "sales-order-detail.pdf"; format = WriterFormat.PDF; } else if (word.IsChecked == true) { fileName = "sales-order-detail.docx"; format = WriterFormat.Word; } else if (excel.IsChecked == true) { fileName = "sales-order-detail.xlsx"; format = WriterFormat.Excel; } else { fileName = "sales-order-detail.html"; format = WriterFormat.HTML; } reportWriter.Save(fileName, format); //Message box confirmation to view the created report document. if (MessageBox.Show("Do you want to view the " + format + " file?", "" + format + " report Created", MessageBoxButton.YesNo, MessageBoxImage.Information) == MessageBoxResult.Yes) { //Launching the PDF file using the default Application.[Acrobat Reader] System.Diagnostics.Process.Start(fileName); } } catch (Exception Ex) { MessageBox.Show(Ex.Message); } } -
Now, run and export the report with specified export format in your Report Writer application.
Congratulations! You have completed your first WPF Writer application! Click here to download the already created WPF Report Writer application.
- Exported files are saved in the application bin location.
Note: You can refer to our feature tour page for the WPF Report Writer to see its innovative features.