Load Bold Report Server Reports
You can easily render reports hosted on the Bold Report Server in your WPF report viewer application. Utilizing an external server in WPF enables you to display the Bold Report Server reports. The following steps explain how to render Bold Report Server reports in the WPF report viewer.
To quickly get started with the Report Viewer, you can watch this video:
Create a WPF .NET Core Application Using Report Viewer
-
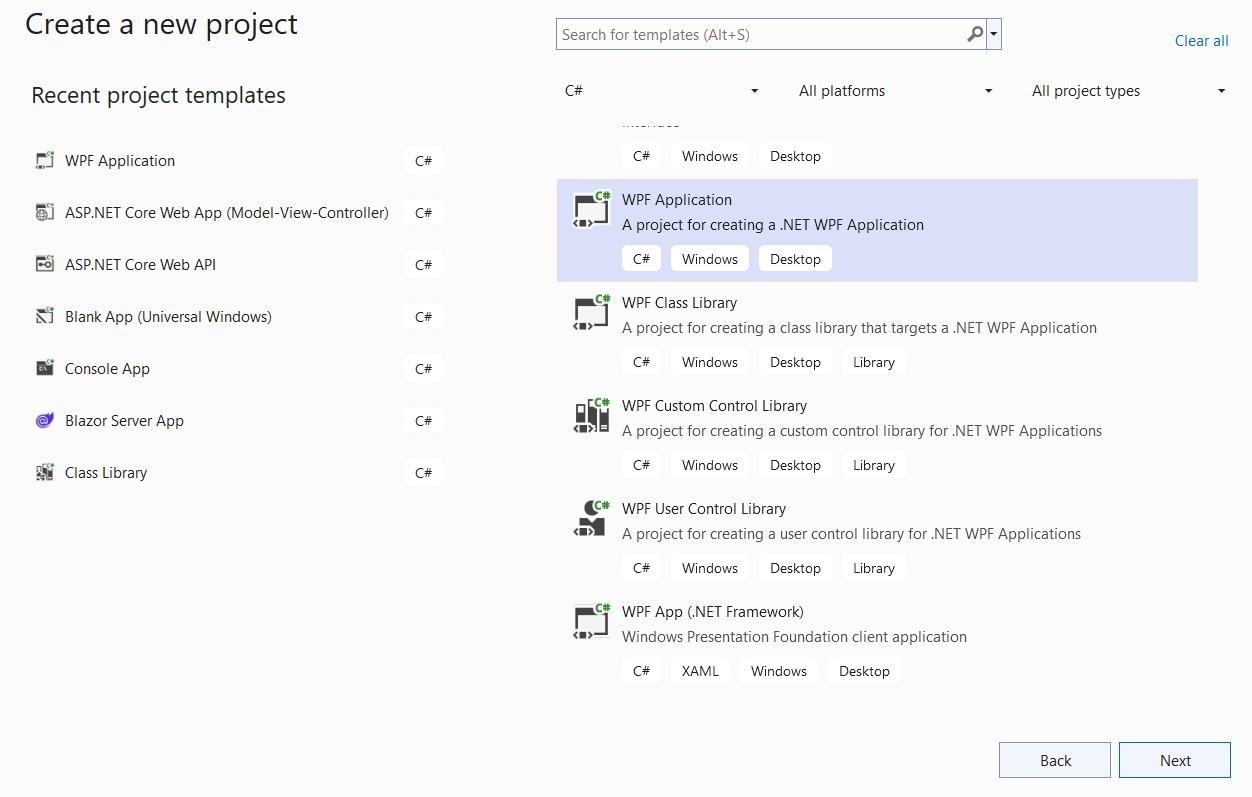
Open Visual Studio 2022 and click on Create new project.
-
Select WPF Application, and then click Next.

-
Change the project name, and then click Create.
Configure Report Viewer in an application
-
Right-click the project or solution in the Solution Explorer tab and choose Manage NuGet Packages. Alternatively, select Tools > NuGet Package Manager > Manage NuGet Packages for Solution.
Refer to the NuGet Packages to learn more details about installing and configuring Report Viewer NuGet packages.
-
Search for the
BoldReports.WpfNuGet package and install it in your WPF application.Package Purpose BoldReports.WpfContains WPF Reporting controls (Report Viewer and Report Writer) to preview and export the reports.
Initialize Report Viewer
-
Import the Report Viewer namespace as shown below in the
MainWindow.xamlfile,xmlns:BoldReports="clr-namespace:BoldReports.UI.Xaml;assembly=BoldReports.Wpf" -
Initialize the Report Viewer component inside the
<Grid>tag as shown below in theMainWindow.xamlfile,<Window ..... ..... ..... ..... xmlns:BoldReports="clr-namespace:BoldReports.UI.Xaml;assembly=BoldReports.Wpf" ..... .....> <Grid> <BoldReports:ReportViewer Name="reportViewer" /> </Grid> </Window>
Render the Bold Report Server reports
To embed reports successfully in the Report Viewer, you need to provide the ReportServerUrl, ReportServerCredential, and ReportPath. You can provide the necessary information from the report server as explained below:
ReportServerUrl- This API requires the Report Server URL, which contains information for the Report Server Reporting Server.ReportServerCredential– This is used to set the network credentials needed to access the SQL Server Reporting Services (SSRS) server.ReportPath- The report path needs to be formed with information for the category and report name, like/{category name}/{report name}.
Depending on your Report Server type, follow one of the procedures below:
Add the ReportServerExt.cs and DataClasses.cs files, which are extensions for the report server, into your WPF report viewer application to successfully display reports from the Bold Report server.
Download the
ReportServerExt.csandDataClasses.csreport server extension files from here.
Enterprise Reporting Server
Set the Bold Report Server report properties as shown in the following code snippet.
private void MainWindow_Loaded(object sender, RoutedEventArgs e)
{
    this.reportViewer.ReportServerUrl = @"https://on-premise-demo.boldreports.com/reporting/api/site/site1/";
    this.reportViewer.ReportServer = new ReportingServerExt();
    this.reportViewer.ReportServerCredential = new System.Net.NetworkCredential("[email protected]", "demo");
    this.reportViewer.ReportPath = @"/Sample Reports/Company Sales";
    this.reportViewer.RefreshReport();
}
Note: Ensure that you include the Report Server in this format:
{domain}/reporting/api/site/{tenant-name}/.
Cloud Reporting Server
Set the Bold Report Server report properties as shown in the following code snippet,
private void MainWindow_Loaded(object sender, RoutedEventArgs e)
{
    this.reportViewer.ReportServerUrl = @"https://acmecorp.boldreports.com/reporting/api/";
    this.reportViewer.ReportServer = new ReportingServerExt();
    this.reportViewer.ReportServerCredential = new System.Net.NetworkCredential("[email protected]", "demo@123");
    this.reportViewer.ReportPath = @"/Sample Reports/Company Sales";
    this.reportViewer.RefreshReport();
}
Note: Ensure that you include the Report Server in this format:
{domain}/reporting/api/.