Utilizing Blazor’s JavaScript Interoperability for Rendering SSRS RDL Reports in Bold Reports® Viewer
Create your first Blazor Web application in the .NET 8.0 or .NET 9.0 framework to Utilizing Blazor’s JavaScript Interoperability for Rendering SSRS RDL Reports in the Bold Reports® Blazor Report Viewer without using a Report Server using these step-by-step instructions.
To create your first application on other .NET Core versions lower than .NET 8.0, refer to the documentation for .NET 6.0
To get start quickly with Report Viewer, you can check on this video:
Prerequisites
Before getting started with a bold web report viewer, make sure your development environment includes the following requirements.
- Install Visual Studio 2022:
- Make sure you have Visual Studio 2022 installed on your machine. You can download it from the official Visual Studio website at Visual Studio 2022.
- Install .NET 8.0 or .NET 9.0 SDK:
- Ensure that you have .NET 8.0 / 9.0 SDK installed. You can download it from the .NET download page at .NET 8.0 / 9.0.
Create a Blazor application
- Start Visual Studio 2022 and click Create new project.
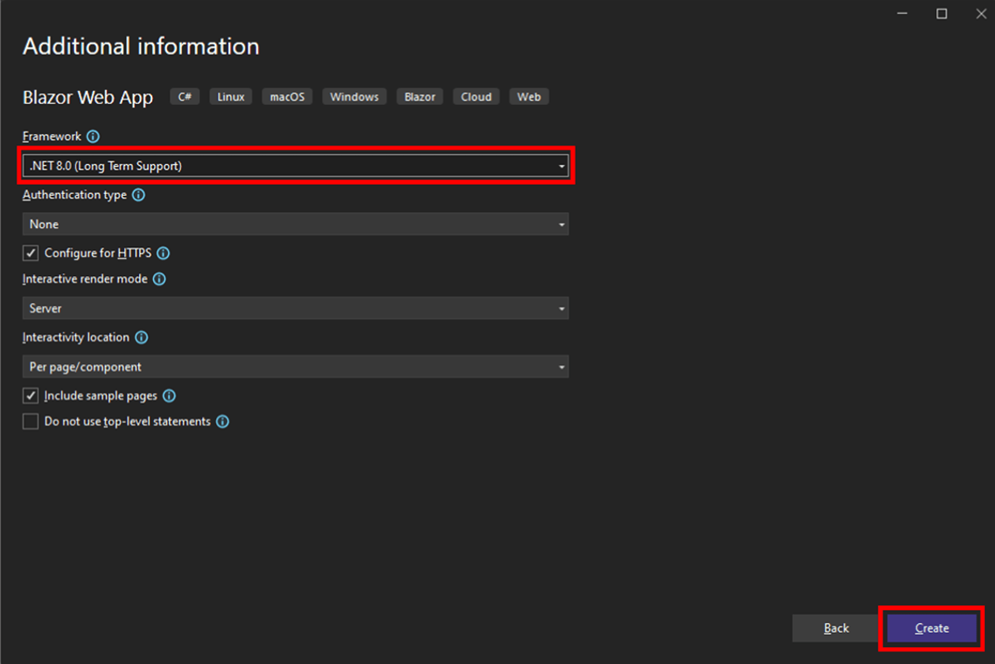
- Choose Blazor Web App, then click Next.

- Modify the project name, then click Next.
- From the dropdown menu for Framework, choose .NET 8.0 or .NET 9.0, and then click Create.
List of dependency libraries
- In the Solution Explorer tab, right-click the project or solution, and choose Manage NuGet Packages. Alternatively, select the Tools > NuGet Package Manager > Manage NuGet Packages for Solution menu command.
- Search for the
BoldReports.Net.Corepackage, and install them in your Blazor application. The following table provides details about the packages and their usage.
| Package | Purpose |
|---|---|
BoldReports.Net.Core |
Creates a Web API service used to process the reports. |
Microsoft.AspNetCore.Mvc.NewtonsoftJson |
ASP.NET Core MVC features that use Newtonsoft.Json. Includes input and output formatters for JSON and JSON Patch. The package version should be higher than 6.0.0. |
Microsoft.Data.SqlClient |
This package is optional. Install it if the RDL report contains a SQL Server or SQL Azure data source. |
Refer to the NuGet Packages section to learn more details about installing and configuring Report Viewer NuGet packages.
Configure Web API
The Blazor Report Viewer requires a Web API service to process the RDL, RDLC, and SSRS report files.
Add Web API Controller
-
Right-click the project and select Add > New Item from the context menu.
-
In the Add New Item dialog, select API Controller Empty class and name it as
BoldReportsAPIController.cs.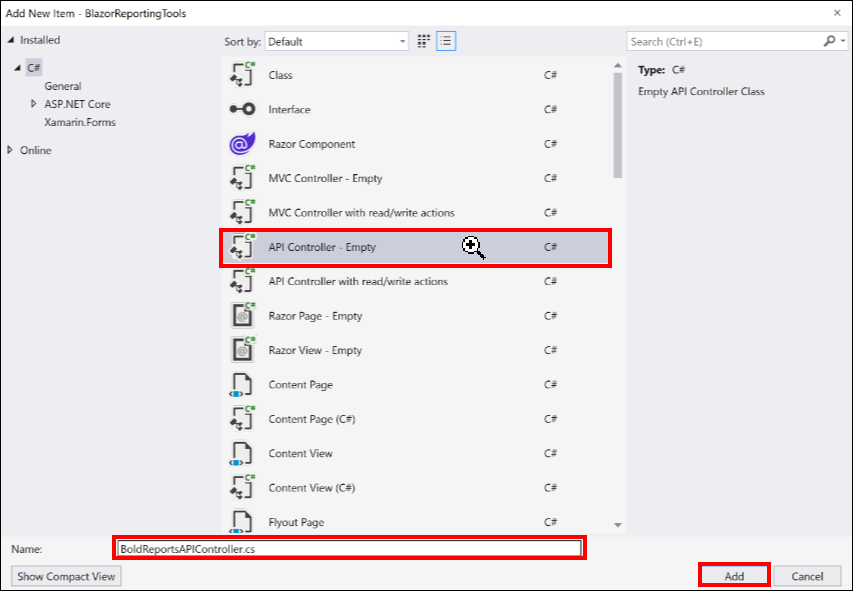
-
Click Add.
While adding the API Controller class, it is mandatory to name it with the suffix
Controller. -
Open the
BoldReportsAPIControllerand add the following using statement.using BoldReports.Web.ReportViewer; using Microsoft.AspNetCore.Http; using Microsoft.Extensions.Caching.Memory; -
Inherit the
IReportControllerinterface and implement its methods.It is required for processing reports and handling requests from the Report Viewer.
-
Create local variables inside the
BoldReportsAPIControllerclass.// The Report Viewer requires a memory cache to store information from consecutive client requests and // the rendered report viewer in the server. private IMemoryCache _cache; // The IWebHostEnvironment is used within the sample to retrieve application data from the wwwroot. private IWebHostEnvironment _hostingEnvironment; -
Load the report as a stream in the
OnInitReportOptionsmethod.[NonAction] public void OnInitReportOptions(ReportViewerOptions reportOption) { string basePath = _hostingEnvironment.WebRootPath; // Here, we have loaded the sales-order-detail.rdl report from the application folder wwwrootResources. sales-order-detail.rdl should be located in the wwwroot\Resources application folder. System.IO.FileStream inputStream = new System.IO.FileStream(basePath + @"\Resources\" + reportOption.ReportModel.ReportPath + ".rdl", System.IO.FileMode.Open, System.IO.FileAccess.Read); MemoryStream reportStream = new MemoryStream(); inputStream.CopyTo(reportStream); reportStream.Position = 0; inputStream.Close(); reportOption.ReportModel.Stream = reportStream; }You cannot load the report stored in the application with path information from an ASP.NET Core service.
-
Set the
Routeattribute forBoldReportsAPIController.[Route("api/{controller}/{action}/{id?}")] public class BoldReportsAPIController : Controller, IReportController { ... } -
You can replace the template code with the following code.
using Microsoft.AspNetCore.Mvc; using BoldReports.Web.ReportViewer; using Microsoft.AspNetCore.Http; using Microsoft.Extensions.Caching.Memory; namespace BlazorReportingTools { [Route("api/{controller}/{action}/{id?}")] public class BoldReportsAPIController : Controller, IReportController { // Report viewer requires a memory cache to store the information of consecutive client requests and // the rendered report viewer in the server. private IMemoryCache _cache; // IWebHostEnvironment used with sample to get the application data from wwwroot. private IWebHostEnvironment _hostingEnvironment; public BoldReportsAPIController(IMemoryCache memoryCache, IWebHostEnvironment hostingEnvironment) { _cache = memoryCache; _hostingEnvironment = hostingEnvironment; } //Get action for getting resources from the report [ActionName("GetResource")] [AcceptVerbs("GET")] // Method will be called from Report Viewer client to get the image src for Image report item. public object GetResource(ReportResource resource) { return ReportHelper.GetResource(resource, this, _cache); } // Method will be called to initialize the report information to load the report with ReportHelper for processing. [NonAction] public void OnInitReportOptions(ReportViewerOptions reportOption) { string basePath = _hostingEnvironment.WebRootPath; // Here, we have loaded the sales-order-detail.rdl report from the application folder wwwrootResources. sales-order-detail.rdl should be located in the wwwroot\Resources application folder. System.IO.FileStream inputStream = new System.IO.FileStream(basePath + @"\Resources\" + reportOption.ReportModel.ReportPath + ".rdl", System.IO.FileMode.Open, System.IO.FileAccess.Read); MemoryStream reportStream = new MemoryStream(); inputStream.CopyTo(reportStream); reportStream.Position = 0; inputStream.Close(); reportOption.ReportModel.Stream = reportStream; } // Method will be called when report is loaded internally to start the layout process with ReportHelper. [NonAction] public void OnReportLoaded(ReportViewerOptions reportOption) { } [HttpPost] public object PostFormReportAction() { return ReportHelper.ProcessReport(null, this, _cache); } // Post action to process the report from the server based on json parameters and send the result back to the client. [HttpPost] public object PostReportAction([FromBody] Dictionary<string, object> jsonArray) { return ReportHelper.ProcessReport(jsonArray, this, this._cache); } } } -
To invoke this Web API with the controller and action, we have to include
AddControllers()andAddMemoryCache()builder services andMapControllers()in theProgram.csfile.builder.Services.AddControllers(); builder.Services.AddMemoryCache(); ... ... ... app.MapControllers(); -
You can replace the template code with the following code in the
Program.csfile.using BlazorReportingTools.Components; var builder = WebApplication.CreateBuilder(args); // Add services to the container. builder.Services.AddControllers(); builder.Services.AddMemoryCache(); var app = builder.Build(); // Configure the HTTP request pipeline. if (!app.Environment.IsDevelopment()) { app.UseExceptionHandler("/Error", createScopeForErrors: true); // The default HSTS value is 30 days. You may want to change this for production scenarios, see https://aka.ms/aspnetcore-hsts. app.UseHsts(); } app.UseHttpsRedirection(); app.UseStaticFiles(); app.UseAntiforgery(); app.MapRazorComponents<App>() .AddInteractiveServerRenderMode(); app.MapControllers(); app.Run();
Initialize the Report Viewer
In this section, we are going to integrate the Bold Reports® JavaScript controls by creating an interop file to initialize the report viewer with basic parameters.
-
Right-click the project and select Add > Class from the context menu.
-
In the Add New Item dialog, select class and name it as
BoldReportViewerOptions.cs.
-
Click Add.
-
Add the following code to the
BoldReportViewerOptions.csfile to hold the RDL report rendering properties.namespace BlazorReportingTools.Data { public class BoldReportViewerOptions { public string ReportName { get; set; } public string ServiceURL { get; set; } } } -
Create a
boldreports-interop.jsfile inside thewwwroot/scriptsfolder and use the following code snippet to invoke the Bold Report Viewer JavaScript control.// Interop file to render the Bold Report Viewer component with properties. window.BoldReports = { RenderViewer: function (elementID, reportViewerOptions) { $("#" + elementID).boldReportViewer({ reportPath: reportViewerOptions.reportName, reportServiceUrl: reportViewerOptions.serviceURL }); } } -
Create a folder named
Resourcesinside thewwwrootfolder in your application to store the RDL reports. Then, add any previously created RDL reports to this newly created folder.In this tutorial, the
sales-order-detail.rdlreport is used, and it can be downloaded here. You can add the reports from the Bold Reports® installation location. For more information, refer to the samples and demos section of the Bold Reports® documentation. -
Reference the following online CDN links, along with the
boldreports-interop.jsfile, in the head section of thePages/_Layout.cshtmlfile to use our JavaScript reporting controls in the Blazor application. Although Blazor applications useApp.razorfor routing, all global CSS and script references must still be added to the_Layout.cshtmlfile. This is because_Layout.cshtmldefines the HTML structure and includes for your app.<!-- Report Viewer component style --> <link href="https://cdn.boldreports.com/14.1.12/content/v2.0/tailwind-light/bold.report-viewer.min.css" rel="stylesheet" /> <!-- Report Viewer component dependent scripts --> <script src="https://cdnjs.cloudflare.com/ajax/libs/jquery/3.6.0/jquery.min.js"></script> <script src="https://cdn.boldreports.com/14.1.12/scripts/v2.0/common/bold.reports.common.min.js"></script> <script src="https://cdn.boldreports.com/14.1.12/scripts/v2.0/common/bold.reports.widgets.min.js"></script> <!-- Report Viewer component script --> <script src="https://cdn.boldreports.com/14.1.12/scripts/v2.0/bold.report-viewer.min.js"></script> <!-- Blazor interop file --> <script src="~/scripts/boldreports-interop.js"></script>
-
Inject IJSRuntime and add InteractiveServer rendermode and invoke this JavaScript interop with the
sales-order-detail.rdlreport and the createdBoldReportsAPIURL in theComponents/Pages/Index.razorfile to visualize the report using our viewer.@page "/" @using Microsoft.JSInterop @using Microsoft.AspNetCore.Components @using BlazorReportingTools.Data @inject IJSRuntime JSRuntime <div id="report-viewer" style="width: 100%;height: 950px"></div> @code { // ReportViewer options BoldReportViewerOptions viewerOptions = new BoldReportViewerOptions(); // Used to render the Bold Report Viewer component in Blazor page. public async void RenderReportViewer() { viewerOptions.ReportName = "sales-order-detail"; viewerOptions.ServiceURL = "/api/BoldReportsAPI"; await JSRuntime.InvokeVoidAsync("BoldReports.RenderViewer", "report-viewer", viewerOptions); } // Initial rendering of Bold Report Viewer protected override void OnAfterRender(bool firstRender) { RenderReportViewer(); } }
Here, we have created and used BoldReportViewerOptions to pass the parameters for report rendering. In the future, if we need any additional parameters, we can just include them in the BoldReportsOptions.cs file and use it to render the reports.
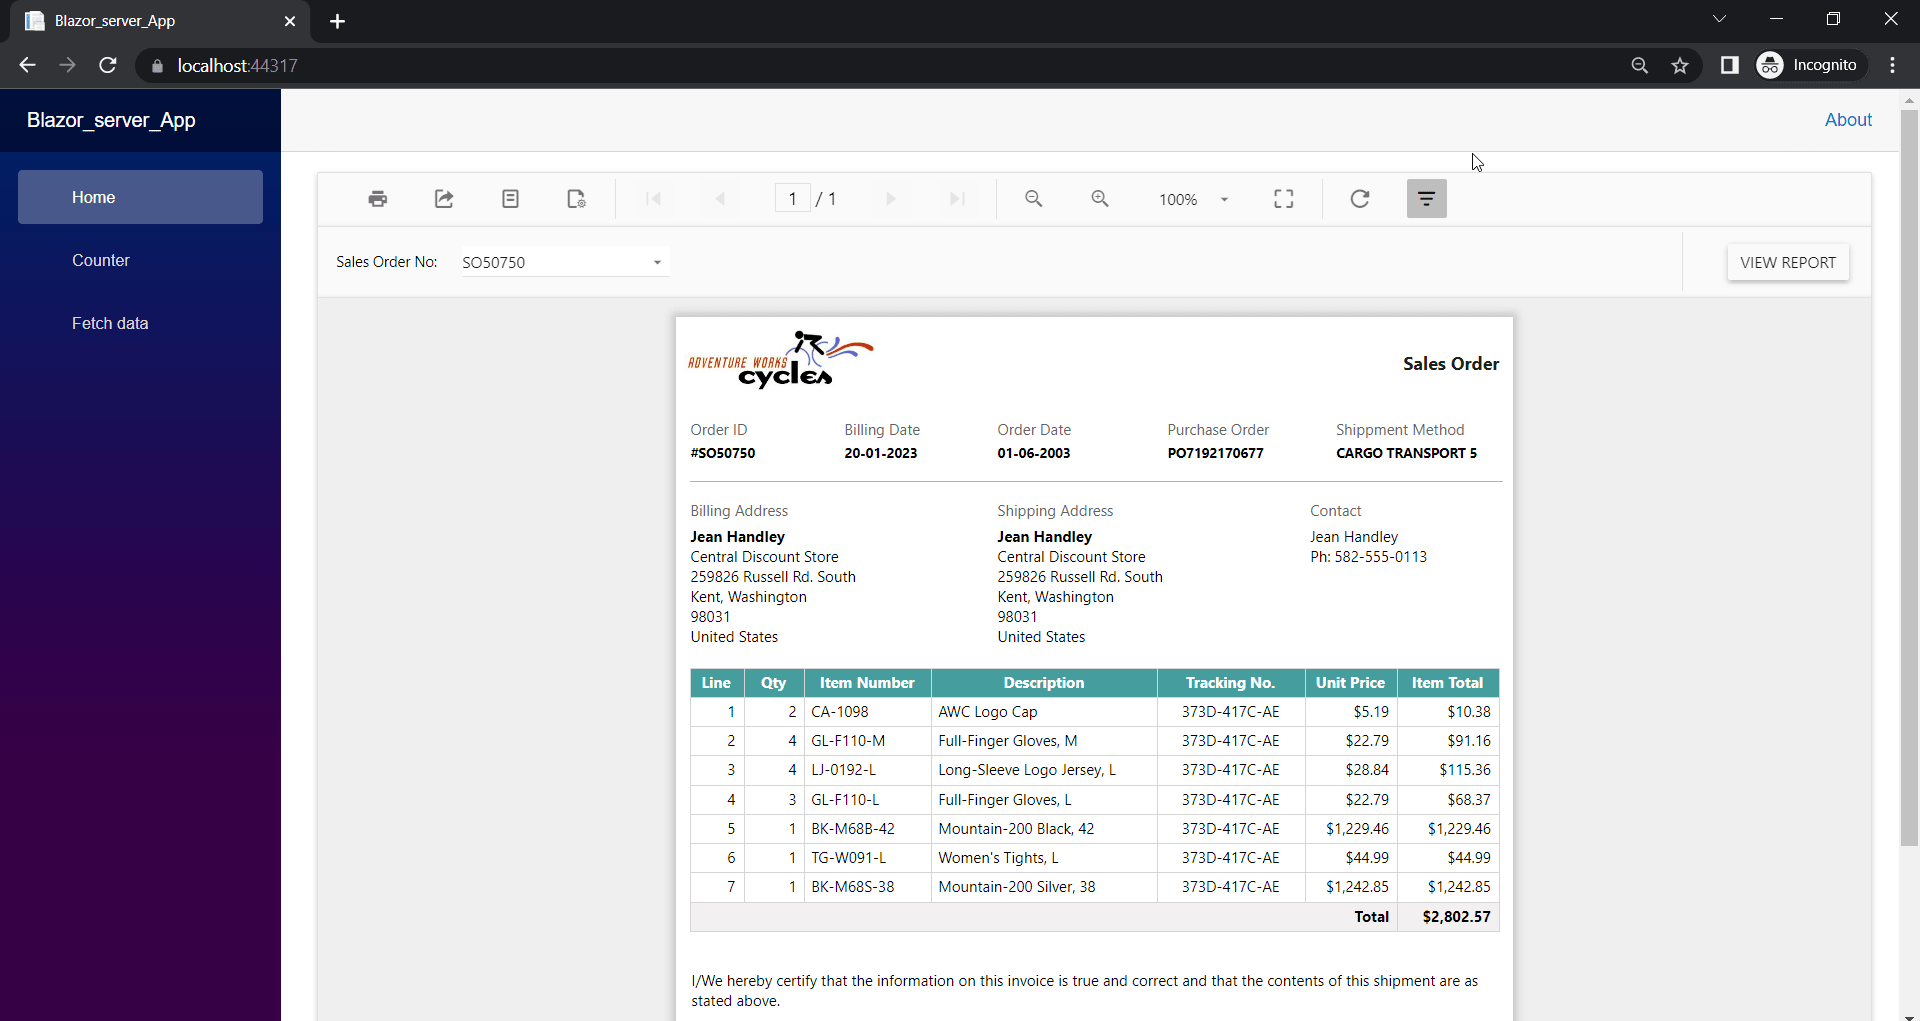
Run the Application
Build and run the application to view the report output in the Report Viewer as displayed in the following screenshot.
Note: You can refer to our feature tour page for the Blazor Report Viewer to see its innovative features. Additionally, you can view our Blazor Report Viewer examples which demonstrate the rendering of SSRS RDLC and RDL reports.