Assign data to tablix data region
The table, matrix and list report items can display data from a single dataset. You can also assign conditional expressions to filter or sort the dataset columns.
Assign dataset
There are two ways to assign the dataset to the tablix:
- Assign dataset from data assign menu
- Assign dataset in
Datasetproperty of tablix
Assign dataset from data assign menu
-
Select any cell in the tablix data region, then click the
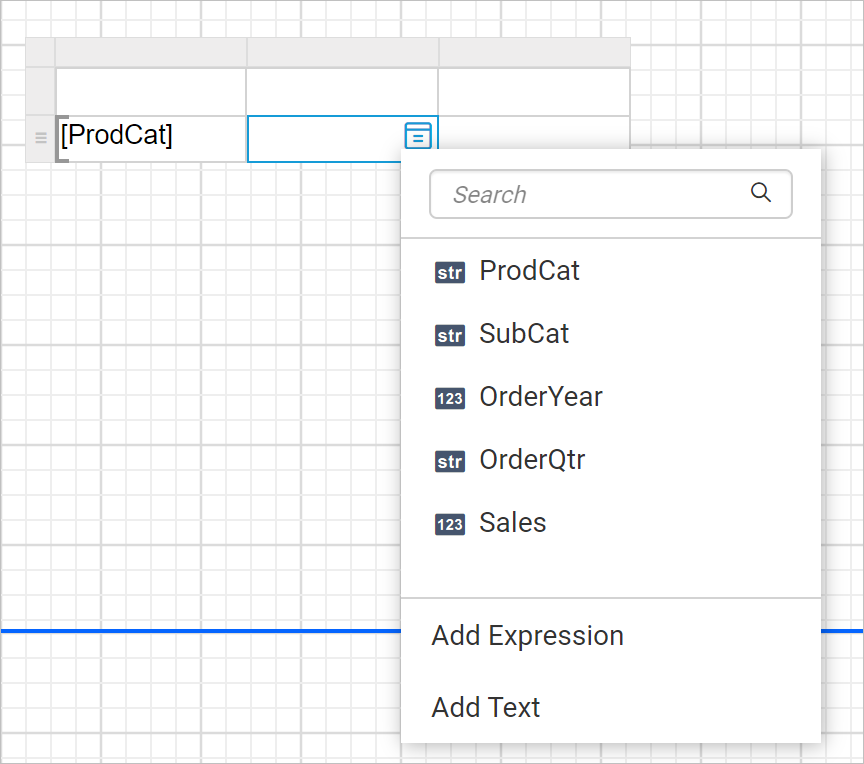
Data Assignmenu icon to open the data assign menu. If the report does not have a dataset, the data assign menu will have following options.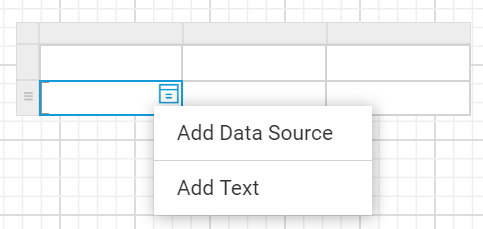
Click on the
Add Datasourceoption in the menu and add dataset using the steps provided in Create Data section. -
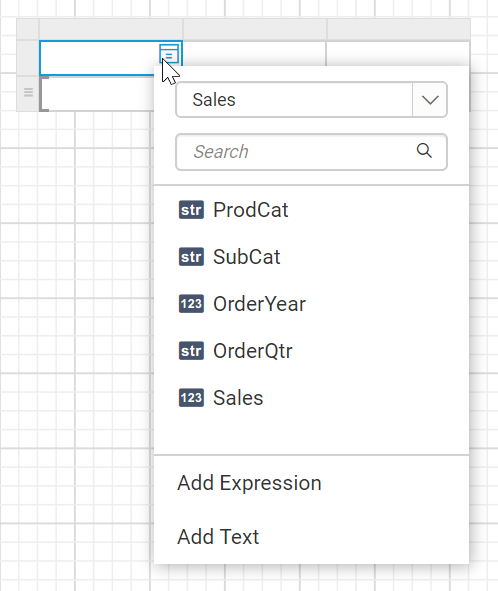
By default, the menu displays the fields of the first dataset in the report.
-
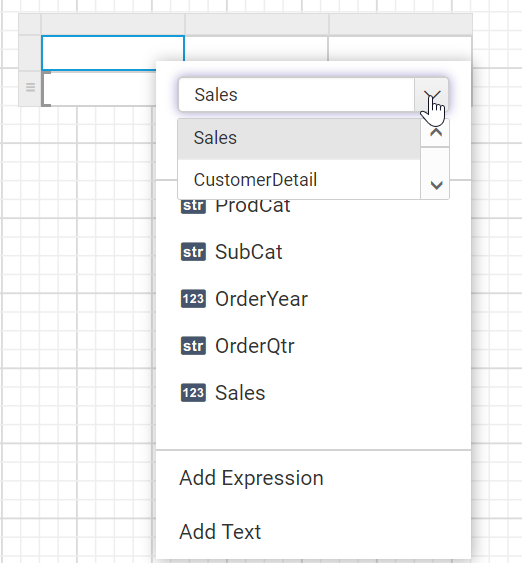
The available datasets in the report will be listed in the first dropdown. To assign different dataset, choose desired dataset in the dropdown.
-
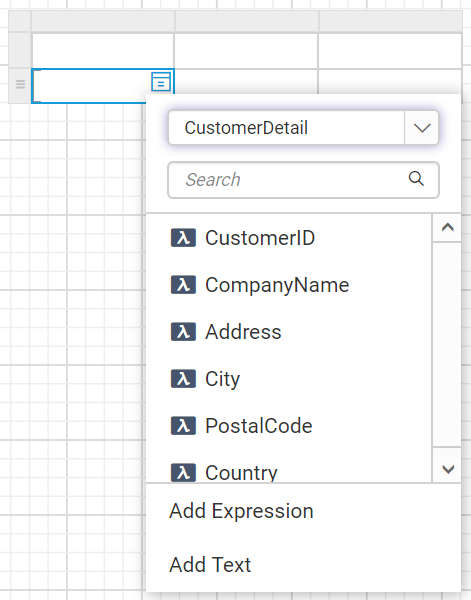
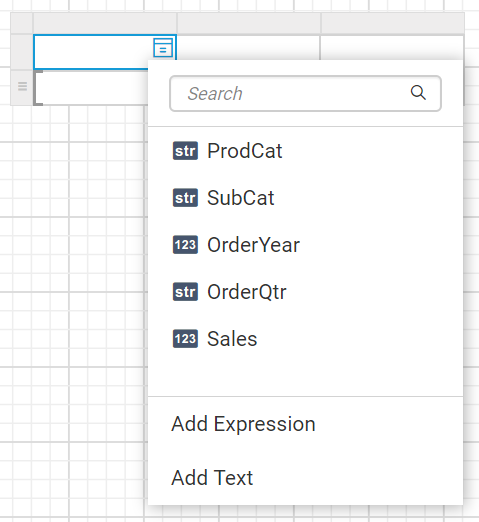
Now, the fields of selected dataset will be listed in the data assign menu like below.
Assign dataset from properties panel
- Select the tablix report item in design area, now the respective tablix properties will be listed in the properties panel.

- The available datasets in the report will be listed in the
Datasetproperty dropdown. You can choose the desired dataset from the drop-down.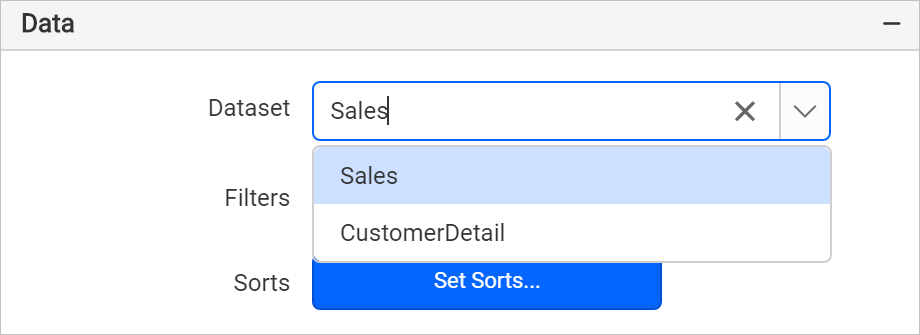
- Now, the fields of selected dataset will be listed in the data assign menu like below.
Assign fields to tablix cell
There are a few different ways to assign the fields into a tablix cell:
- Drag and drop data fields from the
DATApanel. - Select the field from the data assign menu provided in each cell.
Drag and drop data fields
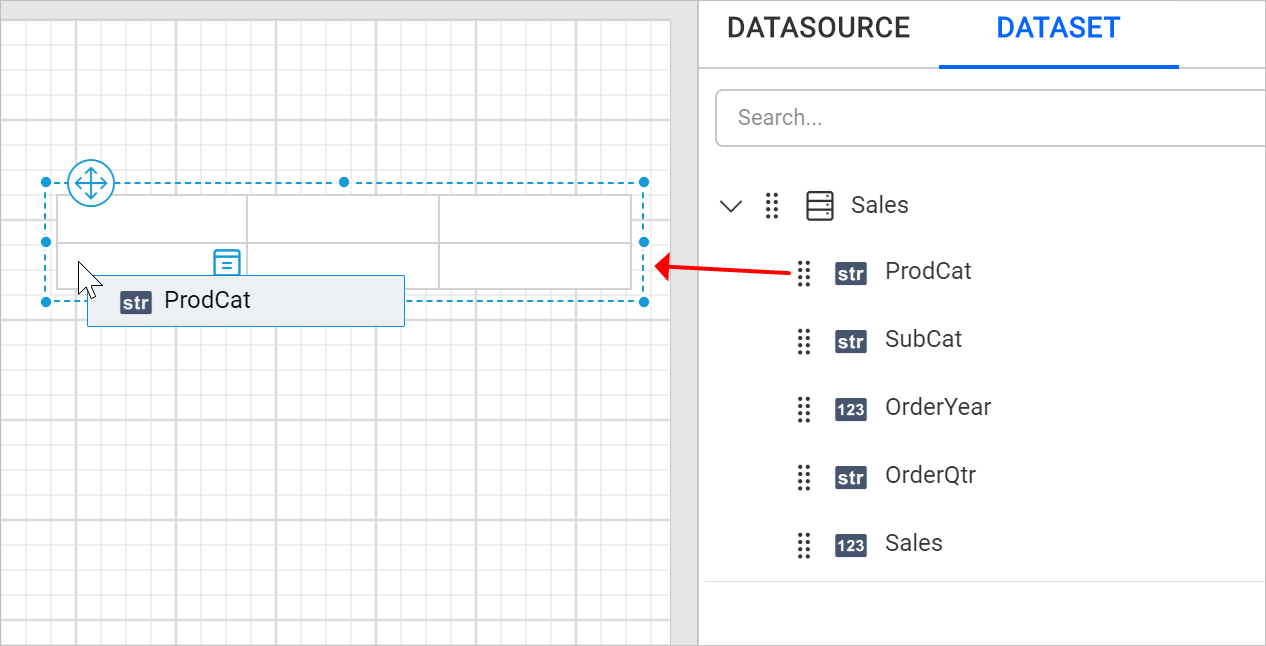
- Open the
DATApanel and expand the required dataset.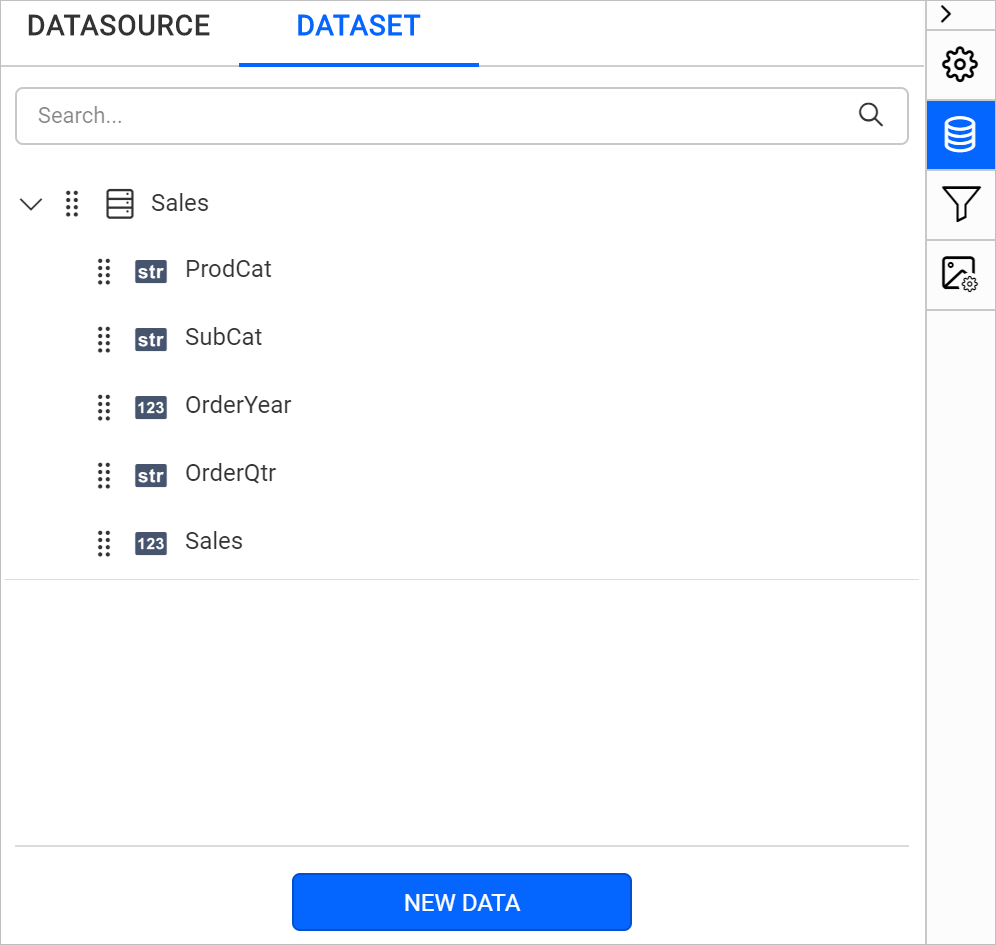
- Drag a field from the list and drop into a required cell.
Assign fields using data assign menu
-
Select the tablix cell and click on the
Data assignmenu icon to open data assign menu.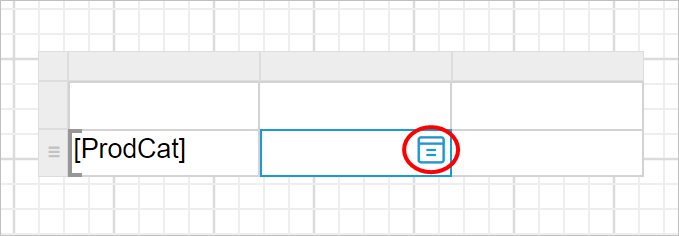
-
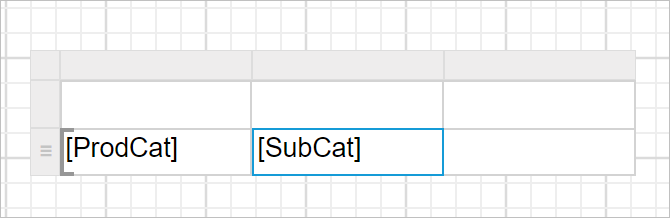
Click on the required data field name in the menu.
The fields of the dataset which is assigned to
Datasetproperty of tablix will be listed in the menu. -
Now, the respective field will be assigned to the respective cell like below.
Assign or edit expression into table cell
There are two ways to assign or edit an expression in a Tablix cell.
- Set expression using the
Add Expressionand modify them using theEdit Expressionoption in the Data Assign menu. - Set or edit expression using Multi-Text Run Editor Dialog.
Set expression using data assign menu
The Data Assign Menu is recommended when you want to quickly assign a single TextRun expression to a tablix cell. It provides a direct way to open the Expression Editor.
-
Select a tablix cell and click the
Data Assignmenu icon to open the Data Assign menu.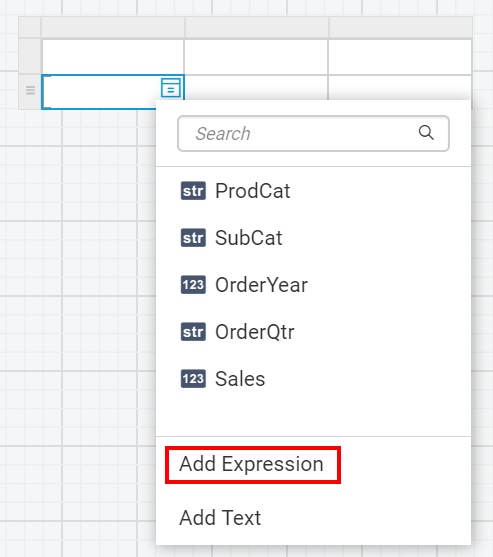
-
Click
Add Expressionoption from the data assign menu. Now, theExpressionbuilder will be launched like below.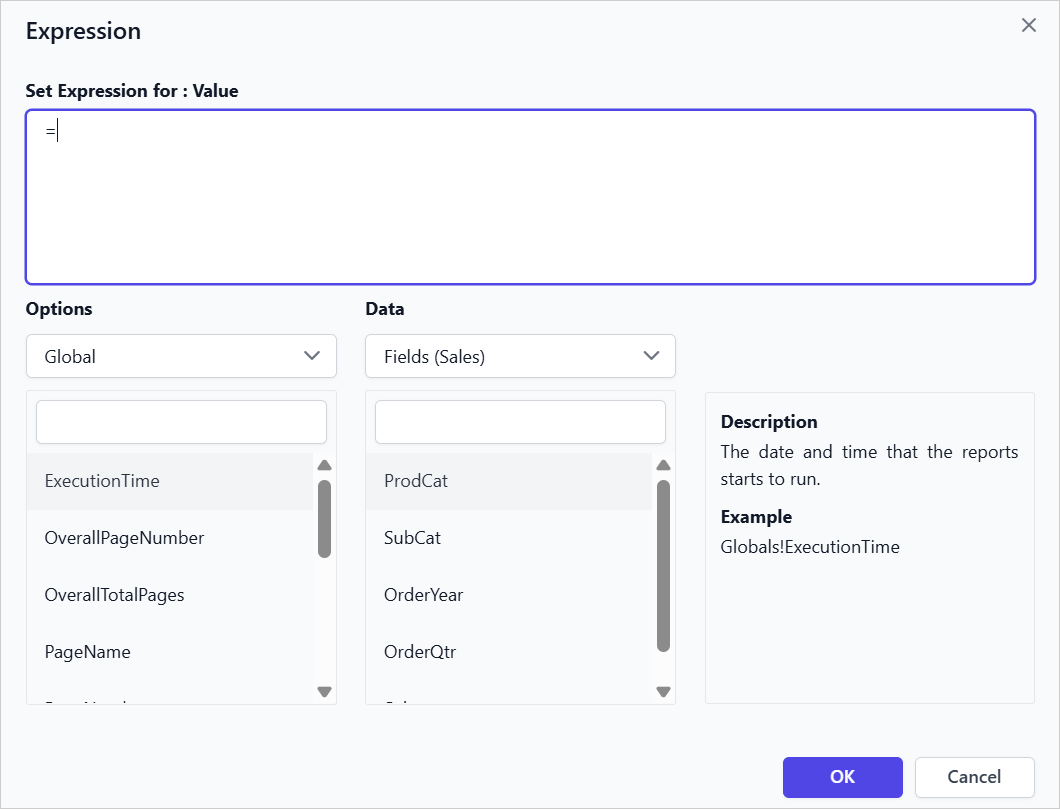
To learn more about working with expressions in the Report Designer refer to the Expressions section.
-
Set the Expression in the Expression editor.
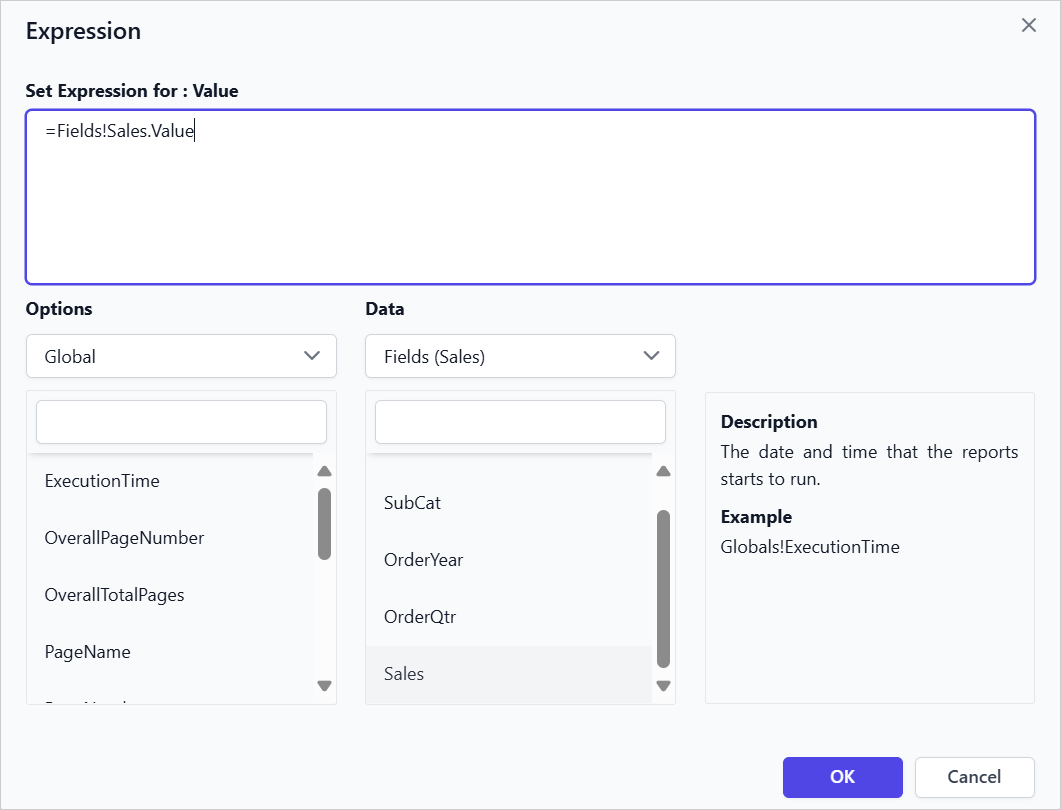
-
Click
OKto assign added expression into the respective tablix cell.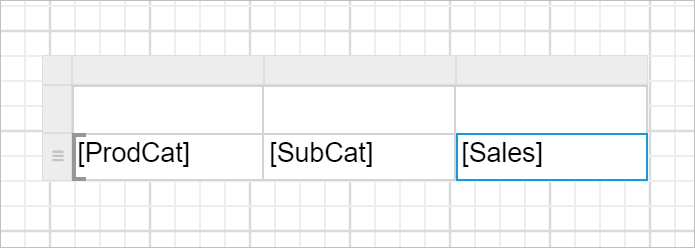
Set expression using Multi-Text Run Editor Dialog
The Multi‑Text Run Editor Dialog is ideal when you need to manage multiple TextRuns within the same tablix cell. It allows you to combine static text and expressions, giving flexibility for complex formatting or mixed content scenarios.
- Select the tablix cell and click the
Text Editoricon to open the Multi-Text Run Editor Dialog.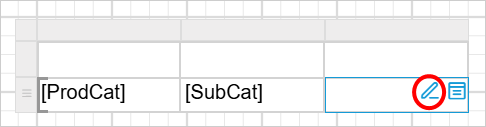
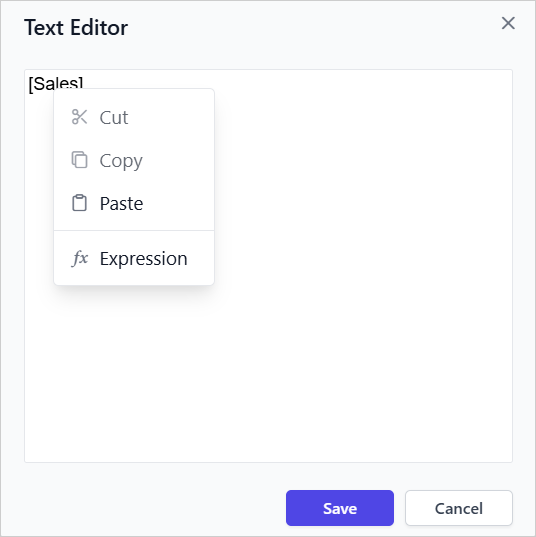
- The
Multi-Text Run EditorDialog opens, allowing you to add and manage expressions within the cell.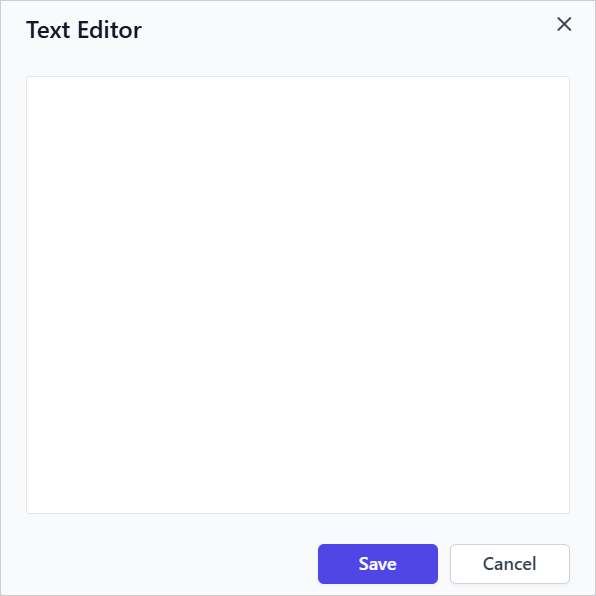
- Right-click within the editor area to open the context menu.

- From the context menu, click the
Expressionoption to open theExpression Editor. - Set the Expression in the Expression editor and click
OK. - The
[Sales]expression will now appear in theMulti-Text Run EditorDialog.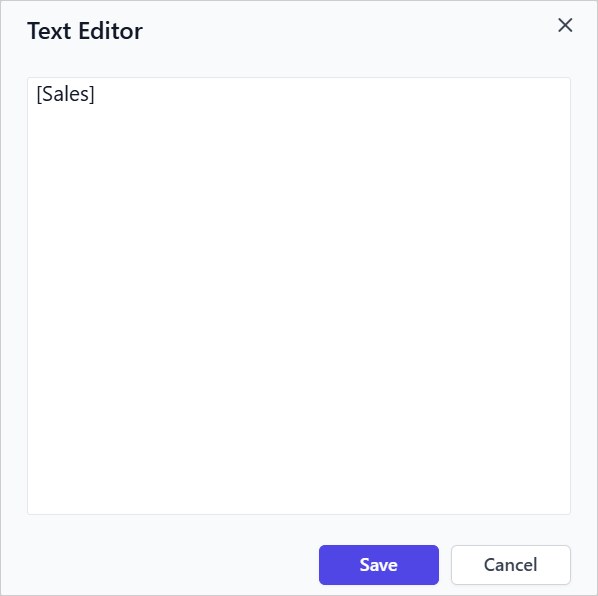
- Click
Saveto assign added expression into the respective tablix cell.
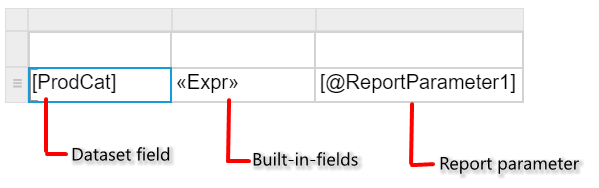
You can specify dataset fields, parameters, or built-in functions in the Expression Editor, then click OK.
The label denoted in the table cell varies based on the assigned values in table cell. The following snap depicts the label text variations.
Edit expression using data assign menu
- Select a table cell in which you need to edit the expression and click on the
Data assignmenu icon to open data assign menu.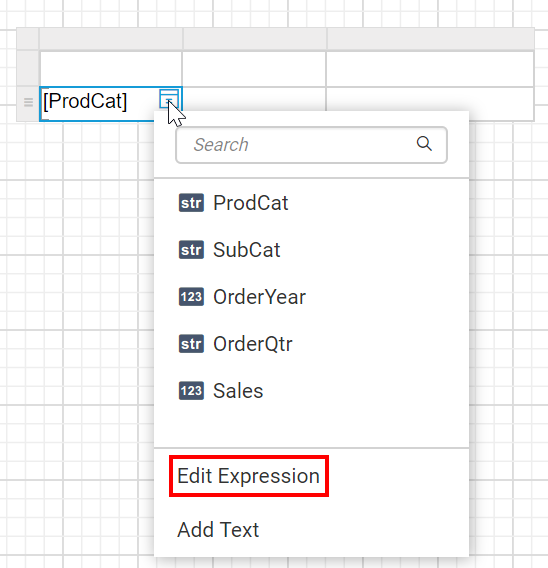
- Click the
Edit Expressionoption in the data assign menu. Now, theExpressionbuilder will be launched like below. - Modify the expression as required and click on the
OKbutton.
Edit expression using Multi-Text Run Editor Dialog
- Select the tablix cell and click the
Text Editoricon to open the Multi-Text Run Editor Dialog.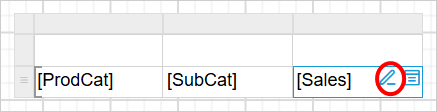
- The
Multi-Text Run Editordialog will appear, allowing you to modify the existing Expression. - Right-click within the expression context to edit the Expression.
- From the context menu, click
Expressionoption to open theExpression Editor. - Update the Expression in the
Expression editorand clickOK.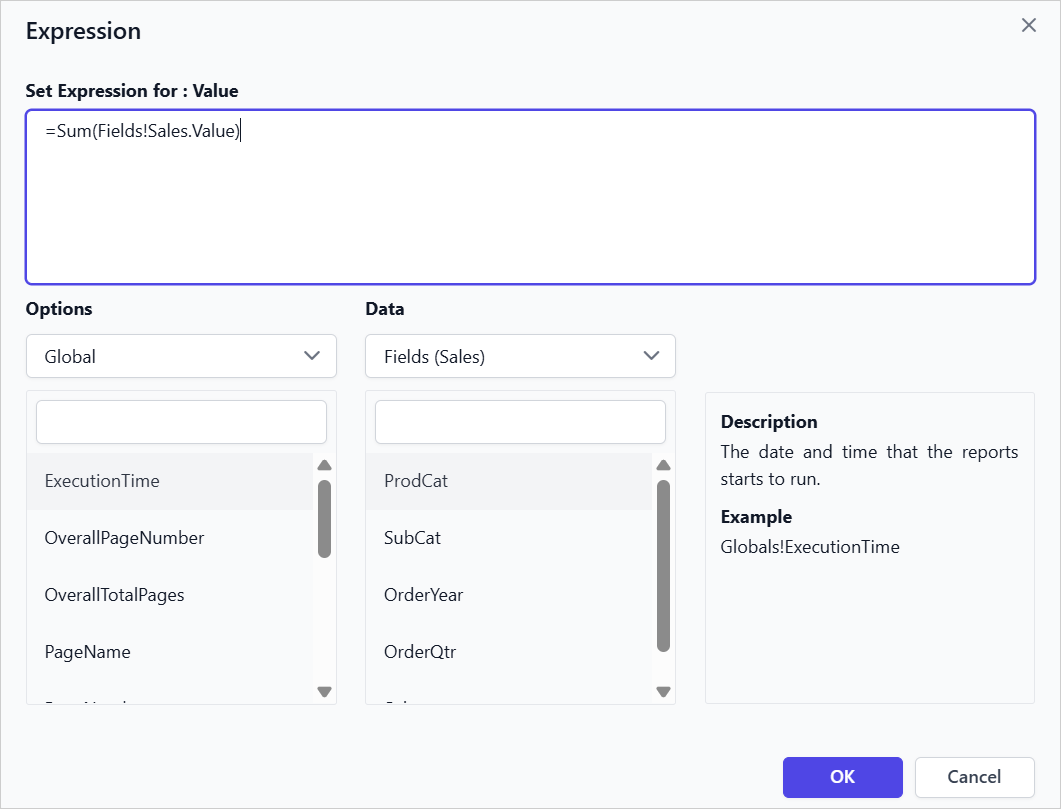
- The
[Sum(Sales)]expression is updated to the Multi-Text Run Editor dialog.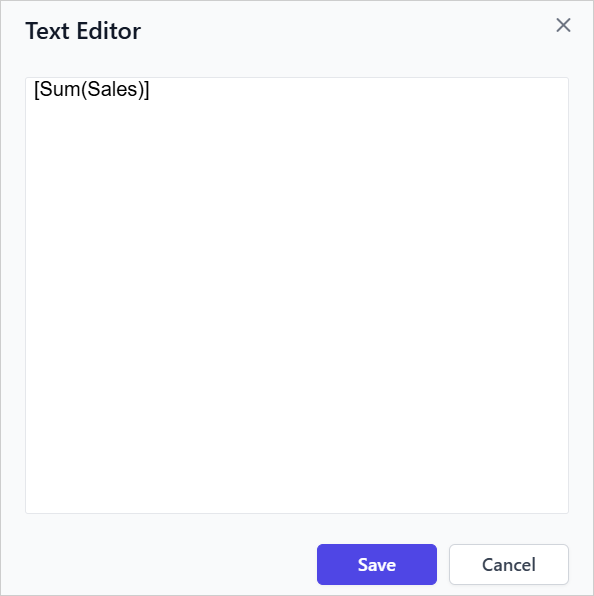
- Click
Saveto assign modified expression into the respective tablix cell.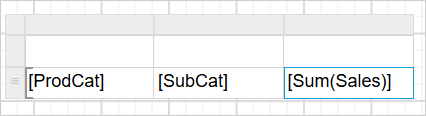
Tablix Cell Editors
Each tablix cell provides flexible editing options to manage text and expressions. These options simplify report design with quick access to text entry or expression assignment.
- Text Editor icon: Opens the Multi-Text Run Editor dialog.
- Data Assign Menu icon: Opens a menu with options to add text or expression.
![]()
Text Editor Icon
- Opens the
Multi-Text Run Editordialog to enter static text or expressions. - Right-click inside the editor and select Expression from the context menu to open the Expression Editor.
- Supports adding a single TextRun or multiple TextRuns.
Data Assign Menu Icon
The Data Assign Menu provides the following options:
- Add Text: Opens the
Multi-TextRun Editordialog to enter static text or expressions. - Add Expression: Opens the
Expression Editordirectly. This option allows adding only a single TextRun, enabling faster report creation.
The following options shown in the Data Assign Menu depend on the current state of the tablix cell:
| Cell State | Menu Options Displayed |
|---|---|
| Empty cell (no TextRuns) | Add Expression, Add Text |
| Single TextRun (static text) | Add Expression, Edit Text |
| Single TextRun (expression) | Edit Expression, Edit Text |
| Multiple TextRuns | Edit Text |
Double-Click Actions in Tablix Cells
Double-clicking a tablix cell provides a shortcut to open the appropriate editor:
| Cell State | Double-Click Action |
|---|---|
| Empty cell (no TextRuns) | Opens Multi TextRun Editor |
| Single TextRun (static text) | Opens Multi TextRun Editor |
| Single TextRun (expression) | Opens Expression Editor |
| Multiple TextRuns | Opens Multi TextRun Editor |