Database settings
You should configure the database settings in the Bold Reports® Server to import users and groups from an existing database.
Configure database connection details
- To configure the database connection details, click on the Settings option in the left-side panel of the Reports Server.
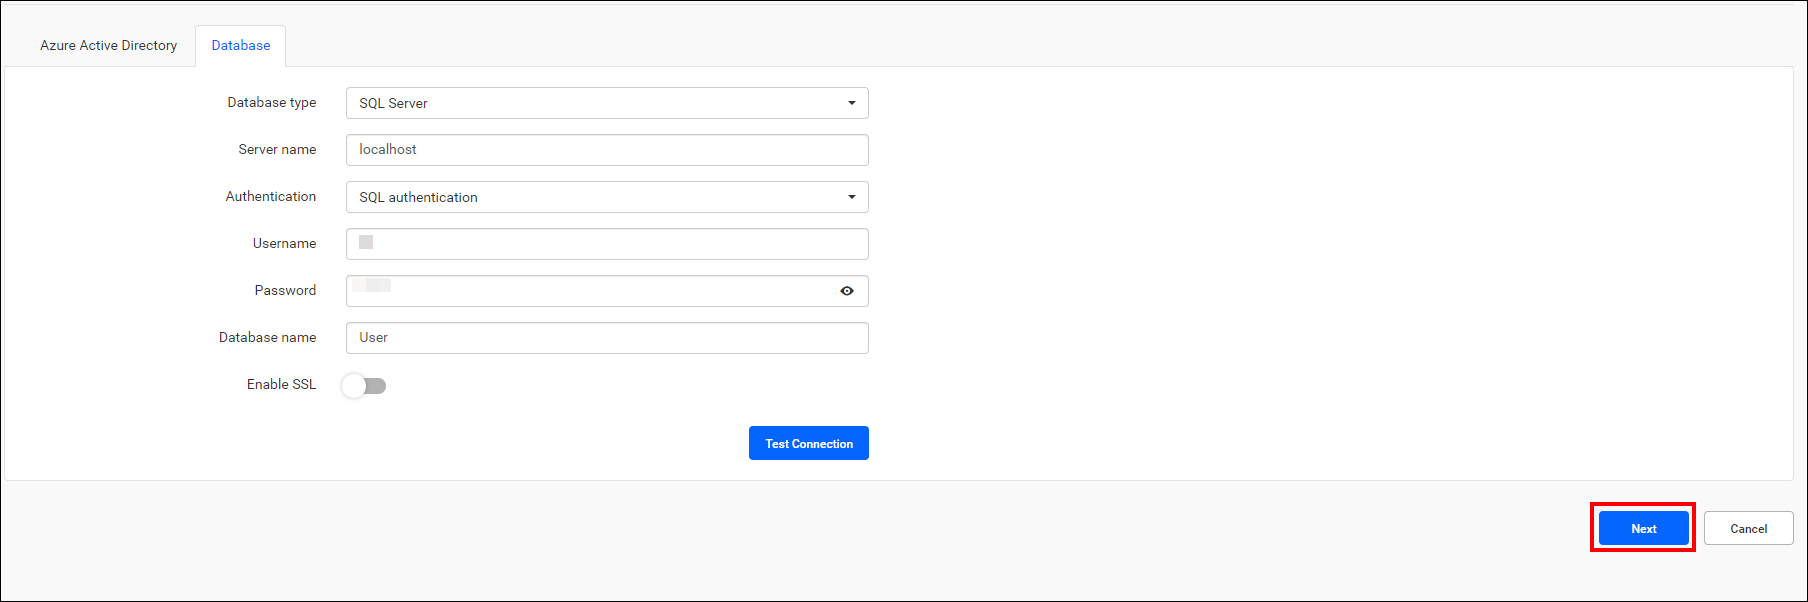
- Navigate to the Authentication tab, then select Database as shown in the following image.
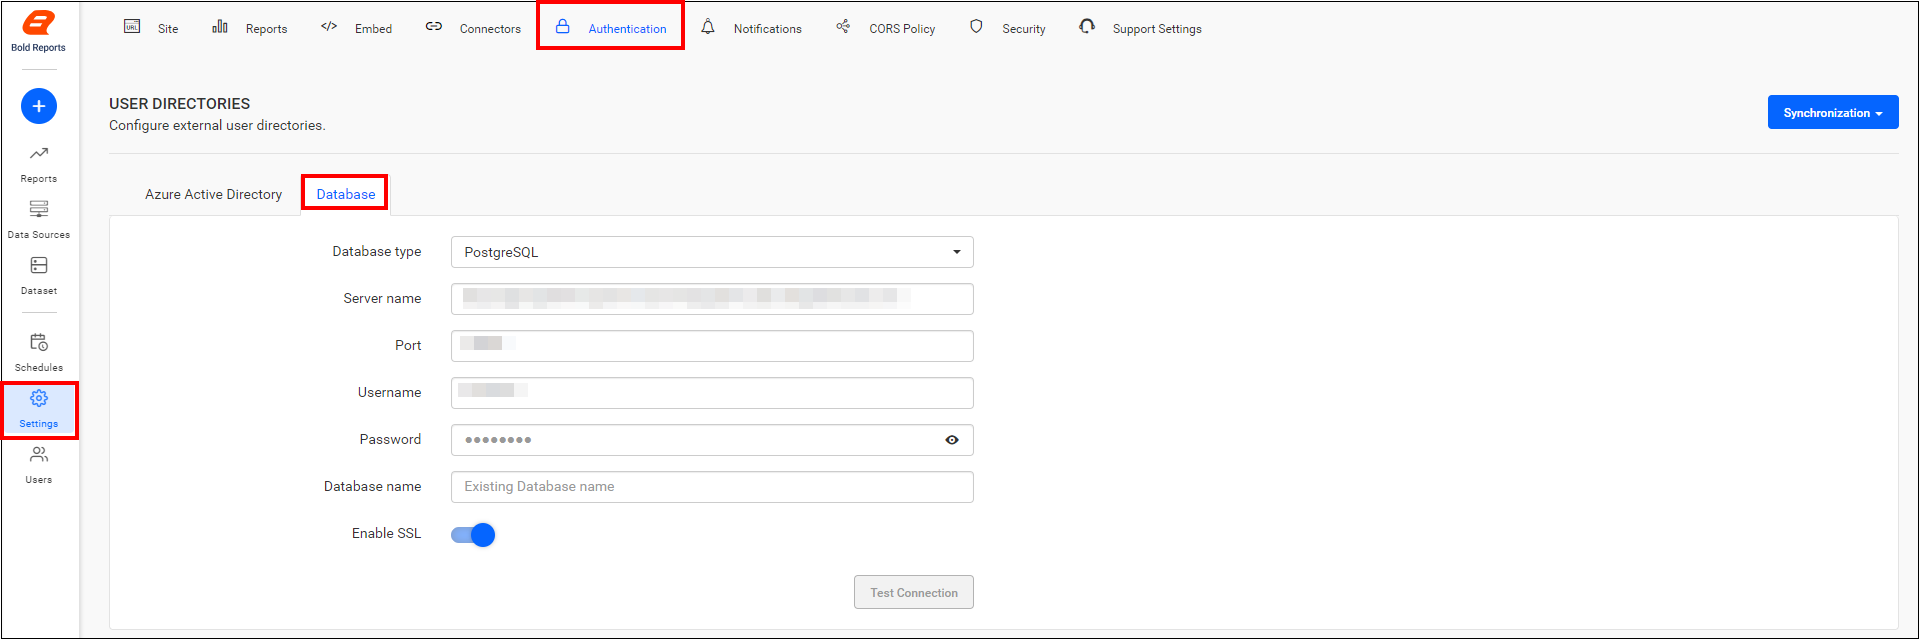
Users can be imported from the following types of databases:
- SQL Server
- PostgreSQL
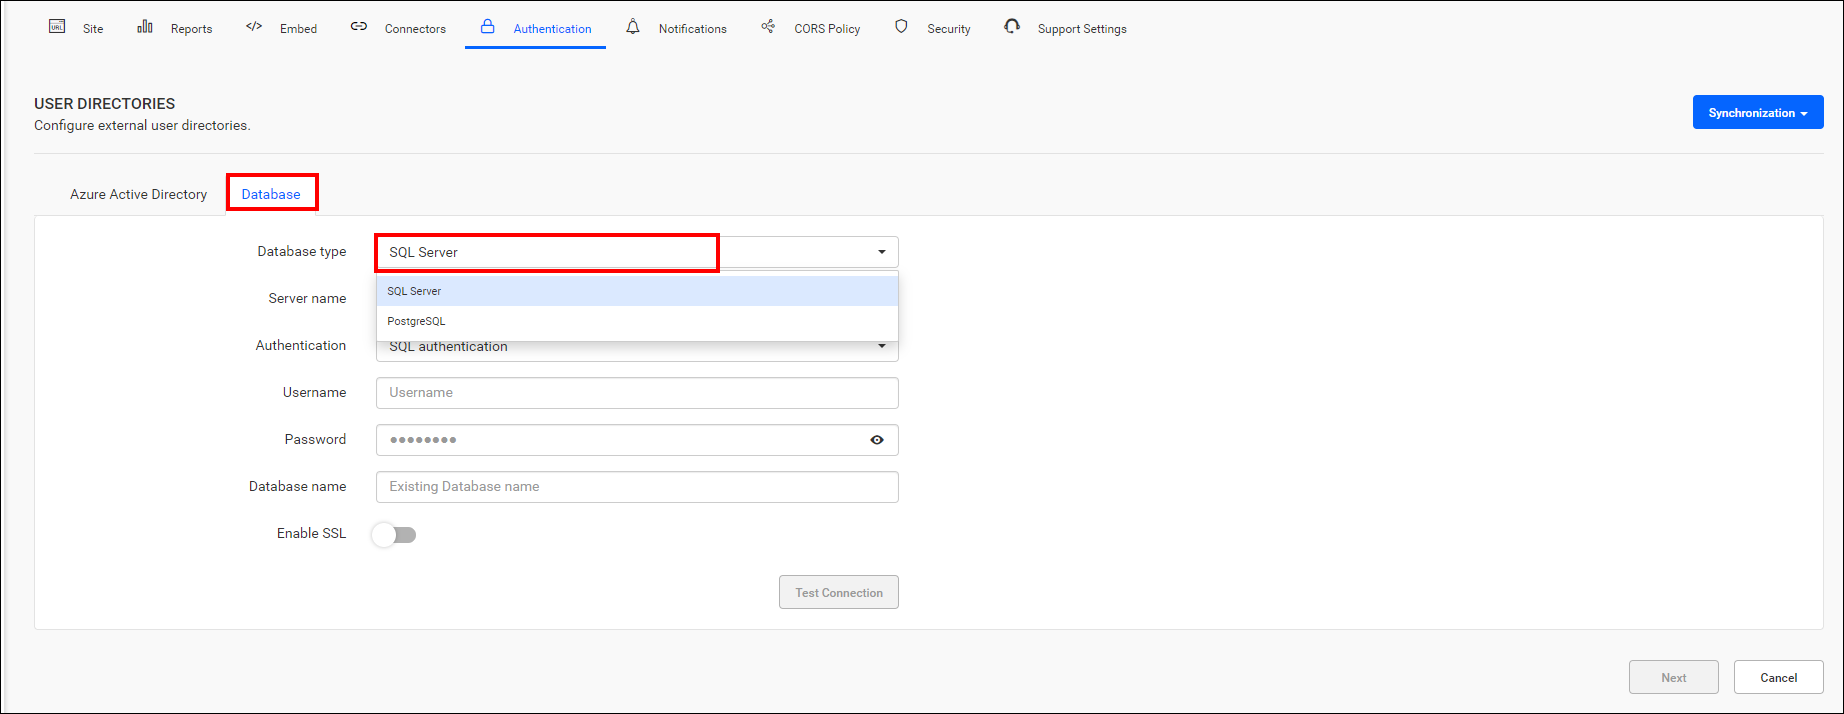
To select the type of database from which users are to be imported, click on the Database type dropdown.
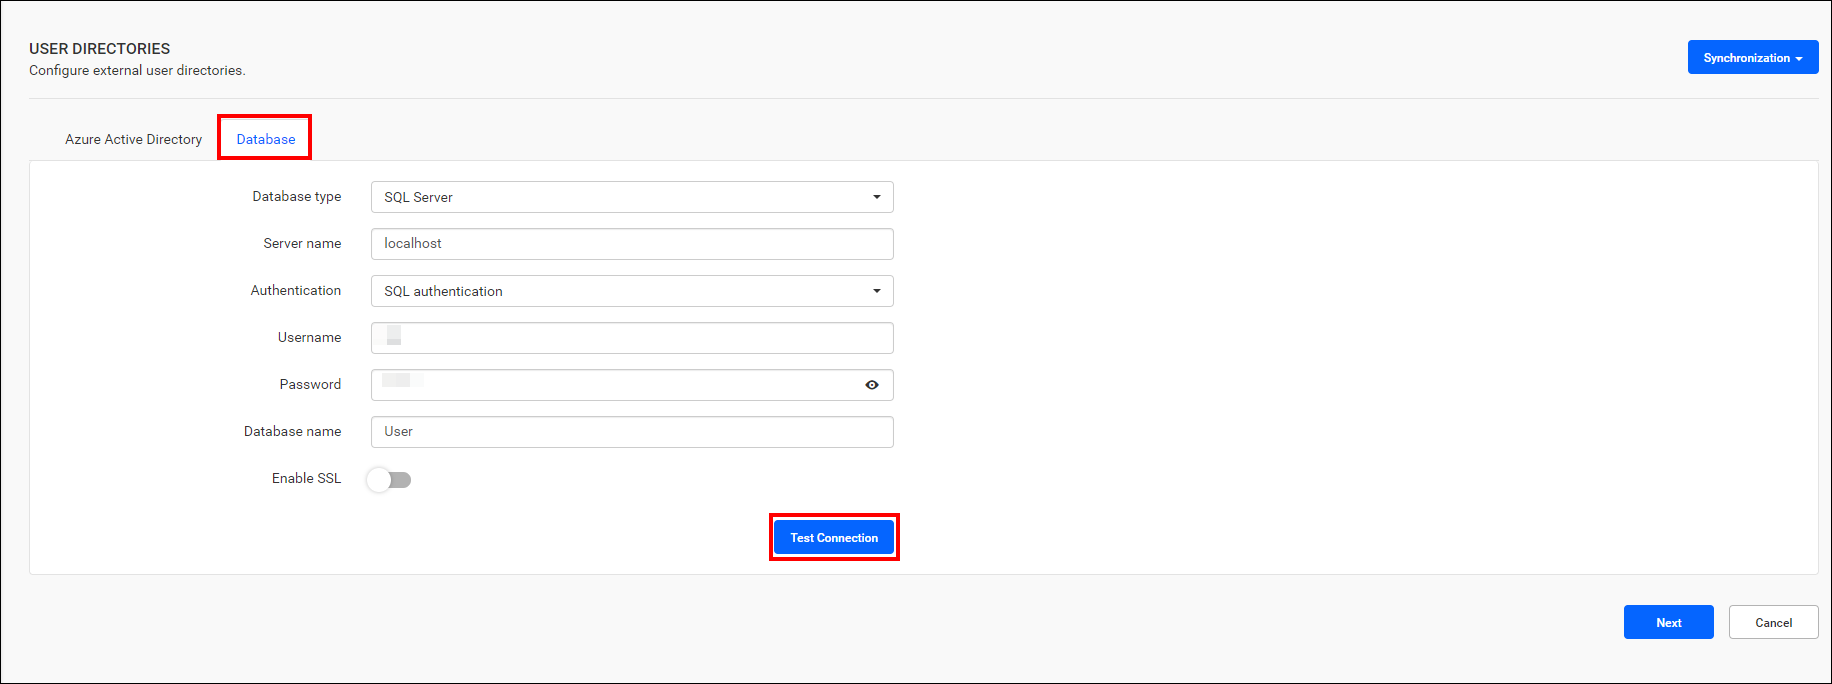
SQL Server database
- For the SQL Server Database, provide the following connection details: Server name, Authentication type, Username, Password, and Database name.
- Click Test Connection to validate the connection details.
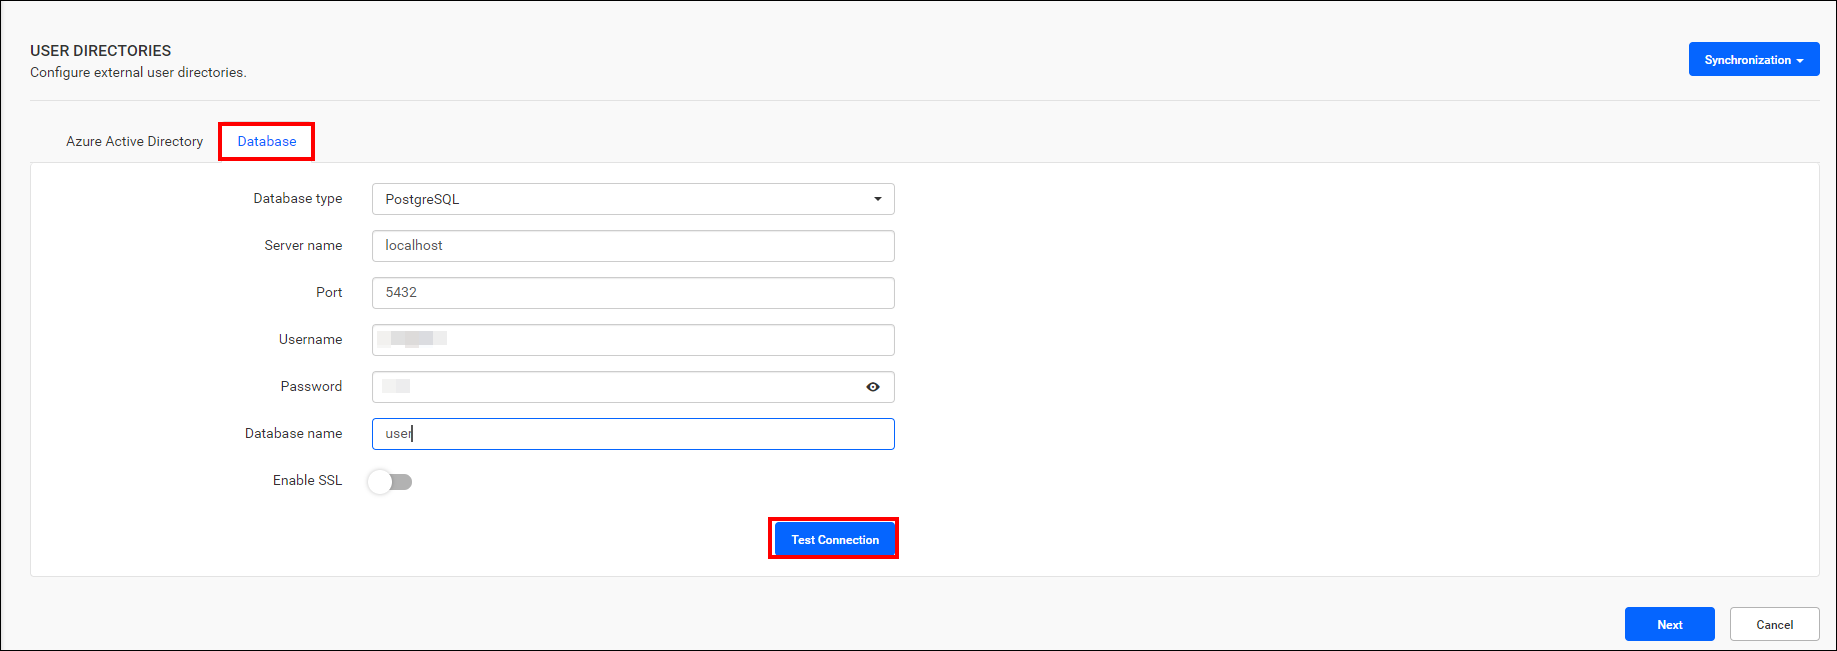
PostgreSQL database
- For the PostgreSQL Database, provide the following connection details: Server name, Port, Username, Password, and Database name.
- Click Test Connection to validate the connection details.
Map database columns
-
Once the connection details are filled out, click Next to retrieve the schema of the provided database connection.
-
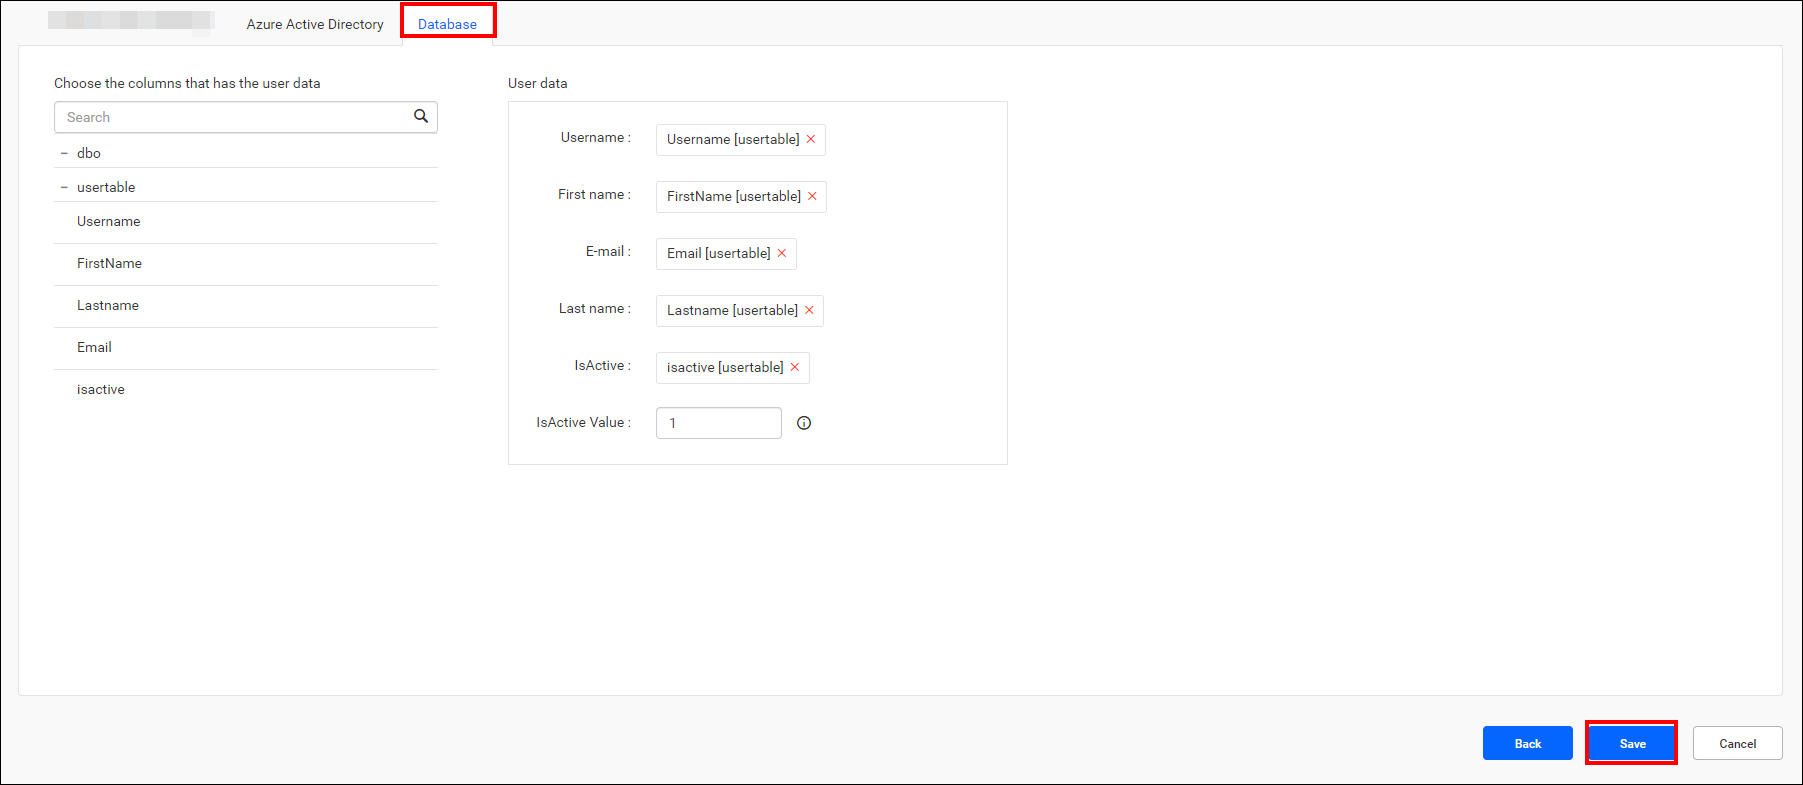
After establishing the database connection, the data page will be displayed as follows.

-
Select the matched columns from the database schema for the Username, First name, Email address, Last name (optional), and
IsActive(Optional) fields.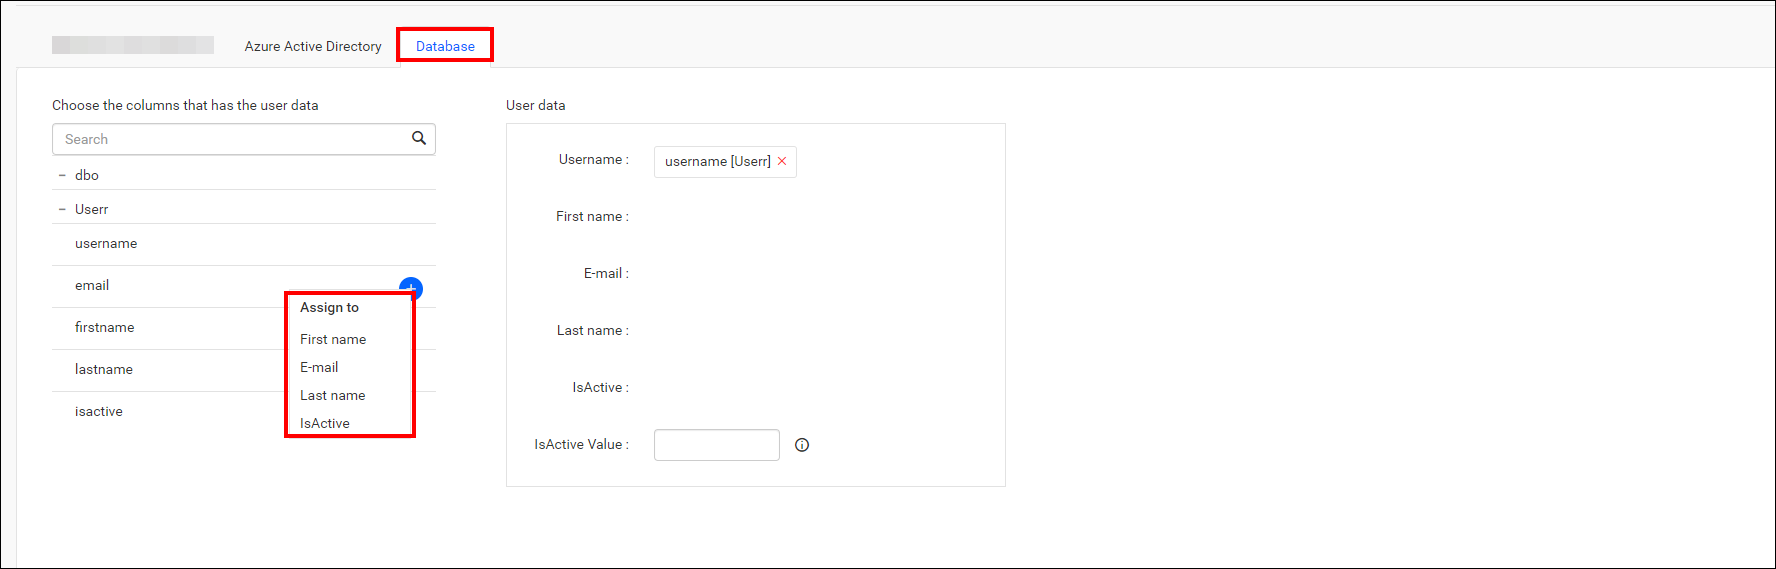
-
If the columns are selected from different tables, the following scenarios will occur:
-
If the tables have a single relationship, the join will be made with the particular relationship.
-
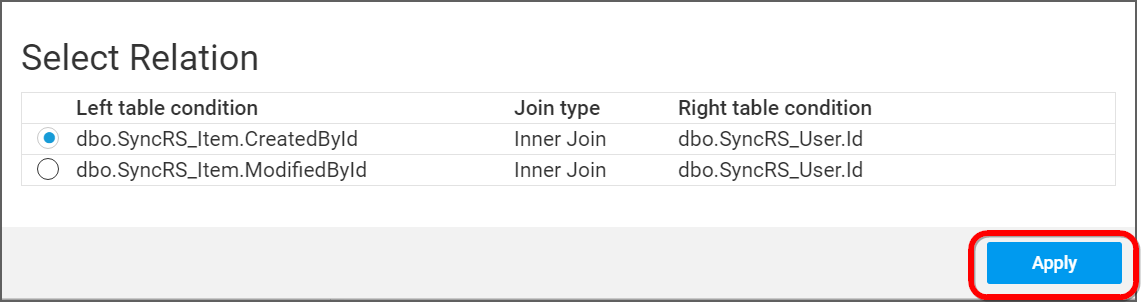
If the tables have multiple relationships, the relationship can be selected from the list of relationships, and then click Apply.
-
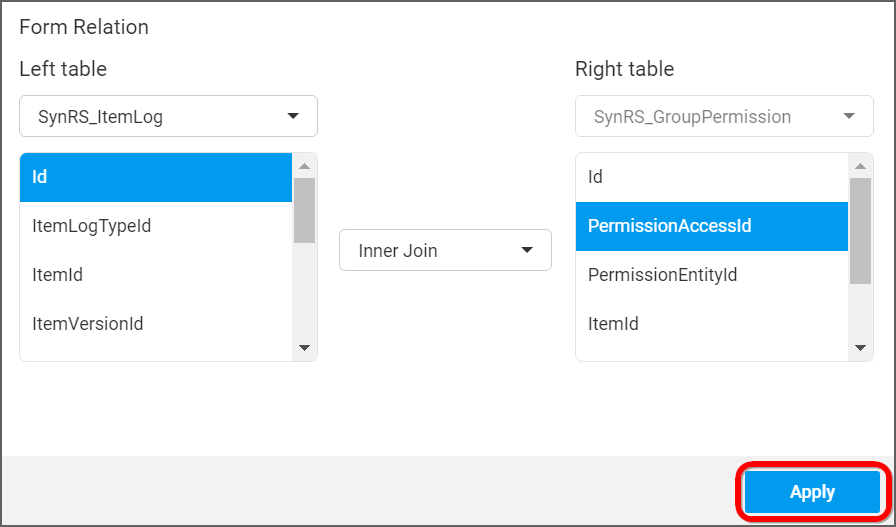
If there is no relationship between tables, form a join with the selected tables, and then click Apply.
-
-
After selecting all columns, click on Save to save the database details. Based on these saved details, the system will retrieve users from the configured database.
Use the Back button on the settings page to edit the database details before mapping and saving the database configuration.
-
After the changes are completed, the success message will be displayed as shown in the image.
